Example: Working with the Export Data Action
•Before Creating an Export Data Action
•Creating an Export Data Action
•Running the Export Data Action
Before Creating an Export Data Action
You can create an action that exports either an ad-hoc or a scheduled report.
See Export Data Action.
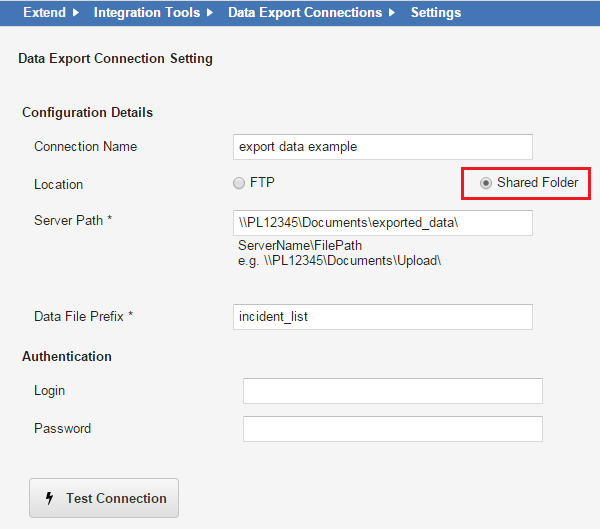
1.Create an export data connection from the Data Integration Wizard by following the process in Exporting Data. For this example, create a connection that creates a file by selecting Shared Folder. (File share is only available for on-premise deployments.)
Data Integration Wizard
2.Create a report template and upload it.
3.Create a table report that includes the fields to use. See Creating Reports and Templates.
To include multiple records in the report, the primary key field should be RecID.
If you intend to re-import the data, ensure that you include a unique identifier field for each record (such as RecID). Otherwise, the imported data does not match the correct records.
Ensure that Can run from Export Data action is checked. (Go to the Report workspace, and click the edit icon next to a report.)
Creating an Export Data Action
1.From the Configuration Console, click Build > Automation Tools > Quick Actions to open the Actions Manager workspace. The list of business objects that have actions appears.
2.Click Add/Edit for the Incident business object. The Actions Center appears.
3.Click the Create New Actions tab.
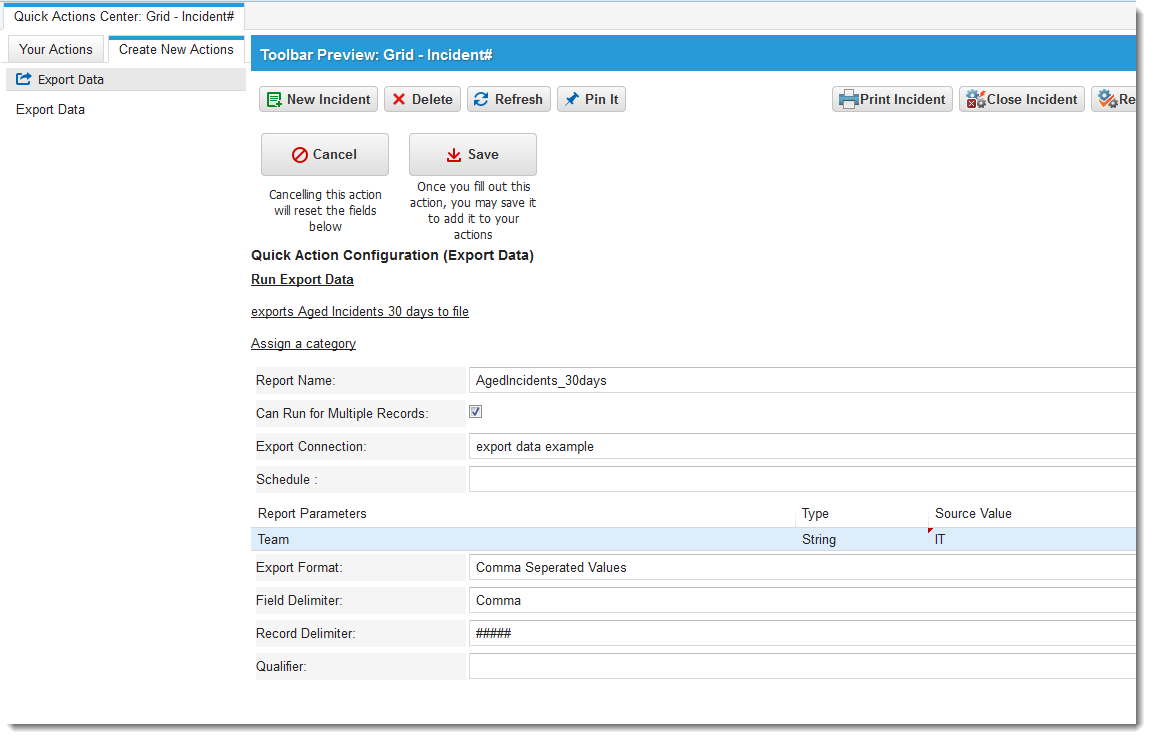
4.Choose Export Data. The Export Data action appears.
5.For this example, enter the following information into the fields.
Export Datan Action
| Field | Description |
|---|---|
| Enter action name | A unique name for the action. In this example, use Run Data Export. |
| Enter action description | Optional. A description of what the action does. |
| Enter category | Optional. The category. Select from the drop-down list. |
| Report Name | The report that you created above. Select from the drop-down list. |
| Can run for multiple records | Allows the action to be run against multiple records. |
| Connection | The connection. Select from the drop-down list. |
| Schedule | Optional. The schedule for the action so that it runs at a scheduled time, such as within a workflow. |
| Report Parameters | Parameters appear according to the chosen report. In this example, under Source Value, enter Main. |
| Export Format | The export format. Select from the drop-down list. In this example, choose Comma Separated Values. |
| Field Delimiter | A field delimiter. Enter one or select from the drop-down list. In this example, choose Comma. |
| Record Delimiter | A delimiter for each record. In this example, enter '#####'. |
| Qualifier | Leave this field blank. |
6.Click Save.
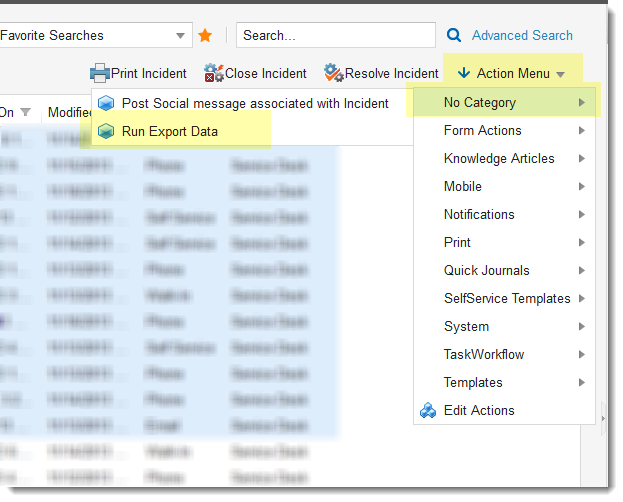
The Run Data Export action now appears under the Action Menu.
Running the Export Data Action
1.Log in to Neurons for ITSM.
2.Open the Incident workspace.
3.Select one or more records (CTRL + click) from the list. (You can only export multiple records if you have checked Can run from Export Data Action on the Report Parameters page. See Creating Reports and Templates.)
4.From the Action Menu, choose No Category > Run Export Data.
Export Datan Action
The report runs and is saved to your local drive.