Example: Updating a Record using the Go to Record Quick Action (CAD)
This example shows you how to provide input criteria for a Go to Record Quick Action so it redirects to another record for the same business object. The Update Object Quick Action is then used to update that second record that the Go to Record Quick Action redirected to. A real-world use could be that of a customer using the CI business object and an external system which sends data about these CI records to ITSM. Using the Go to Record Quick Action, incoming CI data can be used to update existing records, but if the external system finds some new CI and sends that as part of the data, the Create Record if not Found option automatically creates a record in ITSM for the new item.
This example uses the Classic Action Designer (CAD). Examples using the GAD are here: Examples of Using Actions (GAD).
To use Go to Record Quick Action, set the global constant EnableActionService to True.
Prerequisite
This example assumes you have administrator-level access to the Configuration console and are familiar with creating business objects and Quick Actions.
Steps:
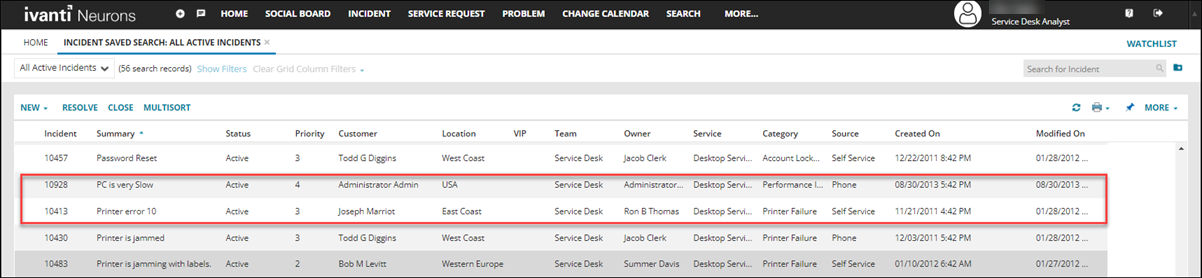
1. Identify two Incidents you can use for this exercise where the Summary field can be usefully changed in the second record. Let's call these Incidents 10928 and 10413. At the end of this example, we will run the action from 10928 and it will change the Summary field of 10413.
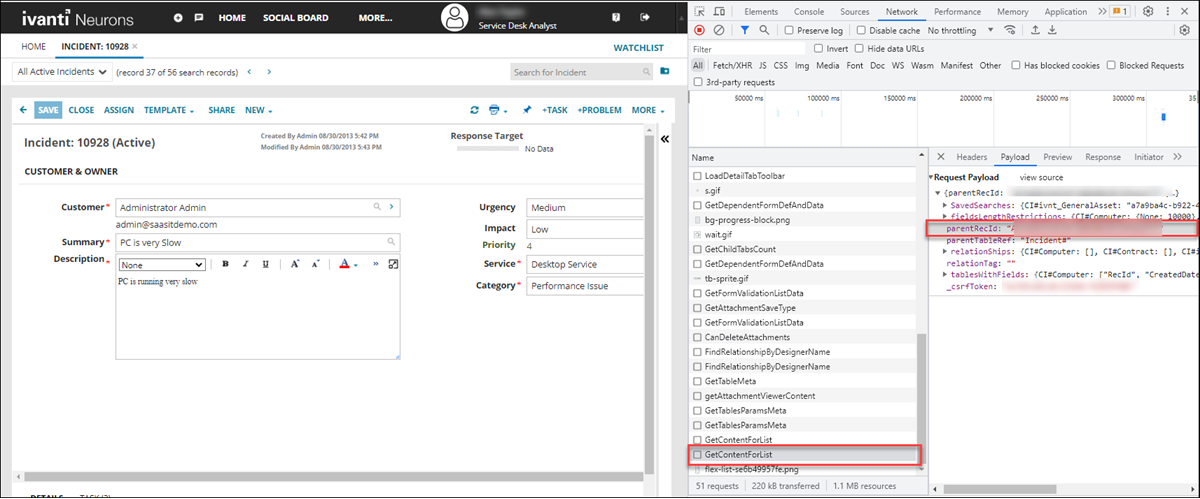
2.Find the Record Id from 10413 (for later use) as follows:
| a. | Log in to the Service Desk console. |
| b. | Go to the Service Request workspace > Incidents list view. |
| c. | Open the Developer tool by pressing F12 and go to Network tab. |
| d. | Double click on the incident 10413. |
| e. | In the Network tab, find GetContentForList item & go to its Payload tab. |
| f. | ParentRecId is the RecId of the selected record. It will look something like this in length, for example, AB1AC111A1CD111B1B1CB1111111AAA. |
3.Go back to the Configuration Console > Build >Business Objects > Incident > Quick Actions > Classic Action Designer.
4.Under Create New Actions, find Composite Action and select it.
5.Enter a name in the Action Name field, for example, GTR-Action2.
6.Select the Go to Record action from the drop-down list and click the + icon next to the field.
7.For the Field Value, enter the RecID you previously saved for record 10413.
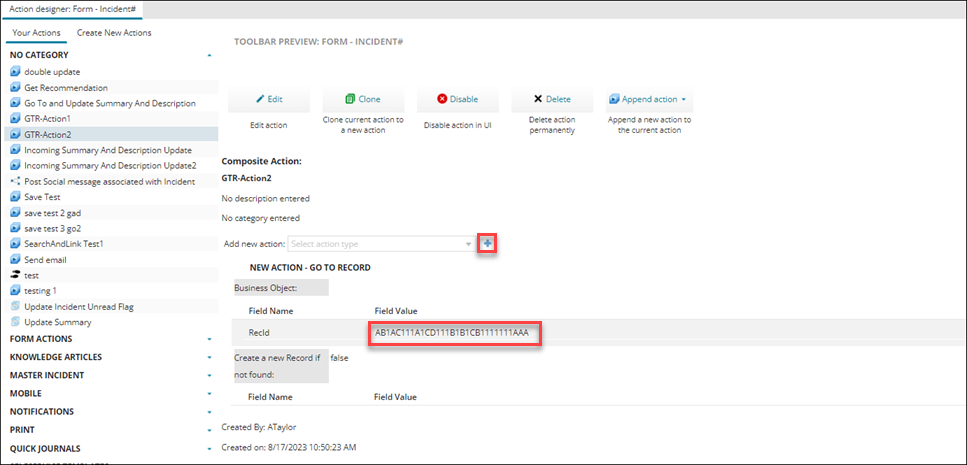
8.Click Save.
9.To add the next part of the Composite Action, select Append Action button (top right) and select Update Object from the drop-down list.
10.Enter values for the Update Object action. For example, Field Name = Subject (Summary) and Field Value = Printer Error 14 - Toner Cartridge needs changing. The field value was previously Printer error 10.
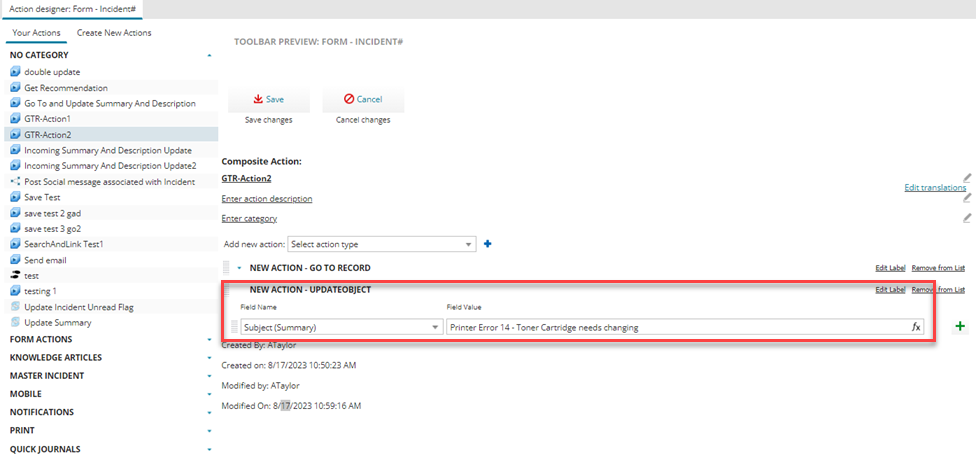
11.Click Save.
12.Go to Service Desk Analyst workspace > Incidents list view.
13.Go to the Incident record 10928. Select the created action GTR-Action1 and execute it.
14.Check the summary of the other incident record 10413.
The summary should have changed to Printer Error 14 - Toner Cartridge needs changing as specified.