GitHub Actions Deployment Protection Rules Integration
With GitHub introducing the Custom Deployment Protection Rules in addition to the existing pre-defined protection rules, it allows us to have better control over the CI/CD workflows and employ customized conditions in order to deliver higher quality applications to our customers.
With the adoption of CI-CD process, developers can trigger deployments at any given point of time. But as an Administrator, the need to regulate the deployment process by having some pre-defined rules like code coverage or scheduled deployment window is necessary to maintain the availability of the applications.
Overview
Ivanti Neurons for ITSM helps to automate the deployment process through Change Management which allows to keep track of the deployment history, approvals, and rejections for the better Project Management.
Administrators managed the release process through Neurons for ITSM by manually creating a Change Request. But the challenge with this is that it does not guarantee a Change Request is created whenever a deployment request is raised or the Change is approved before the deployment is initiated.
Therefore extending the capabilities of Neurons for ITSM to automate the process is the need of the hour. And this is achieved by leveraging the Custom Deployment Protection rules and ITSM Webhooks.
Introduction to Custom Deployment Protection Rules
Custom deployment protection rules are powered by GitHub Apps that run based on Webhooks and Callbacks. The Custom Apps subscribe to the Deployment Protection Rule Event which is initiated when a Deployment is triggered for a particular environment, based on which they are configured to initiate certain events. These events can be forwarded to a Webhook which can integrate with 3rd party services like Ivanti Neurons for ITSM.
The protection rules run only on environments created within a repository. The events will not be initiated if no environment is configured for a repository.
Once you have created a Custom Deployment Protection Rule and installed it on your repository, the Custom Deployment Protection Rule will automatically be available for all environments in your repository.
For more information on protection rules, see Creating custom deployment protection rules - GitHub Docs.
Prerequite:
Ensure you have installed the latest ITSM metadatapatch - 2023.4 in your ITSM tenant.
1.Generate API Keys to establish communication from GitHub to ITSM.
2.Login to ITSM as an Administrator.
3.From the Configuration console, select Configure > Security Controls > API Keys.
4.Click Self Registration > Add APIKey.
For more information, see Using Rest API Key.
5.From the Service Desk console, click the More tab, search and open the External Integration Configuration workspace.
6.Click New External Integration Configuration.
7.Enter the API Key you generated in step 4.
8.ISM Webhook URL will be available from Webhook Manager > Receive GitHub Webhook events.
9.Enter all the required information and click Save.
10.From the Configuration console, under Extend, search and open GitHub Integration.
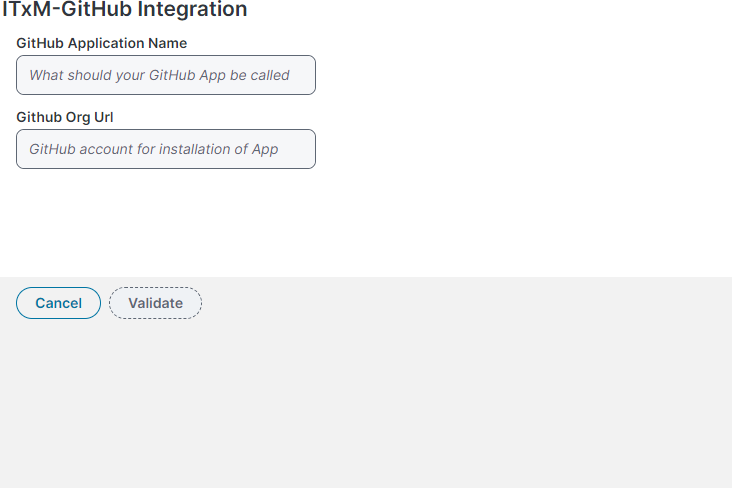
11.Enter the name of the application of your choice and the GitHub URL use to access it.
12.Click Validate and then Submit the form.
You will be navigated to their GitHub account with a prompt to confirm creation of a Custom Application.
On clicking Create, you will be re-directed back to ITSM application and few other information specific to GitHub shall be populated in the form which was saved in Step 1.
It is strongly recommended to have only one integration with GitHub. ITSM currently does not support integration with multiple GitHub accounts.
The GitHub App created needs to be configured to the environment where the deployment is to be protected.
1.In the upper-right corner of any page on GitHub, click your profile photo.
2.Navigate to your account settings.
| a. | For a GitHub App owned by a personal account, click Settings. |
or
| b. | For a GitHub App owned by an organization: |
•Click Your organizations and to the right of the organization, click Settings.
3.To the right of the organization, click Settings.
4.In the left sidebar, click GitHub Apps.
5.Find the GitHub which was created from ITSM and click on edit.
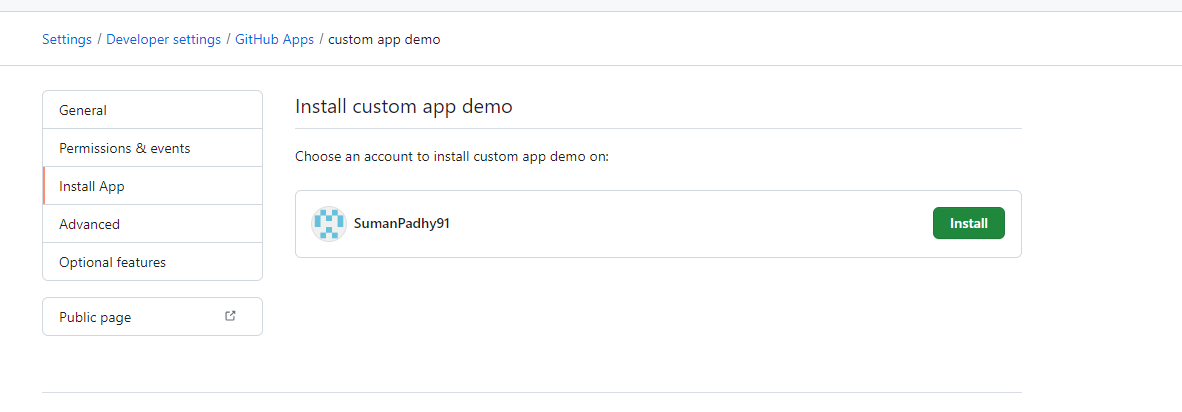
6.Click on Install App and click on Install.
7.You need to choose if you wish to have the app installed in selected repositories or in all repositories and click Install.
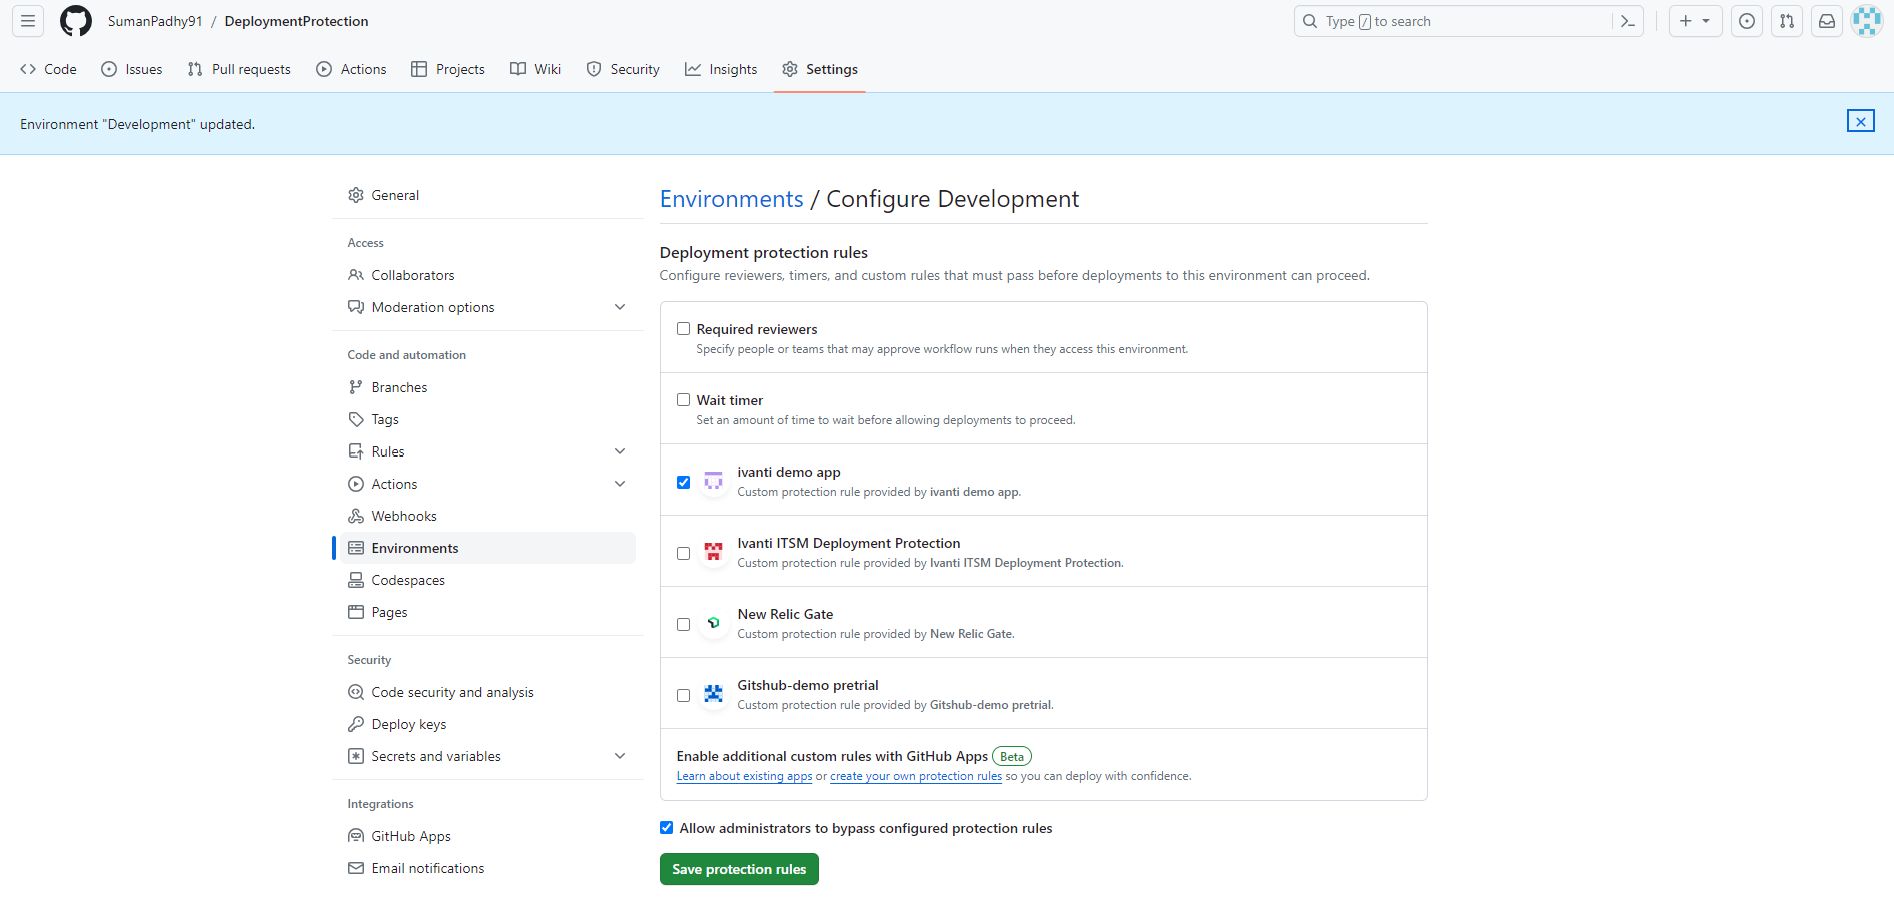
8.Post installation, navigate to environment in the repository which you want to protect from the settings option.
9.Under Deployment Protection rules, select the app created and click Save.
1.Login to the GitHub repository, from where the deployment is to be initiated.
Ensure the repository has the environments and the workflow action created.
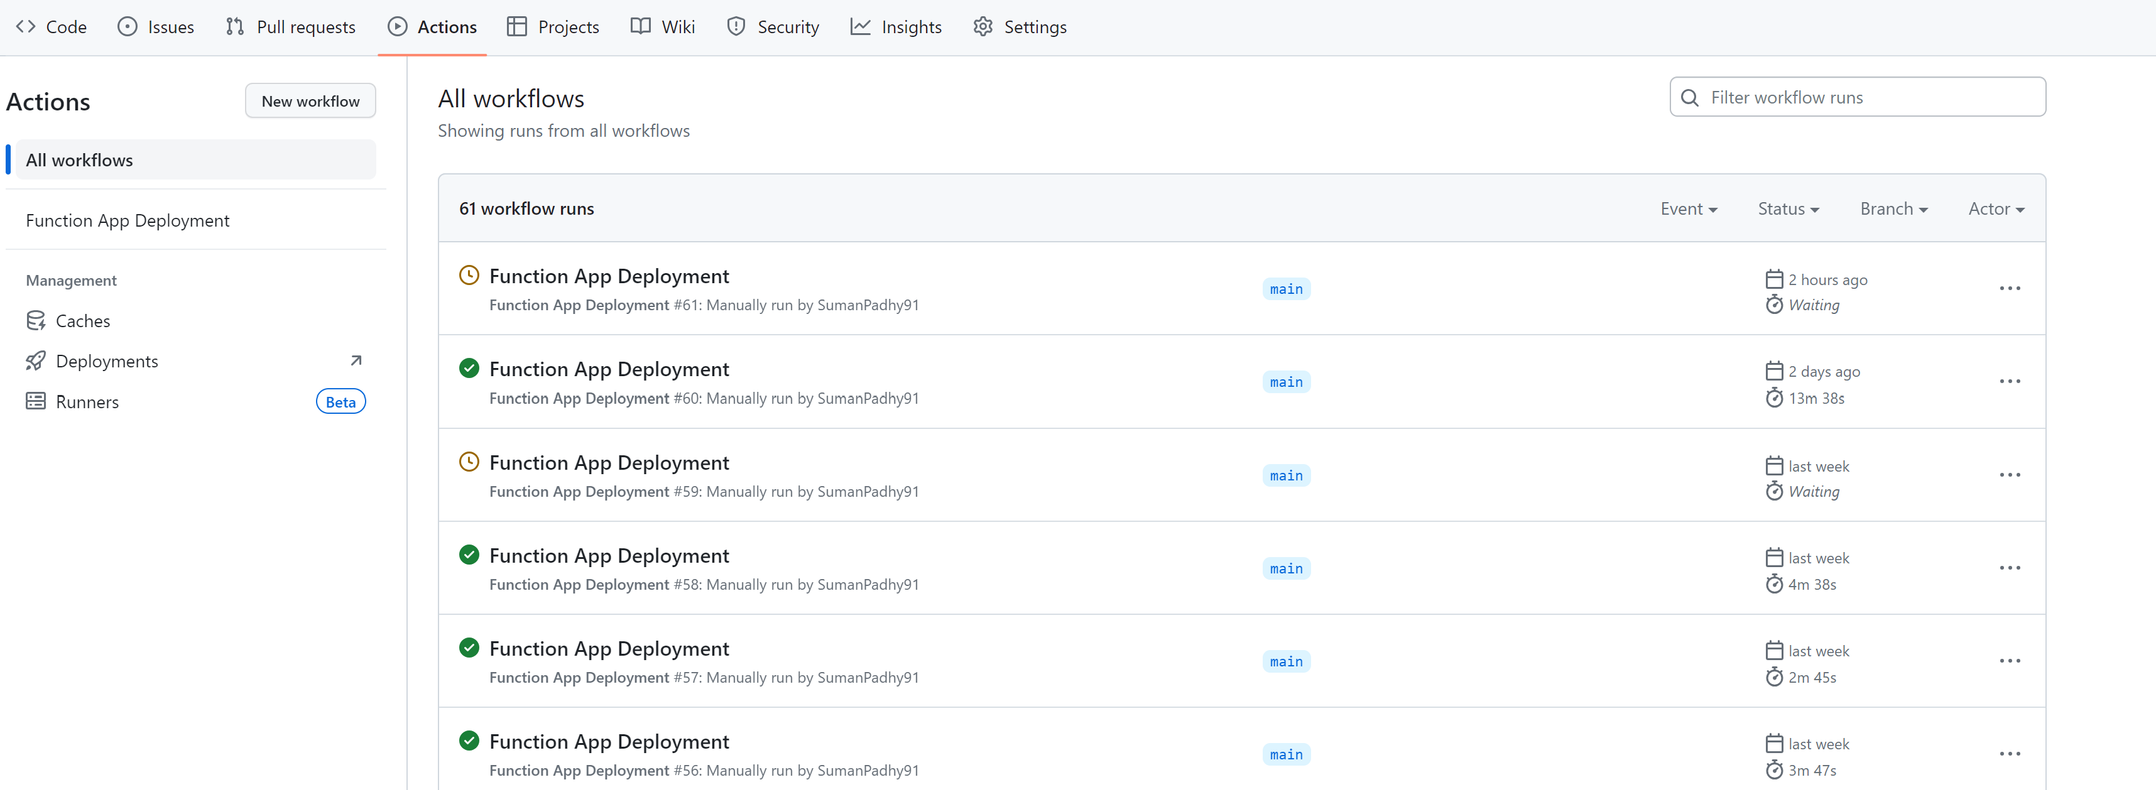
2.Go to Actions to access your deployment workflow.
3.From your deployment workflow, Run your workflow.
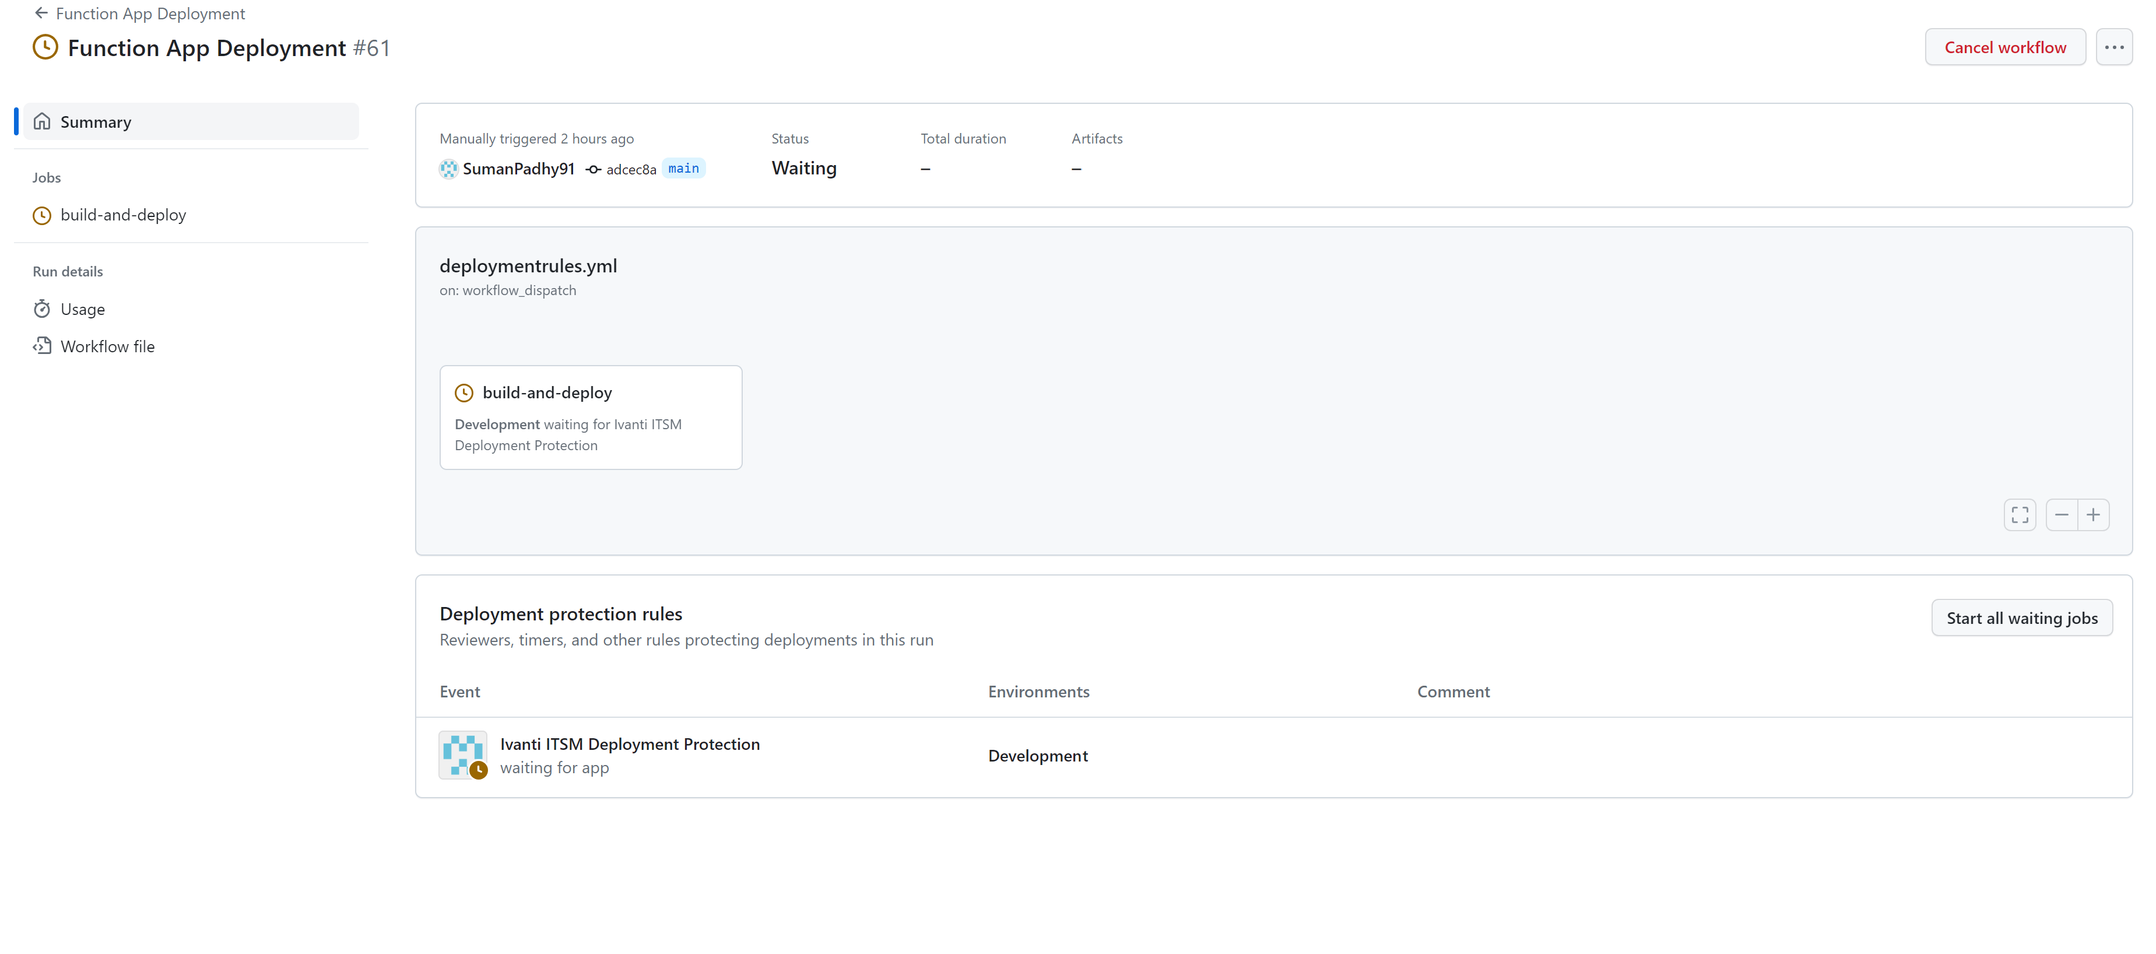
4.Once the workflow is executed, a new workflow run is created and will have status as Waiting.
On opening of the run which got created, under Deployment protection rule, the details of the target and the status will be Available.
5.Login to ITSM as an Administrator and access Change workspace.
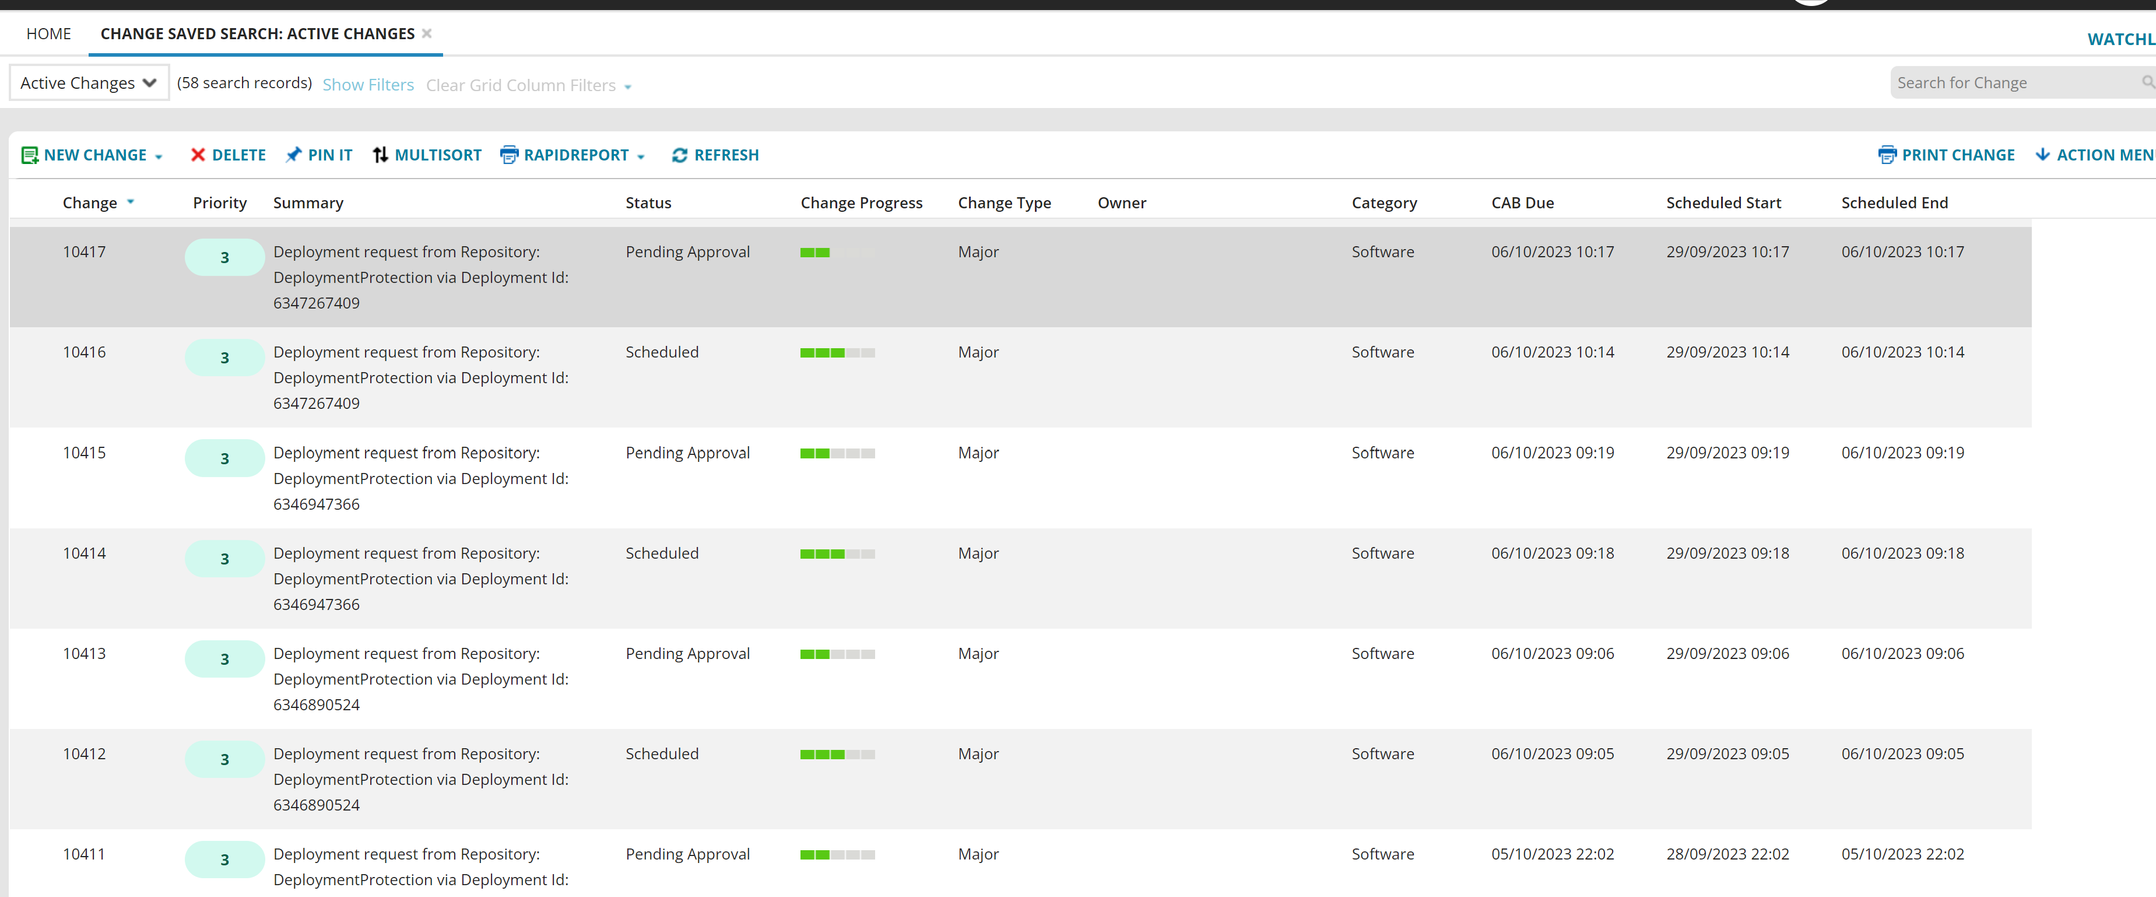
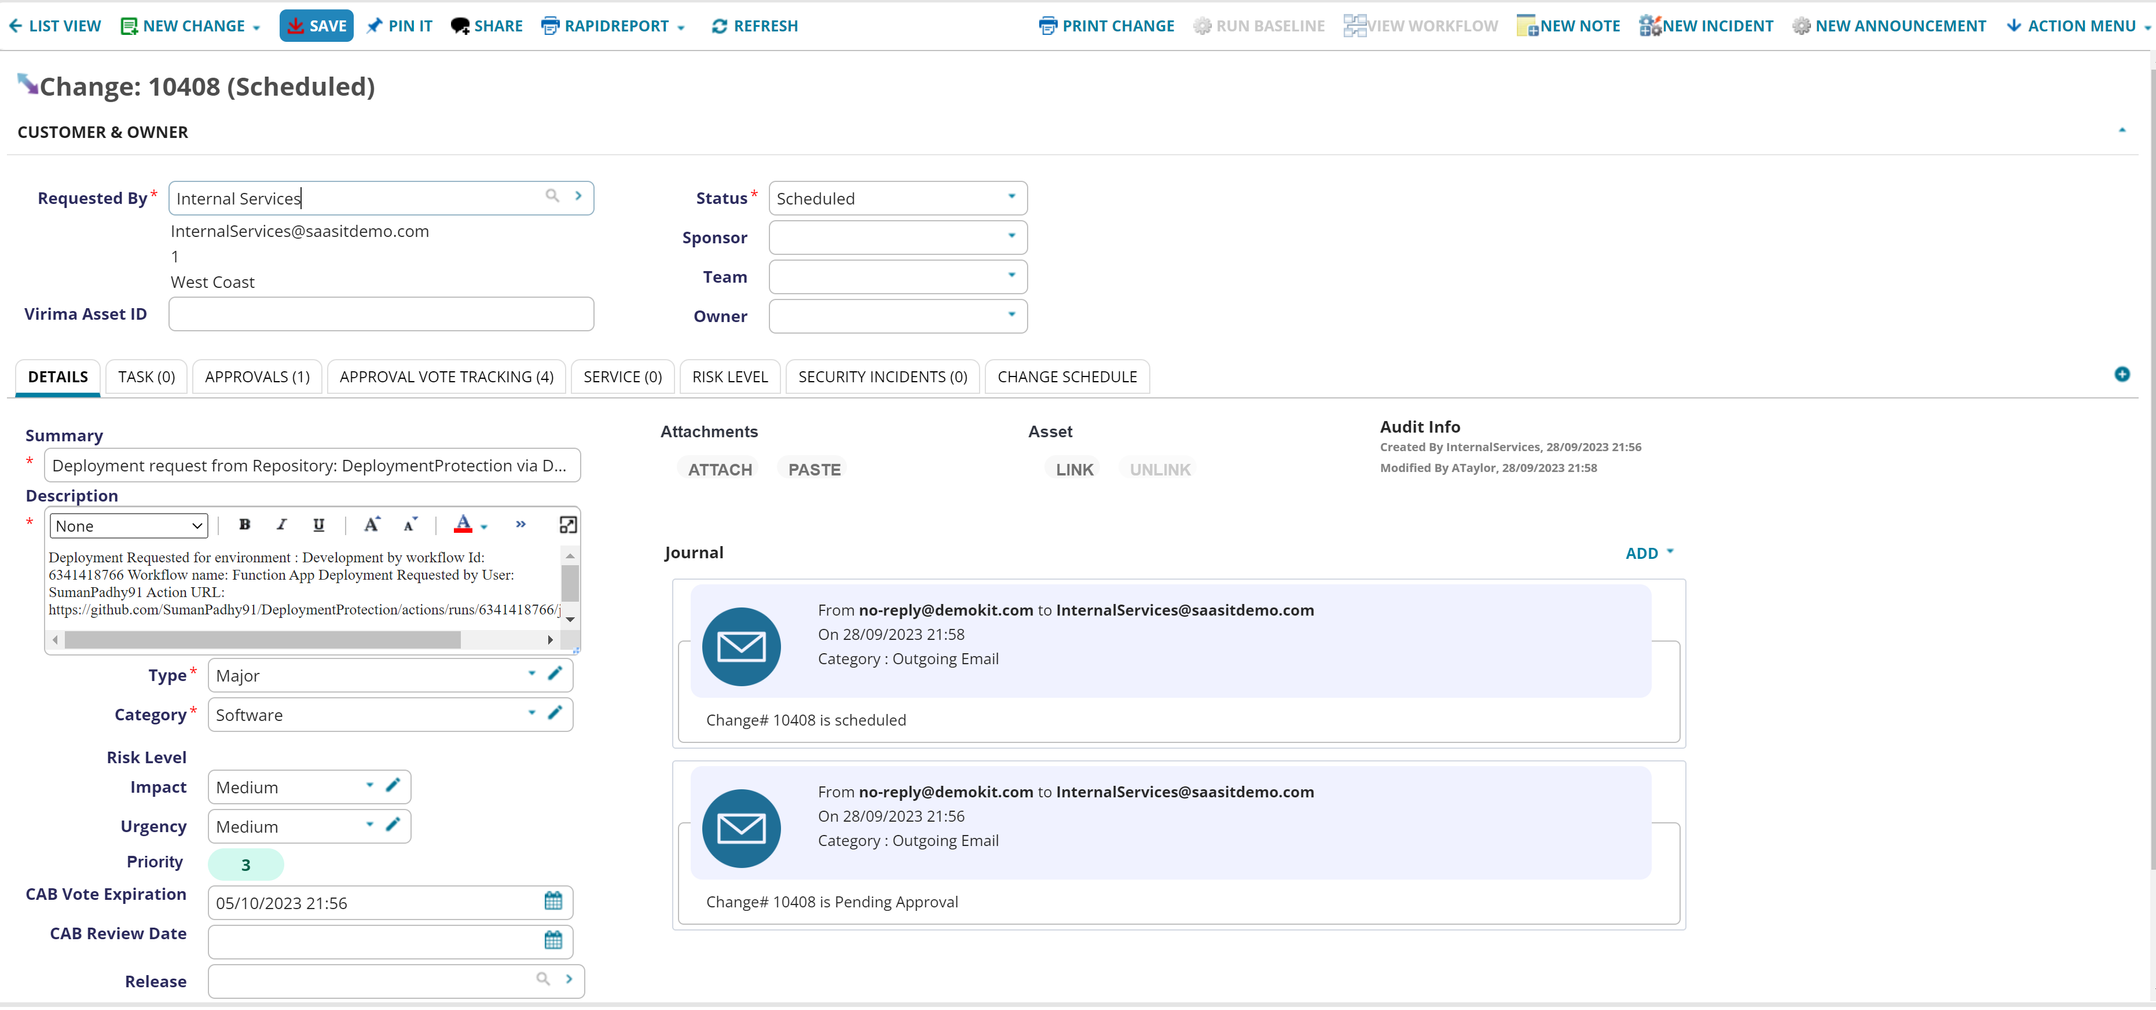
A new record will be created under Change with the Category Software, Status Pending Approval and Summary Deployment request from Repository {Repository Name} via Deployment Id: {Deployment Run Id}.
The description of the change request contains the details of the run with the Run Id, Environment to which the deployment is targeted and the author of the deployment request.
•Based on the change workflow, the request needs to be approved by the Change Advisory Board.
•Once the change is approved by the board, the status will be set to Scheduled.
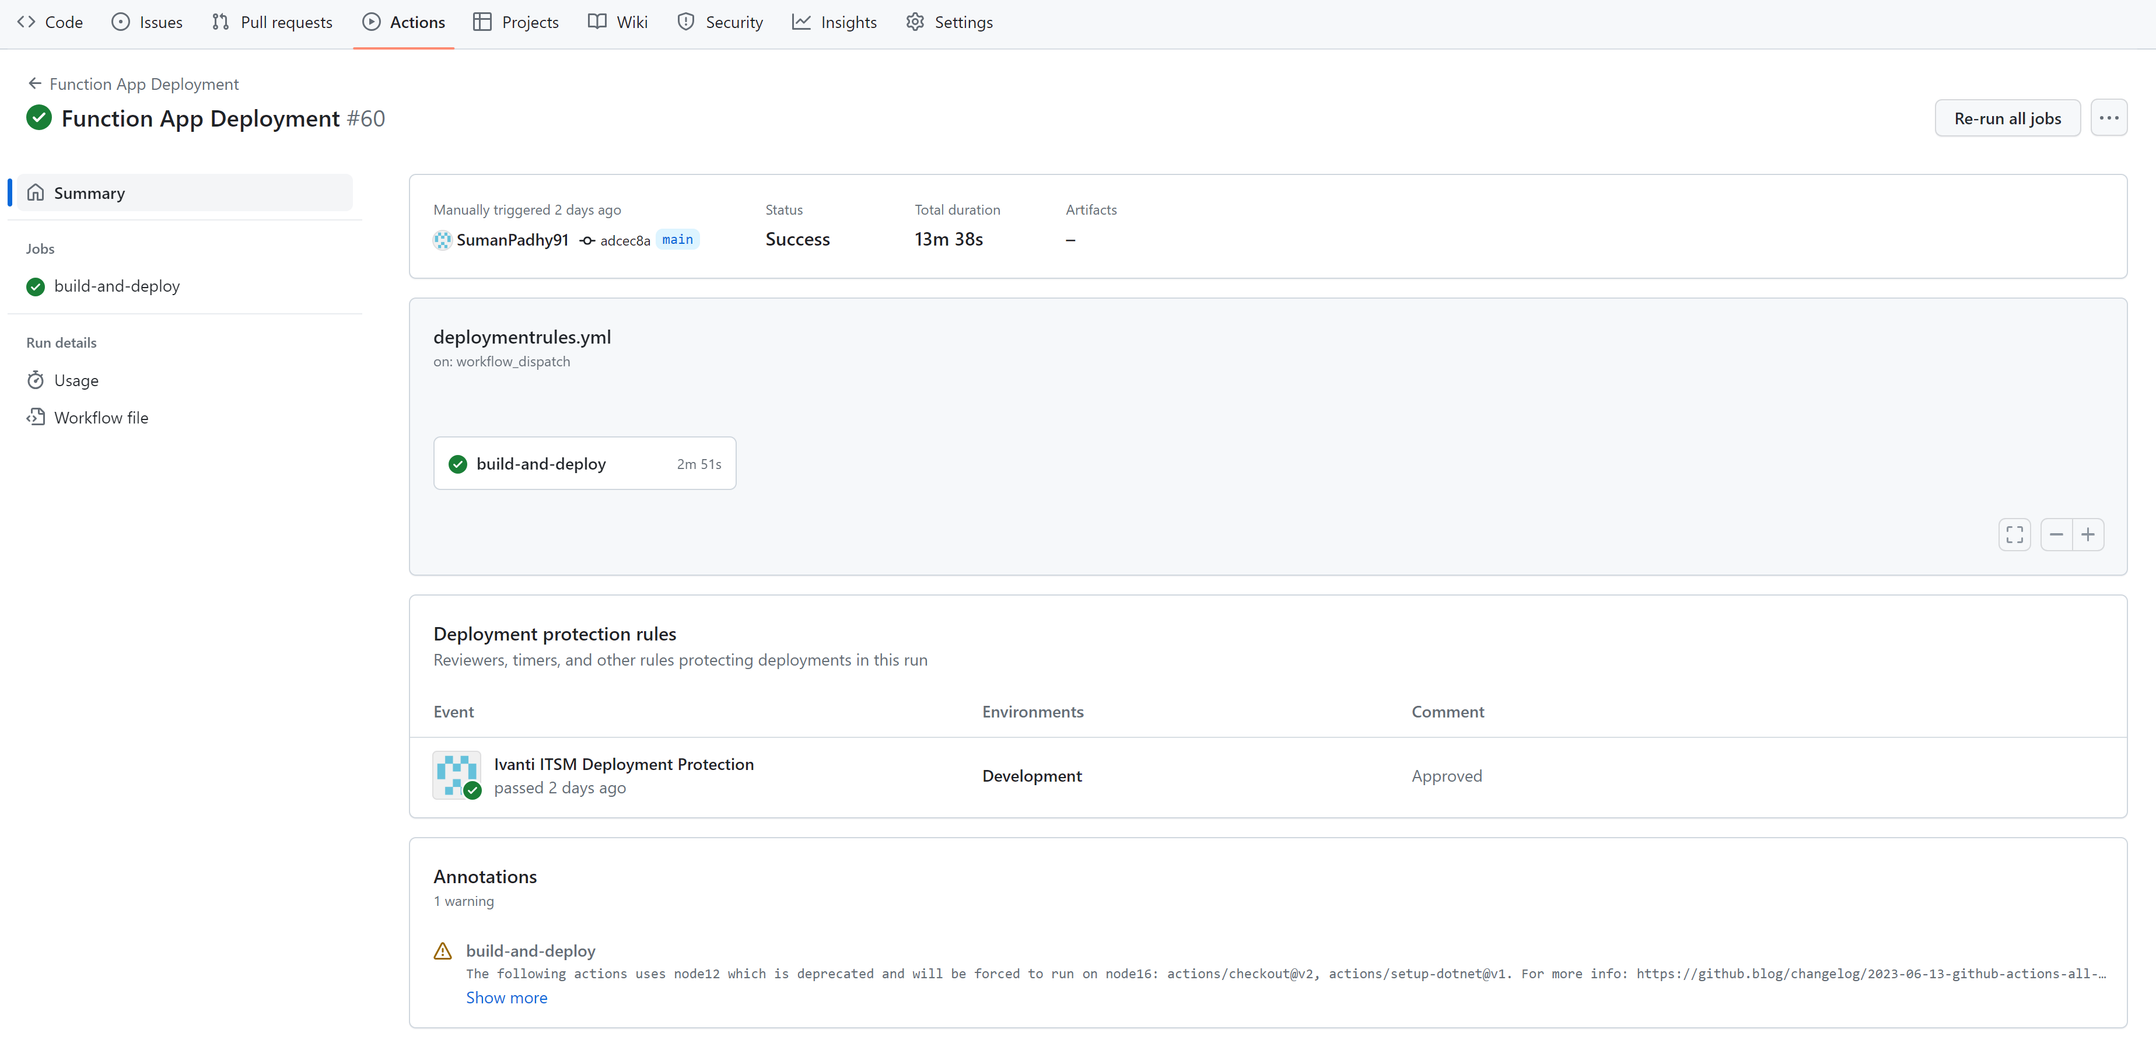
•After the status is updated to Scheduled, a request to GitHub will be initiated automatically which shall be updating the status to Approved with the comments as Approved.
A green tick shall appear after the status is updated to approved and the deployment is initiated.
