Setting Up and Configuring Trusted Agent
This topic provides an overview of the process to setup and configure a Trusted Agent for LDAP connection.
Overview of Trusted Agent Setup and Configuration
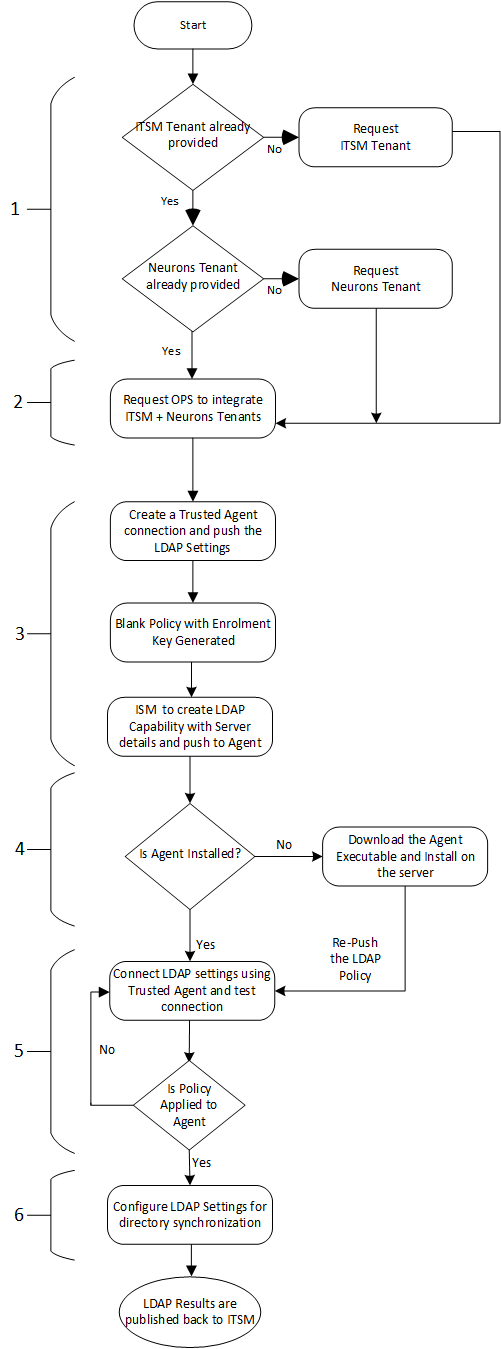
This is an overview of the setup and configuration process. Detailed procedures are given in Configuring Trusted Agent for LDAP Connections and Configuring LDAP Settings.
1.If you are not already provided with an Neurons for ITSM and/or Neurons tenant, request tenant provision for Trusted Agent from Ivanti Sales.
Skip this step if you already have both tenants provided.
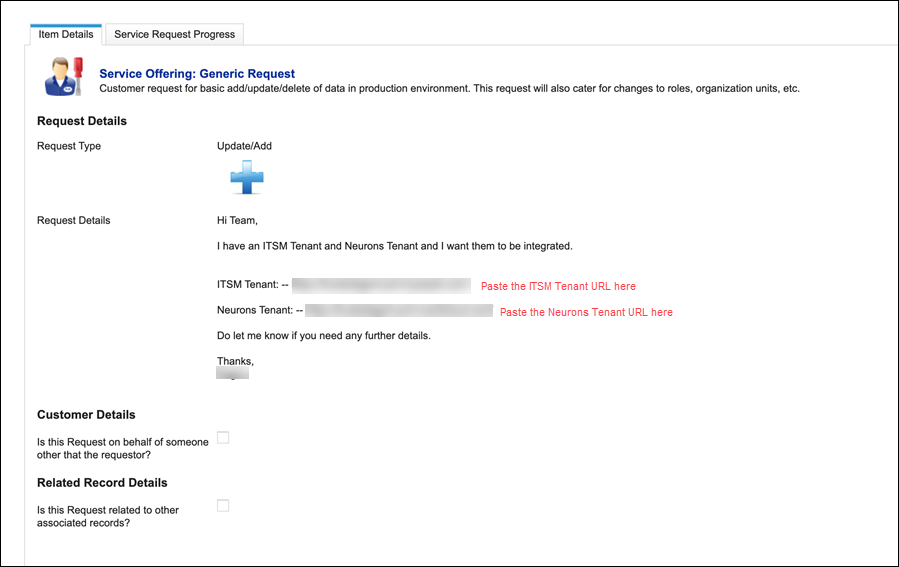
2.When you receive email confirmation that the new tenants are provided, request integration of the tenants. The tenants must be integrated so that the Neurons framework service can be used within Neurons for ITSM. Request the tenant integration by submitting a Generic Request to Operations, and include both tenant URL's. A typical message is shown in the following example.
Skip this step if you already have both tenants integrated.
3.With a Neurons for ITSM and Neurons tenant installed and integrated, proceed to creating the Trusted Agent connection and push the LDAP settings for policy creation. When successful, an enrollment key is created that you copy, the key is used to activate Trusted Agent during installation on your private network. See Add a New Connection.
4.Download the Windows agent installer files, and install the Trusted Agent. Use the enrollment key you created when required during the installation process. See Install Trusted Agent.
5.In LDAP Settings connect to a directory using Trusted Agent and test the connection. See Connect Trusted Agent to the Directory Server and Test the Connection. If the connection test fails, you can locate error information in Trusted Agent Monitoring. See Trusted Agent Monitoring and Logging.
6.Configure the LDAP settings for synchronization, and synchronize the directory information. See Configure Root Nodes, Save and Synchronize Directory Information and Enable External Authentication

