Setting Up and Configuring Trusted Agent
Role: Administrators.
Minimum Version: Ivanti Neurons for ITSM 2023.1
This topic provides an overview of the process to setup and configure a Trusted Agent for LDAP connection.
Overview of Trusted Agent Setup and Configuration
This is an overview of the setup and configuration process for Trusted Agent.
1.If you are not already provided with an Neurons for ITSM and/or Neurons tenant, request tenant provision for Trusted Agent from Ivanti Sales.
Skip this step if you already have both tenants provided.
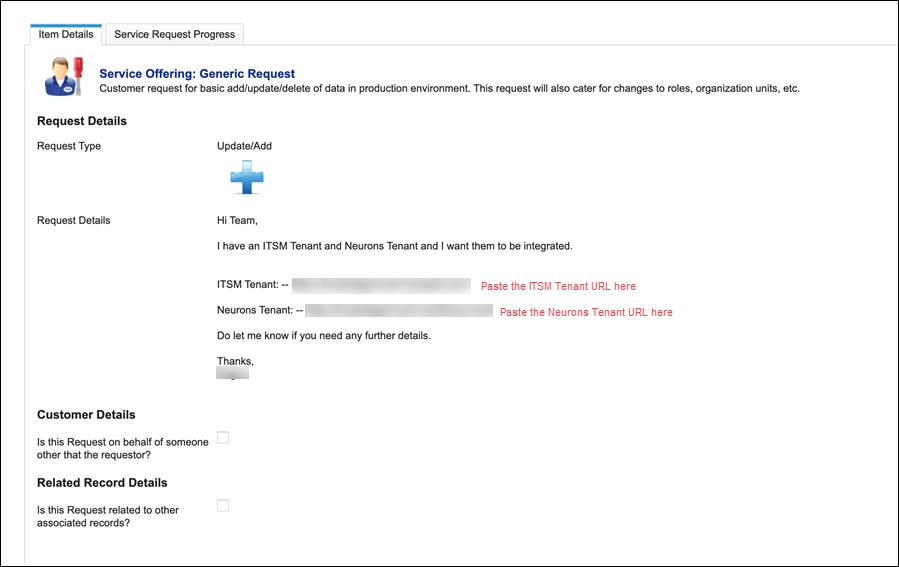
2.When you receive email confirmation that the new tenants are provided, request integration of the tenants. The tenants must be integrated so that the Neurons framework service can be used within Neurons for ITSM. Request the tenant integration by submitting a Generic Request to Operations, and include both tenant URL's. A typical message is shown in the following example.
Skip this step if you already have both tenants integrated.
3.With a Neurons for ITSM and Neurons tenant installed and integrated, proceed to enabling the EnableTrustedAgent global constant, as described in Enable the Global Constant for Trusted Agent.
4.Create a Trusted Agent connection and push the settings for policy creation. The procedure(s) to follow is dependent on you policy type; LDAP or Hybrid. Refer to the procedures linked below for your policy type.
•For LDAP policy settings, refer to Add a New LDAP Connection and Push Policy Settings.
•For Hybrid policy settings, the following procedures must be completed:
•Create a Self-SIgned Certificate.
•Export the Self-signed Certificate.
After completing the procedures, use the enrollment key you create to activate the Trusted Agent installation on your private network.
5.Download the Windows agent installer files and install the Trusted Agent. Use the enrollment key you created when required during the installation process. See Install Trusted Agent.
6.Complete the Trusted Agent setup and configuration for either LDAP or PowerShell starting from the following topics:
•For LDAP, continue from Connect Trusted Agent to the Directory Server and Test the Connection.
•For PowerShell, continue from Configuring Trusted Agent with PowerShell.
Common Configuration Setup
The configuration settings in this section apply to both LDAP and PowerShell.
1.Log in to Neurons for ITSM as Administrator.
2.Open the Configuration console.
3.Select Build > Global Constants to open the Global Constants list.
4.Locate EnableTrustedAgent in the list, and in the Value column, set the value to True.
5.Click Save.
The global constant is now enabled for Trusted Agent.
System Specification: The minimum requirement for the Trusted Agent engine is 16GB RAM.
Perform this task only after you have completed setting up the Trusted Agent connection and successfully pushed the policy settings. The procedures linked below must be completed before continuing to install Trusted Agent.
•For LDAP policy settings, complete the following procedures:
•Add a New LDAP Connection and Push Policy Settings.
•For Hybrid policy settings, complete the following procedures:
•Create a Self-SIgned Certificate.
•Export the Self-signed Certificate.
The IvantiCloudAgent.exe file is installed on the same network as the private resource to which it connects. The IvantiCloudAgent.exe.options file contains the tenant ID and activation key, which together make up the enrollment key. These files are required on the server in your private network where you intend to install Trusted Agent.
1.Open fixed port 8883 from the Trusted Agent machine for Message Queuing Telemetry Transport (MQTT) connection.
2.Use the Test-NetConnection PowerShell command to test the connection, for example:
Test-NetConnection -ComputerName <target computer name> -Port 8883 -InformationLevel "Detailed">
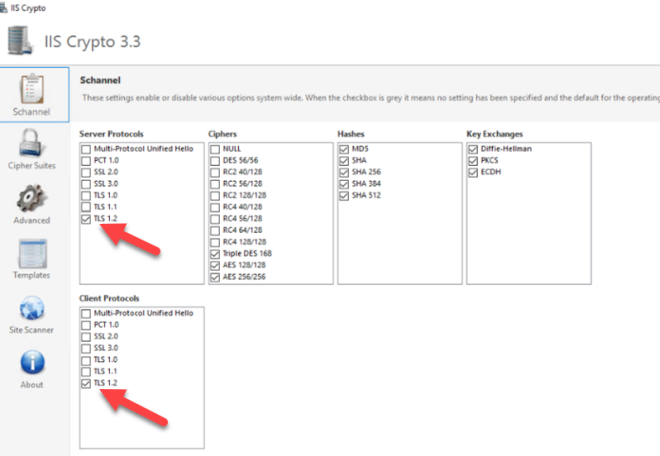
3.Open IIS Crypto (if installed) and enable TLS 1.2 for the Server and Client.

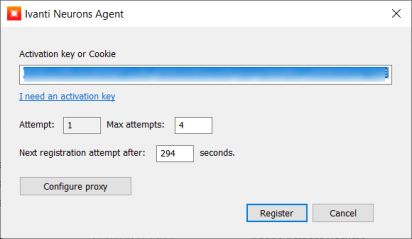
4.Open the IvantiCloudAgent.exe installer file using "Run as Administrator" on the private network server.
The registration dialog opens.

The Activation key field is automatically populated with the activation key.
5.Click Register.
6.Open a command line interface and check-in the policy.
| a. | Ensure you are in directory C:\Program Files\Ivanti\Ivanti Cloud Agent |
| b. | Enter the following command: .\STAgentCtl.exe update --checkin |
| c. | When check-in is complete, enter the following command to check the status: .\STAgentCtl.exe status |
7.Check the status shown on the command line interface. Once the registration state is "Registered", and all engines are installed (as shown below).
You may need to wait up to 10 minutes for the engines to be installed. You can continue to wait, or run the .\STAgentCtl.exe status command again to recheck.

When completed successfully:
•For LDAP, continue from Connect Trusted Agent to the Directory Server and Test the Connection.
•For PowerShell, continue from Configuring Trusted Agent with PowerShell.
