Workaround: Updating an Incident using Webhooks
Scenario
This is a proof-of-concept for a workaround to enable you to use Action types other than Insert Object with the initial webhooks implementation. This is a complex workaround for advanced users, so if you can wait for the full implementation in a future release of Ivanti Neurons for ITSM, we encourage you to do so.
We will use a webhook to update the description for an Incident record; we can do this automatically by using a staging business object and triggered actions.
Important: During testing, using triggered actions to automatically delete the staging business object didn't work. Hence you must manually delete staging records that have the Done field set to True, or set up an action/workflow to run on schedule to do this for you.
Prerequisites
To recreate this example, you need to be an ITSM Administrator, and have access to an external API tool such as Postman.
How it Works
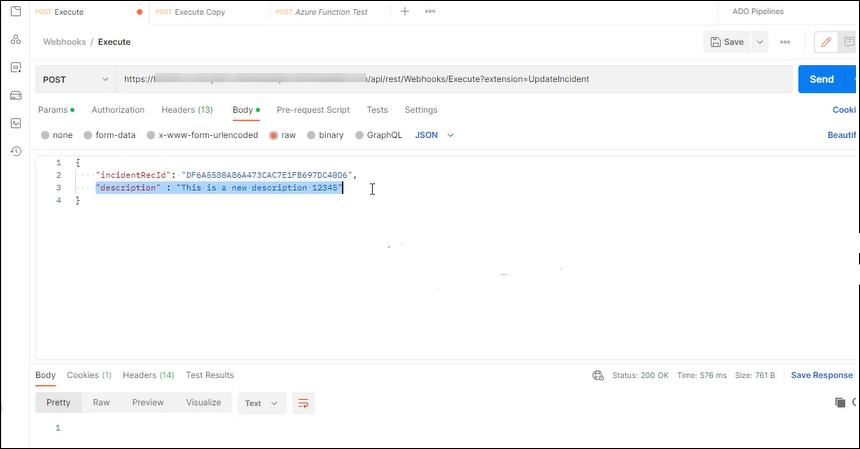
1.Using Postman or a similar tool, send a request via the ITSM webhook to the WebhookStaging business object. This request carries the RecID of the Incident record to be updated, as well as the new description, all in the request body.
2.Receipt of the request causes the WebhookStaging business object to run the Create a New Record Action (called Create Staging in our example) that creates a new record, and puts all the data from the request body into the DataField.
3.In the same Action (Create a New Record), an expression extracts the RecID from the request body and puts it into an ID field in the newly created WebhookStaging object record.
4.The creation of the WebhookStaging record causes a Triggered Action to run the Update a Record Action that changes the value in the Done field from false to true.
5.Simultaneously, the Run for Child Action is configured to run the Update a Record Action against the Incident record which takes the description out of the DataField and updates the Description field in the Incident record.
1.In ITSM, create a business object called WebhookStaging.
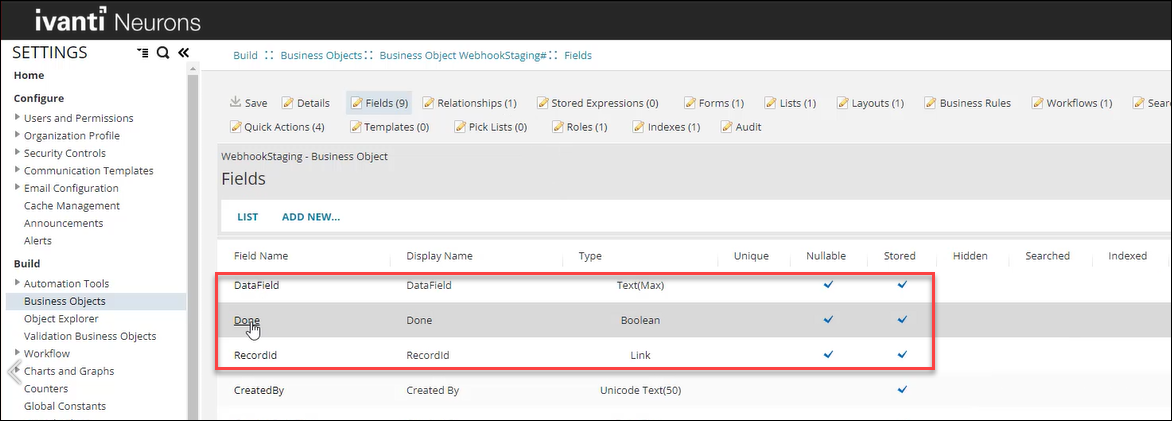
2.Create the following extra fields in the business object:
|
Field |
Display Name |
Type |
Nullable |
Stored |
|---|---|---|---|---|
| DataField | DataField |
Text(Max) |
Selected |
Selected |
| Done | Done |
Boolean |
Selected |
Selected |
| RecordID | RecordID |
Link |
Selected |
Selected |
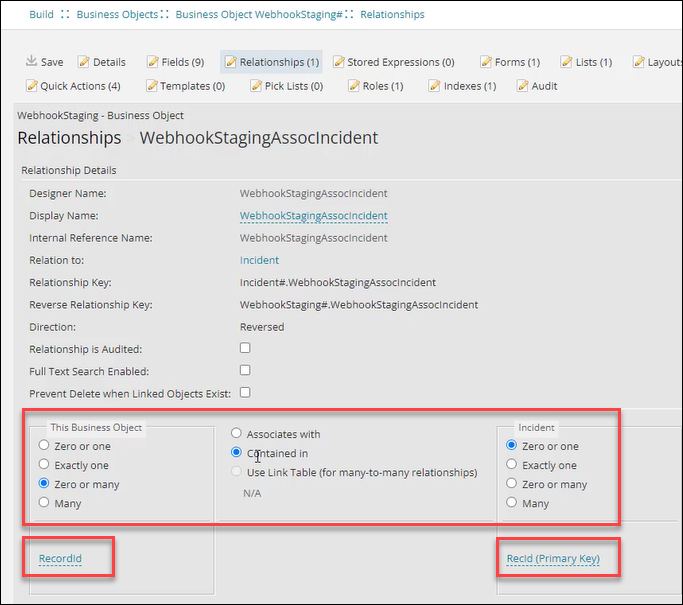
3.Click on Relationships for the WebhookStaging business object and set up the relationship between the staging business object and the Incident business object as shown.
The staging business object is related to the Incident business object (zero or many contained in zero or one), storing the Incident RecID in the Link field.
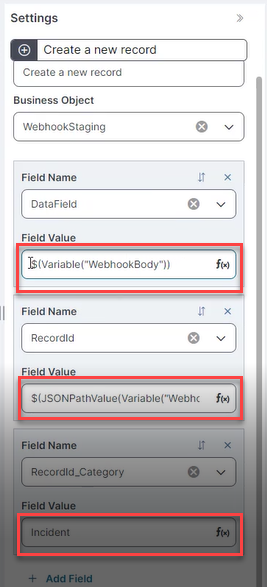
CreateStaging is based on a Create a New Record Action block and is used to create a staging object to dump the data sent to the webhook into, as well as the RecID of the record to update.
1.Open the Graphical Action Designer.
See: Using the Graphical Action Designer (GAD).
Tip: You can use the Classic Action Designer if you prefer.
2.Create a new block using the Update Variables and Stored Values Action block type. This block updates the stored values and variables used in your Action.
For more help see: Update Stored Values and Variables Quick Action
3. Configure the Update Variables and Stored Values Action block to store the data given to the webhook endpoint in the required variable WebhookBody. Edit the values as follows:
|
Field |
Value |
|---|---|
|
Variable Type |
Variable |
|
Name |
WebhookBody |
|
Data Type |
JSON |
|
Value |
{} |
4.Create a new block using the Create a New Record Action block type, and attach it to the Update Variables and Stored Values Action block.
5. Edit the Create a new record block.
For EACH field, create an expression using the Simplified Expression Editor to use the variable to populate that particular field. The DataField and RecordID fields are populated from the webhook data. For RecordID, the expression retrieves a value for the JSON path and uses it to populate the field. Use this expression to populate the RecordID field:
$(JSONPathValue(Variable("WebhookBody"), "$.incidentRecId"))
The target business object (Incident) is set in the RecordId_Category field.
For help, see: Using the Simplified Expression Editor
6.Save your Action as Create Staging.
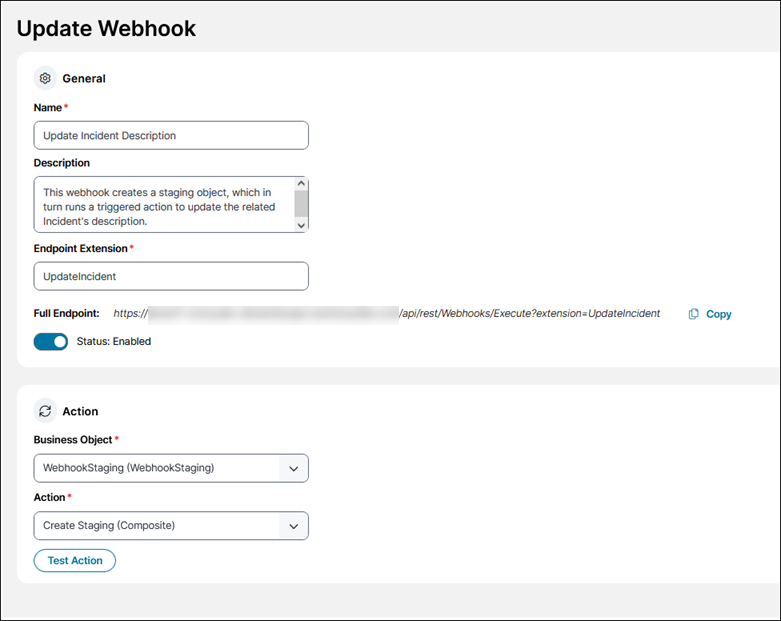
Create a webhook to trigger the Create a New Record Action to put webhook data and the RecID into the staging business object WebhookStaging.
1. In the Settings menu, click on Webhooks Manager in the Build section.
The Webhooks Manager opens.
2.Click Add a Webhook.
3.Enter this information into the fields:
| Field | Value |
|---|---|
| Name | Update Incident Description |
| Description |
This webhook creates a staging object, which in turn runs a Triggered Action to update the related Incident's description. |
| Endpoint Extension |
UpdateIncident Note: The endpoint extension is case-sensitive. |
| Full Endpoint |
https://{tenant url}/api/rest/Webhooks/Execute?extension=UpdateIncident |
| Select Business Object |
WebhookStaging (WebhookStaging) |
| Select Action |
CreateStaging (Composite Action) |
4.Click Save.
A confirmation message appears saying Webhook successfully created. Your webhook appears in the list and is enabled by default.
The Update a Record Action runs from the Run for Child Action, and updates the description of the target object by taking the data dumped into the related WebhookStaging object.
1.Open the Graphical Action Designer.
See: Using the Graphical Action Designer (GAD).
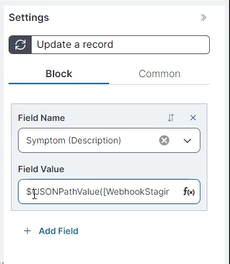
2.Create a new block using the Update Description block type. Name it Update a record.
3. Edit the Update a record block.
Create an expression using the Simplified Expression Editor to take the content from the DataField and parse it into the Incident Description field. Use this expression:
$(JSONPathValue([WebhookStaging#.WebhookStaginAssocIncident]DataField, "$.description"))
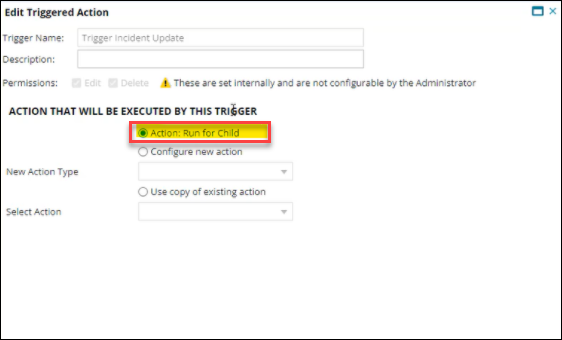
Set up two Triggered Actions against the WebhookStaging business object. One of these has an Action as part of it based on Run for Child.
1.With the WebhookStaging business object open, click Business Rules.
2.Click Triggered Actions.
3.Create two triggered actions as follows:
Tip: Click Next to move to the next screen to find all the fields shown in the tables for each triggered action.
| Trigger 1 | Value |
|---|---|
| Name | Set Done to True |
| Object Event | On Insert |
| Action that will be executed by this trigger | Action: Update Object |
| Target Object Field |
Done = $(true) Overwrite = selected |
| Trigger 2 | Value |
|---|---|
| Name | Trigger Incident Update |
| Object Event | On Insert |
| Action that will be executed by this trigger | Run For Child |
| Run for Child Configuration | |
| Child Object and relationship |
WebhookStagingAssocIncident |
| Add New > Action to run | Update Description |
The Run for Child Action is triggered on creation of the staging object, and runs the third action using the relationship between the staging business object and the target record.
Create the Triggered Action using the following fields:
|
Field |
Value |
|---|---|
|
Name |
Run for Child |
|
Relationship |
WebhookStagingAssocIncident |
|
Action to run |
Update Description |
4.Click Save.
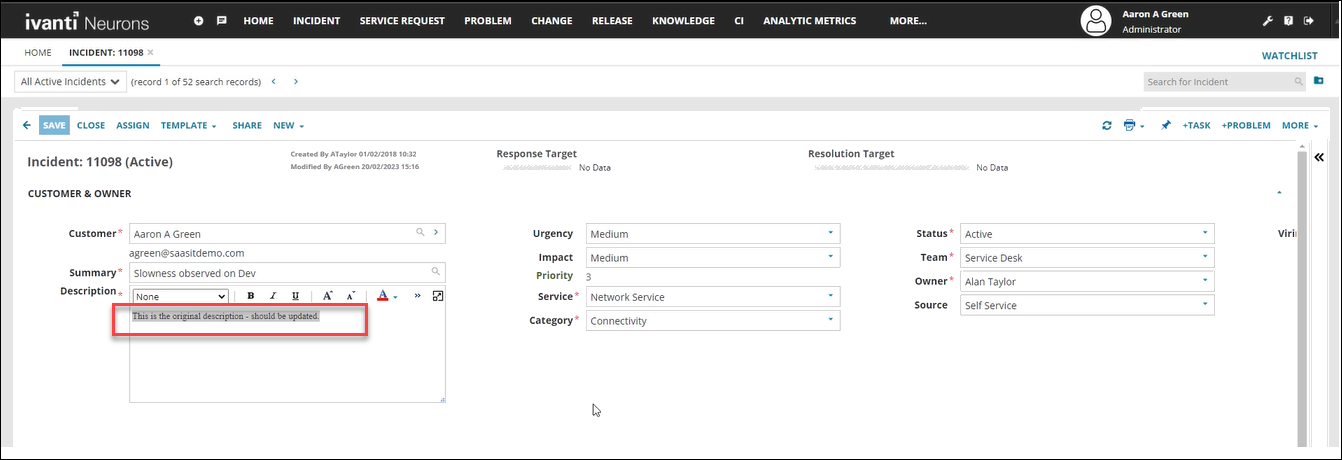
1.This is the target Incident record with the description that we want to update.
2.Using Postman or a similar tool, send the RecID of the target Incident and the new Description in the request.
3.Click Send in Postman.
4.Click Refresh in the ITSM Incident record page.
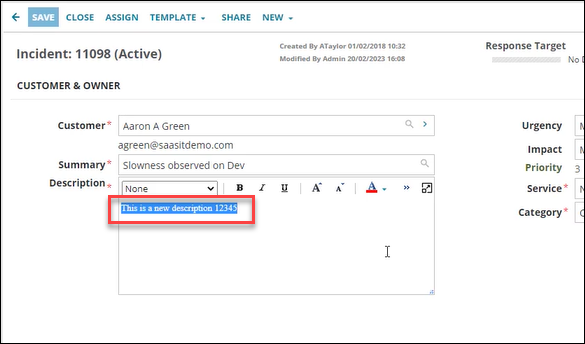
5.The Description field has been updated with your new value.
