Tuning Indexes
Perform these steps to re-index the Ivanti Service Manager database:
•Getting Index Tuning Recommendations
Capturing a Database Trace
Use the Microsoft SQL Server Profiler in Microsoft SQL Server Management Studio to capture a database trace. You analyze the information from this trace file in Getting Index Tuning Recommendations.
1.Open Microsoft SQL Server Management Studio by selecting Start > All Programs > Microsoft SQL Server 2008 > SQL Server Management Studio.
2.Highlight the server that hosts the Ivanti Service Manager database.
3.From the Tools menu, select SQL Server Profiler.
4.Start a new trace:
•If you are prompted for login credentials, specify them for Ivanti Service Manager and click Connect. The system displays the Trace Properties window.
•If you are not prompted for login credentials, select File > New Trace in the SQL Server Profiler window. The system prompts you for login credentials. Specify credentials for Ivanti Service Manager and click Connect. The system displays the Trace Properties window.
5.On the General tab, do the following:
| a. | In the Trace name field, enter a name for the trace. |
| b. | In the Use the template field, select Standard (default). |
| c. | Check Save to file and designate a file location for the trace. |
Running a Trace From the Trace Properties Window
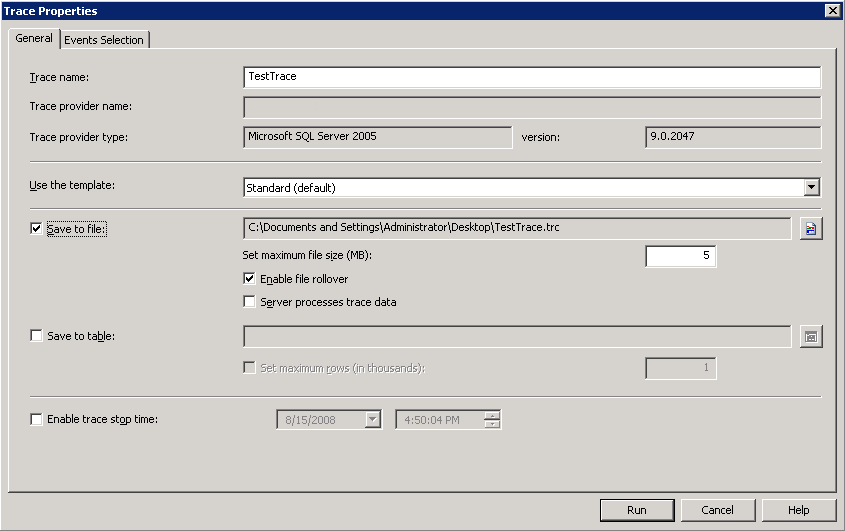
6.Click Run to initiate the trace. The system displays trace information while the trace runs.
A Running Trace
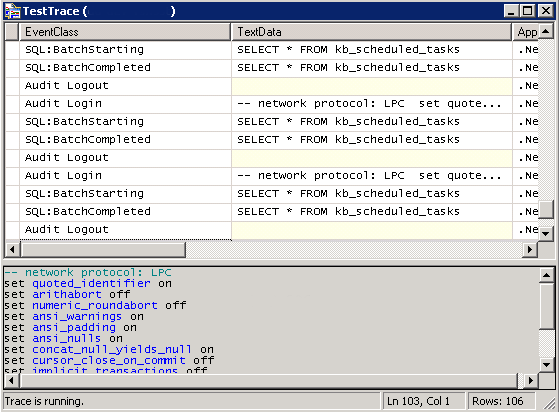
7.When the trace has collected enough information to analyze as described in the next section, select Pause Trace or Stop Trace from the File menu.
Getting Index Tuning Recommendations
Use the Index Tuning Advisor in Microsoft SQL Server Management Studio to get index tuning recommendations.
1.Open Microsoft SQL Server Management Studio by selecting Start > All Programs > Microsoft SQL Server 2008 > SQL Server Management Studio.
2.Highlight the server that hosts the Ivanti Service Manager database.
3.From the Tools menu, select Database Engine Tuning Advisor.
4.Start a new tuning session:
•If you are prompted for login credentials, specify the credentials for Ivanti Service Manager and click Connect. The system displays the Database Engine Tuning Advisor window containing a new open session.
•If you are not prompted for login credentials, select File > New Session in the Database Engine Tuning Advisor window. The system prompts you for login credentials. Specify credentials for Ivanti Service Manager and click Connect. The system opens a new session in the Database Engine Tuning Advisor window.
5.On the General tab, in the Workload area, browse to the trace file that you created in Capturing a Database Trace and click Open.
6.In the Select databases and tables to tune area, highlight the Ivanti Service Manager database.
Selecting the Ivanti Service Manager Database
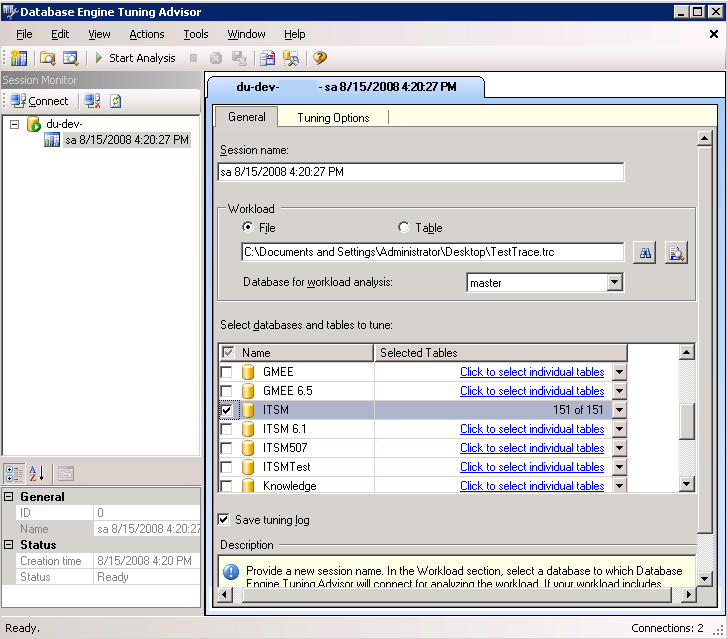
7.From the drop-down menu next to the selected database in the Selected Tables column, choose which tables to analyze.
Selecting Tables
.png)
8.Click the Tuning Options tab.
9.In the Physical Design Structures (PDS) to use in database section, select Indexes.
10.In the Partitioning strategy to employ section, select No partitioning.
11.In the Physical Design Structures (PDS) to keep in database section, select Keep all existing PDS.
12.Click Start Analysis.
13.To view progress, select the Progress tab.
14.To view recommended indexing actions, click the Recommendations tab and go to the Index Recommendations section.
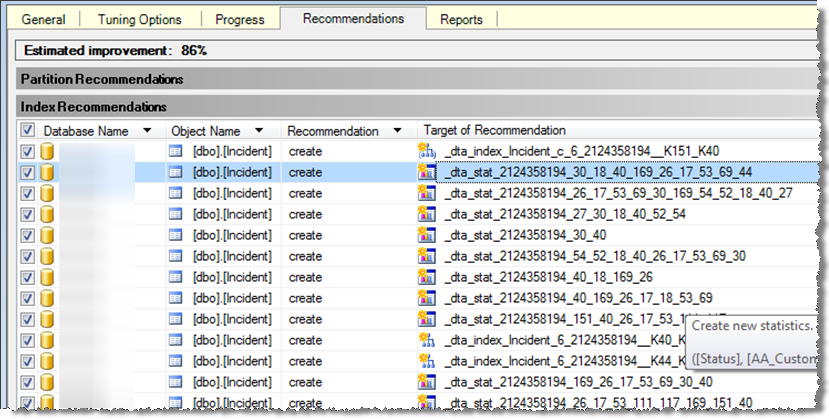
1.Verify that the indexes recommended for creation do not already exist in the Ivanti Service Manager database as described in Checking for Duplicate Indexes.
2.To view the tuning summary, click the Reports tab. You can view reports in the Tuning Reports drop-down list beneath the tuning summary.
About Creating New Indexes
After you verify that the indexes recommended for creation do not already exist in the Ivanti Service Manager database, use the Configuration Console to create the indexes.
•Best Practices for Creating New Indexes
Best Practices for Creating New Indexes
Follow these best practices when you create new indexes:
•Ivanti Service Manager does not create clustered indexes. Disregard any clustered indexes created outside of Ivanti Service Manager.
•Ivanti Service Manager does not create or use include fields or included indexes. You must create and maintain any included indexes that you use outside of the Ivanti Service Manager database. We recommend that you evaluate on a case by case basis the trade off between performance gains and maintenance overhead.
•Ivanti Service Manager maintains statistics only for indexes created in Ivanti Service Manager. Disregard any statistics returned by the create statistics operations in database performance tuning tools.
Creating New Indexes
Perform these steps to create new indexes using the Configuration Console:
1.From the Configuration Console, click Build > Business Objects. The system displays the Business Objects workspace.
2.Select a business object. The system displays the Business Object page.
3.Click the Indexes tab. The system displays the Indexes workspace with a list of indexes for the business object.
4.To add a new index, click Add New.... The system displays index fields associated with this business object.
5.Select the field to index for this business object. You can add more fields later. The system displays the System Properties page.
6.Enter information into the fields.
| Field | Description |
|---|---|
|
Index Name |
A unique name for this index. |
|
Description |
A useful description for this index. |
|
Unique |
Designates this value as unique, preventing duplicate entries in the index and its backing table. You can create uniqueness by using multiple fields. This option automatically creates an unique index of this field. Unlike the primary key field: •You can have multiple unique fields in the business object. •This field is allowed to contain NULL values (although the NULL values are not indexed). |
|
Clustered |
Checks if the business object is part of a clustered index at the database level. Clustered indexes can greatly increase overall speed of retrieval, but usually only where data is accessed sequentially in the same or reverse order of the clustered index, or when a range of items is selected. This is the same as a clustered index function for a Microsoft SQL database. A clustered index cannot contain included fields (it cannot be a cover index). This checkbox is disabled for index fields that have an increasing value, such as GUID. |
| Key Fields | See Viewing, Adding, and Deleting Key Fields |
| Included Fields | See Viewing, Adding, and Deleting Included Fields . |
|
Filter Expression |
Optional. You can apply a filter to the index that does not include NULL values. Click the add new icon •Operation: Choose an operation from the drop-down list for this filter. •NotNull: The filter does not index NULL values. •Value: Enter a string value or expression for this filter. |
7.Click Add this Index. The system adds the index to the business object.
Viewing, Adding, and Deleting Key Fields
The system displays the running size, in bytes, of the index for the key fields. The limit is 900 bytes.
1.From the Configuration Console, click Build > Business Objects. The system displays the Business Objects workspace.
2.Select a business object. The system displays the Business Object page.
3.Click the Indexes tab. The system displays the Indexes workspace with a list of indexes for the business object.
4.Click an index name to open the record.
5.To add a key field, do the following:
| a. | Click the add icon  at the end of the row. at the end of the row. |
| b. | Click not set to select a field from the drop-down list. |
| c. | Click Ascending to change the order. You can select either ascending or descending. |
6.To delete a key field, click the delete icon  at the end of the row.
7.Click Save.
Viewing, Adding, and Deleting Included Fields
1.From the Configuration Console, click Build > Business Objects. The system displays the Business Objects workspace.
2.Select a business object. The Business Object page appears.
3.Click the Indexes tab. The system displays the Indexes workspace with a list of indexes for the business object.
4.Click an index name to open the record.
5.To add a key field, do the following:
| a. | Click the add icon at the end of the row. |
| b. | Click not set to select a field from the drop-down list. |
| c. | Click Ascending to change the order. You can select either ascending or descending. |
6.To delete a key field, click the delete icon at the end of the row.
7.Click Save.
For additional information about adding indexes, see the Ivanti Service Manager online help. (For information about accessing the Ivanti Service Manager documentation.