Ivanti Neurons Workflow Integration
You can automatically invoke and execute the Neurons workflow to a target device or user from a support ticket in Ivanti Neurons for ITSM. Upon successful completion of the workflow, the Neurons for Healing panel in Ivanti Neurons for ITSM displays a success message. You can trigger the Neurons workflow from Ivanti Neurons for ITSM using the following ways:
•Execute the Neurons workflow using a template linked to a Quick Action
•From the Neurons for Healing tab in the Related Items panel – Human in Loop Approach
This feature is available in Ivanti Neurons for ITSM from version 2021.1 onwards.
Creating the Neurons Workflow Configuration
You can configure the Neurons workflow on your tenant by raising a Service Request to the Ivanti Operations team. The Neurons workflow is currently available only for Cloud customers.
1.Log in to Ivanti Neurons for ITSM with the Administrator user role.
2.Click Configure Application to go to the Configuration Console.
3.From the Configuration Console, click Build > Business Objects > Incident to open the Incident business object.
4.Under the Details field > Special Purpose fields sections, set the Boolean field for IsNeuronsWorkflowExecutedFieldRef.
If you do not select the Boolean field, the record will not trigger the Neurons workflow. You can either use an existing Boolean field or create a new field to link with IsNeuronsWorkflowExecutedFieldRef. Refer to Using Form Field Types to create a new Boolean field.
5.Click Build > Global Constants and set the EnableNeuronsForHealing value to True.
Execute Neurons Workflow using the Template linked to a Quick Action
Follow these steps to trigger a Neurons workflow from Ivanti Neurons for ITSM:
1.Log in to the Ivanti Neurons tenant.
2.Create a new workflow in the Ivanti Neurons tenant. For example, create the Test Neurons workflow. Refer to Neuron Workflow Builder for more information.
3.Log in to Ivanti Neurons for ITSM as an Administrator.
4.Click Configure Application to go to the Configuration Console.
5.From the Configuration Console, click Build > Business Objects > Incident > Quick Actions to open the Quick Actions workspace.
6.Open the Template from the Create New Actions tab.
7.Enter data into the following fields:
•Enter Action Name: A unique name for the Quick Action template. For example, type Detect UAC in windows.
•Enter Action Description: A description of what the Quick Action does.
•Enter Category: Select the template category from the list.
8.Enter data into the following fields:
•Field Name: Type the name of the field.
•Field Value: Set a value for the field.
9.Click the Add icon at the end of a field line. A new blank field is inserted below.
10.Repeat to add more fields if required.
11.Under the Additional Actions section, select Neurons for Healing from the list for the Add New Action field.
12.Click the Add icon at the end of a field line.
The list of new actions for the Neurons workflow and the Execute below Action after Save check box appears.
13.Select Execute below Action after Save.
The Execute below Action after Save field will allow all template actions after saving the service ticket.
14.Under the New Actions – Neurons Workflow section, enter data into the following fields:
•Workflow: Select Test Neurons from the list that you created in the Neurons tenant (Creating the Neurons Workflow Configuration, step 4)
•On Success: Select the Quick Action to run when the workflow executes successfully. You can either use an existing Quick Action or create a new Quick Action for the On Success field.
•On Failure: Select the Quick Action to run when the workflow is a failure. You can either use an existing quick action or create a Quick Action for the On Failure field.
•Enter Keywords: Keywords for searching the Neurons workflow.
These keywords are matched with the words typed the Summary field to fetch these Quick Actions.
15.Click Save.
16.Log in to the Service Desk console.
17.Open the Incident workspace.
18.Click New and select the new template Detect UAC in windows (created in the step 7) from the list.
19.Under the Asset section, click Link to add the device to the Neurons workflow.
To trigger a Neurons workflow, you can only link a device which has an Agent ID. Other devices cannot be linked to trigger the Neurons workflow. You can also link multiple devices that have Agent IDs. The Agent ID can be easily fetched from the Neurons Tenant. For more information, refer to the Neurons help.
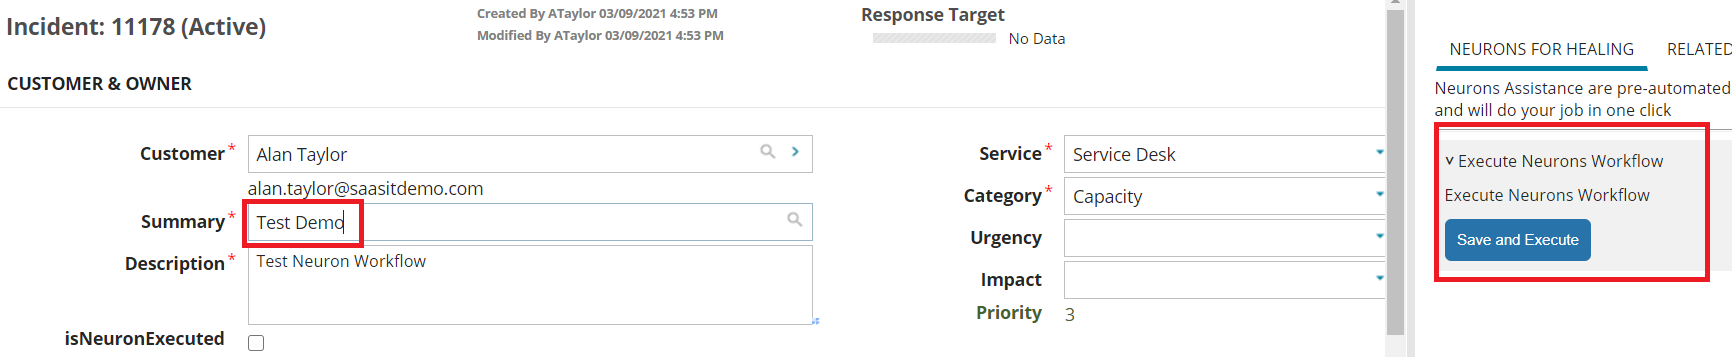
20.Enter data in the remaining fields. Refer to Managing Incidents.
21.Click Save. You can also click Save and Execute in the Neurons for Healing panel.
22.Click the Refresh button.
The Get Current Status button appears in the Neurons for Healing panel.
Neurons Workflow Status
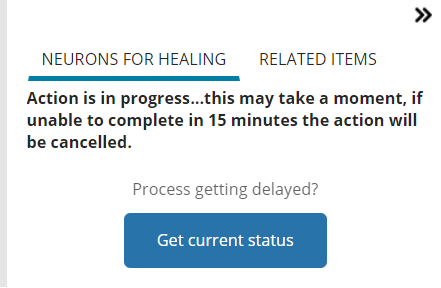
The wait time depends on the complexity of the workflow. For more information, refer to Neurons for Workflow Builder.
23.Click Get Current Status.
When the workflow execution completes, a message “Action is successful” displays in the Neurons for Healing panel.
24.Make sure the On Success Quick Action has run when the workflow executes successfully or else make sure the On Failure Quick Action has run when the workflow is a failure.
Neurons for Healing – Human in Loop Approach
Follow the below steps to trigger a Neurons workflow from Ivanti Neurons for ITSM using the Human in Loop approach:
1.Log in to the Ivanti Neurons tenant.
2.Create a new workflow in the Ivanti Neurons tenant. For example, create the Test Neurons workflow. Refer to Neuron Workflow Builder for more information.
3.Log in to Ivanti Neurons for ITSM with the Administrator user role.
4.Click Configure Application to go to the Configuration Console.
5.From the Configuration Console, click Build > Business Objects > Incident > Quick Actions to open the Quick Actions workspace.
6.Open the Neuron for Healing Quick Action from the Create New Actions tab.
7.Enter data into the following fields:
•Enter Action Name: A unique name for the Quick Action template. For example, type Detect UAC in windows.
•Enter Action Description: A description of what the Quick Action does.
•Enter Category: Select the category from the list.
•Workflow: Select the Test Neurons workflow that you created in the Ivanti Neurons tenant. (Creating the Neurons Workflow Configuration, step 4)
•On Success: Select the Quick Action to run when the workflow executes successfully. You can either use an existing Quick Action or create a new Quick Action for the On Success field.
•On Failure: Select the Quick Action to run when the workflow is a failure. You can either use an existing Quick Action or create a Quick Action for On Failure field.
•Enter Keywords: Keywords for searching the Neurons workflow.
These keywords are matched with the words typed the Summary field to fetch these Quick Actions.
8.Click Save.
9.Log in to the Service Desk console.
10.Open the Incident workspace.
11.Click New.
A blank form opens.
12.Start typing in the Summary field. The Neurons for Healing panel displays all the Quick Actions which are configured with the matching keyword.
List of Matching Quick Actions
13.Under the Asset section, click Link to add the device.
You can only link the device which has an Agent ID, to trigger a Neurons workflow. Other devices cannot be linked to trigger the Neurons workflow. You can also link multiple devices that have Agent IDs.
14.Enter data in the remaining fields. Refer to Managing Incidents.
15.Click Save and Execute in the Neurons for Healing panel for the Test Neurons workflow.
16.Click the Refresh button.
The Get Current Status button appears in the Neurons for Healing panel.
17.Click Get Current Status.
When the workflow execution completes, a message “Action is successful” displays in the Neurons for Healing panel.
18.Make sure the On Success Quick Action has run when the workflow executes successfully or else make sure the On Failure Quick Action has run when the workflow is a failure.