Working with Project Management
•Accessing the Project Workspace
•About the Project Calendar Workspace
About Project Management
The Project Management module allows you to initiate, plan, and manage projects within your organization. Log in as a Project Manager to view the Project dashboard for your day-to-day project activities. The dashboard displays an overview of the status for all projects owned by you. The dashboard parts are:
•Project Health: Displays a color coded status of the health, schedule, and budget for all projects. If the project is associated with a portfolio, displays the portfolio name.
•Project Assessment: Displays the project, due date and the number of escalations, issues, and risks associated with the project.
•Project Overview: Displays the project ID, a color-coded progress bar that displays the percentage of consumption for schedule and budget, and the project status.
Project Managers can access the following workspaces:
•Project workspace: Use this workspace to create new projects.
•Project Calendar workspace: For all of your projects, displays projects, phases that have a status of active, and tasks that are assigned to a resource. After you set a project, phase, or task to active status, it remains on the list even if it is put on hold or completed. This allows you to track the progress of the phase or the task.
Accessing the Project Workspace
Create projects and associate them with phases, then associate each phase with tasks. You can manage costs through the project phase. Therefore, any task associated with a phase can consume against the allocated budget.
To view the Project workspace, do the following:
1.Log in to the application as either a Project Manager or Portfolio Manager.
2.Open the Project workspace. The system displays a list of all projects.
3.Open a project.
You can view or edit any of the project parameters, although Portfolio Managers may have limited rights to edit project parameters.
Creating a New Project
1.Log in to the application as either a Project Manager or Portfolio Manager.
2.Open the Project workspace. The system displays a list of all projects.
3.Click New Project.
Alternatively, you can use a predefined template when creating a new project. refer to About Project Templates.
4.Enter the information into the Overview section and tabs listed below.
5.When completed, click Save.
This is the main section where you enter basic details for the project.
Mandatory fields are marked with an asterisk.
| Field | Description |
|---|---|
| Project Name* |
Enter a unique name for the project. |
|
Summary* |
Enter a summary description for the project. |
|
Project Owner* |
Select the employee who acts as the project owner. |
|
Sponsor |
If there is a sponsor for the project, select the sponsor in this field. |
|
Status |
The status of the project. Select a status from the list.. The choices are Initial, Active, Cancelled or On Hold. The default status is Initial when the project is created, once changed you cannot revert to Initial. If Cancelled is selected, the project record is locked and cannot be edited. |
|
Priority |
Select the project priority, Low, Medium or High. |
|
Alignment To |
Select Major Project, Portfolios or Program. |
|
Start Date / End Date |
The start and end dates for the project. These dates can be edited at a later time if required. |
The Estimated Effort, Planned Effort, Actual Effort and Budget Remaining fields are populated automatically from other sources.
Enter specific details for your project in this tab.
| Field | Description |
|---|---|
| Area | Select an area of your business that the project applies to. |
|
Estimated Start Date / End Date |
Click the calendar icon and select the estimated dates for the start and end of the project. |
|
Type |
Select the type of project, can be Emergency, Major or Minor. |
|
Completion% |
This automatically updated field displays the completion percentage for the whole project. The completion percentage for the project is calculated from the sum of completion percentages for the phases you have added to the project. For more information on completion percentage, refer to Using Automated Project Tracking. |
|
Schedule Health |
Select the current schedule health for the project, can be On Track, At Risk or Off Track. |
|
Budget Health |
Select the current budget health for the project, can be On Track, At Risk or Off Track. |
|
Project Health |
Select the current project health, can be On Track, At Risk or Off Track. |
The Budget Allocated, Budget Remaining and Budget Consumed fields are populated automatically from other sources.
Lists the phases that you have created for the project.
In Neurons for ITSM, you must have at least one phase for every project, even if it is a small project with a short time frame.
Click Go to to open a phase and view its details or to edit it.
Click New Project Phase to add a new phase. refer to Adding or Editing a Phase .
This tab displays all active phases (and associated tasks) in a Gantt chart. The system continues to display phases with a status of active even if the status later changes.
To add a phase in the Schedule tab:
1.Click Add Phase.
2.Enter the details in the New Project Phase form. refer to Adding or Editing a Phase for more information.
3.Click Save.
This tab lists the tasks that are associated to each phase for the project. If you want to create a new task, do this from the relevant project phase, refer to Adding or Editing a Task.
To open a task, select it and then double-click.
You can also edit tasks opened from this tab.
For more detailed information, refer to Working with PPM Deliverables.
To add a new deliverable:
1.Click New Deliverables to add any deliverables required for the project,
Mandatory fields are marked with an asterisk.
| Field | Description |
|---|---|
| Title* | Enter the name of your Deliverable. |
|
Type |
Select the Deliverable type, can be Process or Product. |
|
Due Date |
Click the calendar icon to choose a due date for the Deliverable. |
|
Status |
Choose Open or Closed from the drop-down menu |
|
Details |
Enter any details you want to record about the Deliverable. |
2.Click Save.
To edit and existing deliverable:
1.Select the entry, and then double-click.
2.Edit the details as required.
3.Click Save.
This tab lists all project budgets associated with the project. Click New Project Budget to add a budget, or link existing budgets using the Link button. You can also add a new project budget from the Project Budget Plan workspace.
To edit an existing budget, select it in the list and click Go to. The project budget plan selected opens in the Project Budget Plan page where you can make the required edits.
If the current status of project budget plan you selected for editing is Pending Approval, you cannot edit it in this state.
For more detailed information, refer to Creating a Project Budget Plan.
Use this tab to add a risk for the project.
To add a new risk:
1.Click New Project Risk.
2.Enter the risk details on the New Project Risk form.
Mandatory fields are marked with an asterisk.
| Field | Description |
|---|---|
| Summary* | Enter a brief summary of the risk. |
|
Description* |
Enter a description of the risk. Include any important information regarding the risk. |
|
Risk Owner |
Select an owner for the risk if required. |
|
Status* |
Choose Open, Resolved, Closed or Cancelled from the drop-down menu. When the status is set to Closed or Cancelled, the risk can no longer be edited. |
|
Risk Type* |
Select the type of risk that might impact the project. Can be Resource, Budget, Schedule, Scope or Other. |
|
Severity* |
Select the severity of impact that the risk has on the project. Can be High, Medium or Low. |
|
Likelihood |
Select the likelihood that the risk may have an impact on the project. Can be High, Medium or Low. |
3.Click Save.
You can also add risks from the Risks workspace and associate them to the project, and add further details for the risk that cannot be added here. For example, you can add escalation recipients, or link an issue to the risk.
Further actions you can perform from this tab:
•To open a high-level overview of the risk to view or edit, select it and double-click to open it.
•To open the Risk page to view or edit, click Go to. You can edit additional details for the risk in this view.
Use this tab to add an issue for the project.
To add a new issue:
1.Click New Issue.
2.Enter the risk details on the New Issue form.
Mandatory fields are marked with an asterisk.
| Field | Description |
|---|---|
| Summary* | Enter a brief summary of the issue. |
|
Owner* |
Select an owner for the risk if required. |
|
Description* |
Enter a description of the issue. Include any important information regarding the issue. |
|
Status* |
Choose Open, Resolved, Closed or Cancelled from the drop-down menu. When the status is set to Closed or Cancelled, the issue can no longer be edited. |
|
Severity* |
Select the severity of impact that the issue has on the project. Can be High, Medium or Low. |
|
Target Resolution Date |
Click the calendar icon and select a resolution date for the issue. |
3.Click Save.
You can also add issues from the Issues workspace and associate them to the project, and add further details for the risk that cannot be added here. For example, you can add escalation recipients, or add journals and attachments. To open current issues from this tab on the Risk page to view or edit, click Go to.
Lists any status update notes added for the project. Click New Notes to add a new status update note, and enter a summary and description of the latest status.
To edit an existing status update note, select the note, click Go to, and edit the details.
Project changes allow you to manage change control.
Enter change requests to the project from this tab. Setting the urgency and impact sets the priority of the change to a value between 1 and 5. The system automatically assigns changes to the Change Enablement team. You can set dates for approval and review.
To add a project change:
1.Click New Change.
2.Enter the change details in the New Change form.
3.Click Save.
To edit an existing project change. select the project change entry, click Go to, and edit the details.
Stakeholders are employees that you can add or link to the project.
•To link a stakeholder to this portfolio, click Link. The system displays a list of employees. select one and click Select.
•To remove a stakeholder from the portfolio, select the entry and click Unlink.
•To open the stakeholder Employee page, click Go to. You can view additional details for the employee in this view.
This tab lists any demands that are associated to the project.
The following tabs may be hidden, click the Restore Hidden Tabs icon ![]() and select it from the list.
and select it from the list.
| Tab | Description |
|---|---|
|
Sub-Projects |
Use this tab to link other projects to this project. This effectively makes this project the parent project for any linked sub-projects. To view or edit any sub-projects in the list, select it, and click Go to. |
|
Attachments |
Use this tab to attach a file or insert an URL. The URL must be fully qualified. Refer to Working With Attachments and URLs.. |
|
Activity History |
Displays a record of all notes or emails created and sent by the Project Manager. Select an item from the list and click Go to. |
| Incident |
Links to an incident. You can also remove a link to an incident or view its details by clicking Go to. |
| Problem |
Links to a problem. You can also remove a link to a problem or view its details by clicking Go to. |
| Change | Links to a change. You can also remove a link to a change or view its details by clicking Go to. |
| Service Request |
Links to a service request. You can also remove a link to a service request or view its details by clicking Go to. |
| Knowledge | Attaches a Knowledge Base article to the project. |
| Audit History | Displays a record of entries and changes made to the project. When multiple records are deleted at once, a single record is added in Audit History. |
Adding or Editing a Phase
Phases of a project have defined start and end dates. This allows Project Managers to manage whether or not the project is on track.
1.Log in to the application as either a Project Manager or Portfolio Manager.
2.Open the Project workspace. The system displays a list of all projects.
3.Select the project you want to open and double-click to open it.
4.Select the Phase tab and add or edit a phase
•To add a new phase, click New Project Phase to open a blank form.
•To edit an existing phase, select the entry and double-click to open it.
5.Enter information into the fields.
Mandatory fields are marked with an asterisk.
| Field | Description |
|---|---|
| Title* | Title of the phase. |
| Project |
Connects the phase to a project. You can enter a partial name and click Search or click Search to let the system find and list all available projects. This field may already contain the project name, in which case the field is locked. |
| Phase* | The phase number. You must manually enter this number. This allows you to change the phase number in case you need to insert a new phase between existing phases. |
| Schedule Status* | The schedule status. Select from the list. The status affects the color codes for the portfolio and the project. |
|
Description* |
Describes what this phase will accomplish. |
|
Status* |
The phase status. Select from the list. Only phases with an active status are listed on the project calendar. |
| Start Date | The phase start date. |
| End Date | The phase end date. |
| Actual End Date | When the phase is complete, lists the actual end date. |
| Completion (%) | The percentage of completion for the phase. This impacts the Consumed field. |
Additional information can be added to the phase by opening it from the Project Phase workspace, or select the phase entry in the Phase tab, and then click Go to to open the record in the phase record page,. Adding tasks to a project is done from a phase record page, you cannot add tasks directly from the project page.
Adding or Editing a Task
A task is a unit of work that must be completed for a project phase. A phase can contain multiple tasks. Adding tasks enables you to easily track the progress of each phase throughout a project.
1.From the project page, select the Phase tab.
2.Select the phase you want to add a task to, and then click Go to.
The phase record page opens.
3.Click the Tasks tab, and enter information into the fields.
| Field | Description |
|---|---|
| Summary | Enter a brief summary of the task. |
| Details | Enter details for the task. Include all relevant information related to the task. |
| Service | Select the service associated with the task. |
| Team | Select the team associated with the task. |
| Owner |
Select the owner associated with the task. |
|
Planned Start Date / End Date |
Enter a planned start and end date for the task. Click the calendar icon to select the dates. |
|
Start Date / End Date |
Enter the actual start and end dates for the task. Click the calendar icon to select the dates. |
| Priority | Select the priority for the task. Priority ranges from 1 to 5, with 1 being the highest priority. |
| Planned Effort | Enter the planned number of minutes allocated for completing this task. |
| Actual Effort | The actual number of minutes taken complete this task. |
| Percent Complete (%) | The completion percentage. Updating this field through the project tracks the progress of both the task and the phase, and also impact the consumed budget figures. |
|
Acceptance Target |
The amount of time remaining for the task to be accepted. The system automatically updates the graph based on task details. |
|
Completion Target |
The amount of time remaining before the task is escalated. The system automatically updates the graph based on task details. |
4.Click Save.
About the Project Calendar Workspace
Use the Project Calendar workspace to open a calendar-based view of the phases and related tasks for any projects that you own and manage. The Project Calendar workspace only lists projects or tasks that have a status of active.
The following options are available for viewing projects:
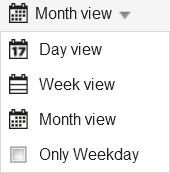
•To view a different time frame: Click the link to select a different time frame such as day view, month view, week view. Check Work week to eliminate weekends from the display.
•To view a list of the color codes: Click the menu icon.

•To view different dates of the time frame: Click the time frame link to change the dates or the year, or use the forward and back icons to scroll through the week or month.
Selecting a Date in the Project Calendar

About Project Templates
Project Managers can use a project template to help set up new projects. Currently, there is one project template called Waterfall Model for Software Project. It contains a project plan based on the waterfall methodology for software development. The project template has project information available in the Overview tab and phase information, available in the Phase tab. The phase information contains 12 phases that are typically seen within a software development project. These can be used when setting up a new project. You can change the names and add tasks as required.
Follow these steps to use the project template:
1.Log in to the application as a Project Manager.
2.Open the Project workspace. The system displays a list of projects.
3.Click New Project > Waterfall Model for Software Project.
4.Change the project name to create a new project.
5.Add and edit the information in the project to quickly set up your own project.
6.Click Save.