Auto-Translation
Role: Administrator
Minimum Version: Ivanti Neurons for ITSM 2025.4.
The Auto-translation capability is a feature that enables access to AI-powered localization and auto- translation of content based on user's selected locale. It functions in the following areas:
•Localization Workbench
•Field-Level Translation
You must enable the Translation Service toggle button to use the Auto-Translation feature. Refer Enable Translation Service for more information.
Enable Auto-Translation
1.Log in to Neurons for ITSM as an Administrator.
2.Go to the Configuration console, scroll and select AI Configuration Hub.
3.Set Auto-Translation to Active using the toggle button.
![]()
4.Select the Edit icon ![]() beside the toggle button.
beside the toggle button.
5.Enable AI Translate for the feature:
| Field | Description |
|---|---|
| Localization Workbench |
Localization Workbench is an independent feature and you can now use the Auto-Translation feature to automatically translate content for the Localization Workbench. Refer Localizing Live Data to know more about Localization Workbench. To enable the feature, click the toggle button. |
| Field level Translation |
Field Level Translation refers to the automatic translation of specific strings within an application based on the user's selected language or locale. To enable the feature, click the toggle button. |
6.Click Save.
Using AI for Auto-Translation in Localization Workbench
To enable AI to automatically translate content for the Localization Workbench, do the following:
Prerequisites:
Before using Auto-Translation in the Localization Workbench, ensure that the Localization Workbench feature is enabled. Refer to Enable Localization Workbench for setup instructions.
1.Log in to Neurons for ITSM as an Administrator.
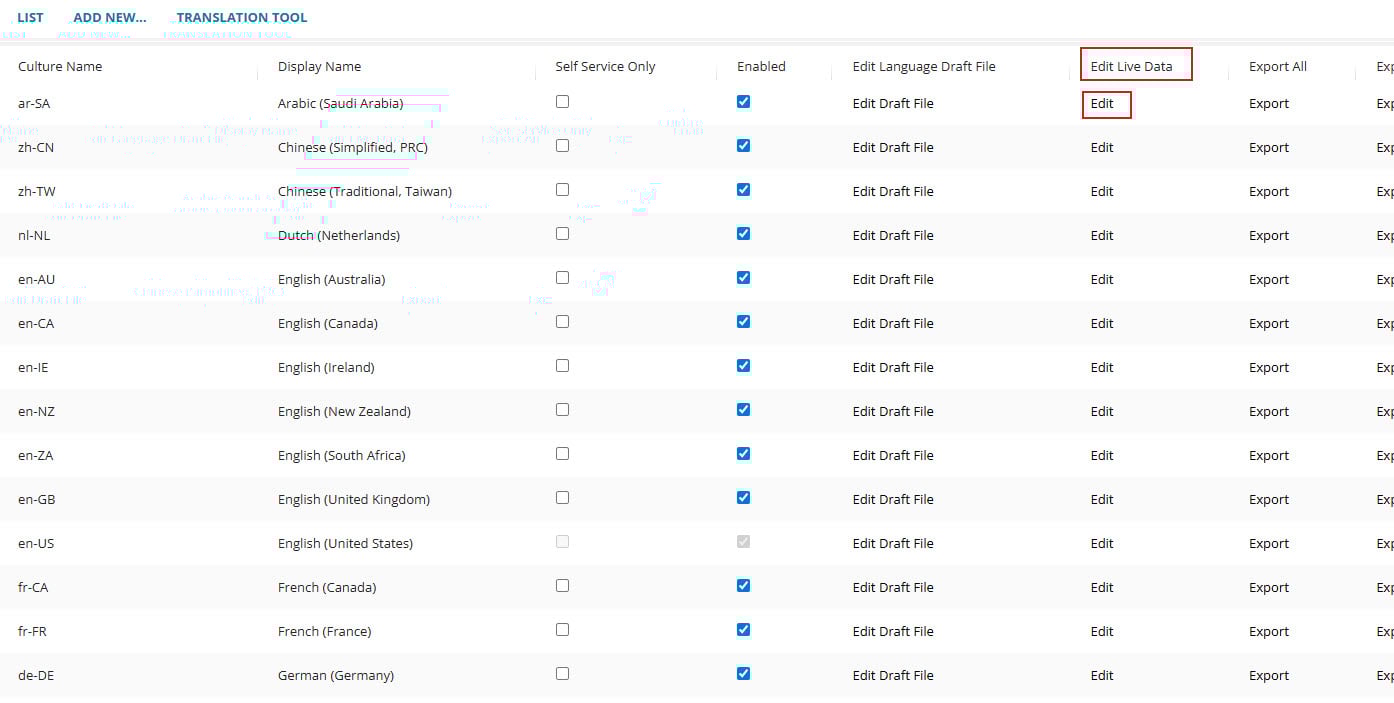
2.Open the Configuration console, select Organization Profile > Languages.
The Languages workspace displays a table of language files.
3.For the desired language, click Edit in the Edit Live Data column.
4.In the Localization Workbench and Settings workspace, choose between Content Strings and Picklist Strings.
•For Content Strings, choose Business Objects or Business Object Properties from the Select criteria by which you would like to load the data menu.
Field | Description |
|---|---|
Business Objects | It loads and presents data according to the name of the business object you want to change. For example, you can translate data for all Address business objects. |
Business Object Properties | It loads and presents data according to the business object property you want to change. For example, you can translate data for all business objects that are Forms. |
5.Select the item you want to translate from the populated live data, and click Next.

6.Click Next.
A grid will display the list of translation records.
7.Select the records you want to translate using the grid selector checkbox.
8.Click the AI Translate button.
Wait for a few seconds for the translation to process.
Once completed, the translated strings will appear in the Target column.
![]()
9.Review the translations, and click Publish to save them.