Write Assist
Role: Administrator
Minimum Version: Ivanti Neurons for ITSM 2025.4.
The AI Write Assist feature provides AI-powered support for enhancing and generating content. It helps you to prepare quality content with proper clarity, grammar, and context. The feature is applicable to HTML-based text fields and email text fields.
Watch these videos for a visual walkthrough -
Setting up and using the AI Field-level Write Assist AI Field-Level Write Assist (2:14)
Setting up and using the AI Write-Assist AI Write Assist (3:52)
The feature is accessible through AI Configuration Hub and includes two sub-features:
•Field-Level Write Assist
•Email Assist
Enable Write Assist
To enable the feature, do the following:
1.Log in to Neurons for ITSM as an Administrator.
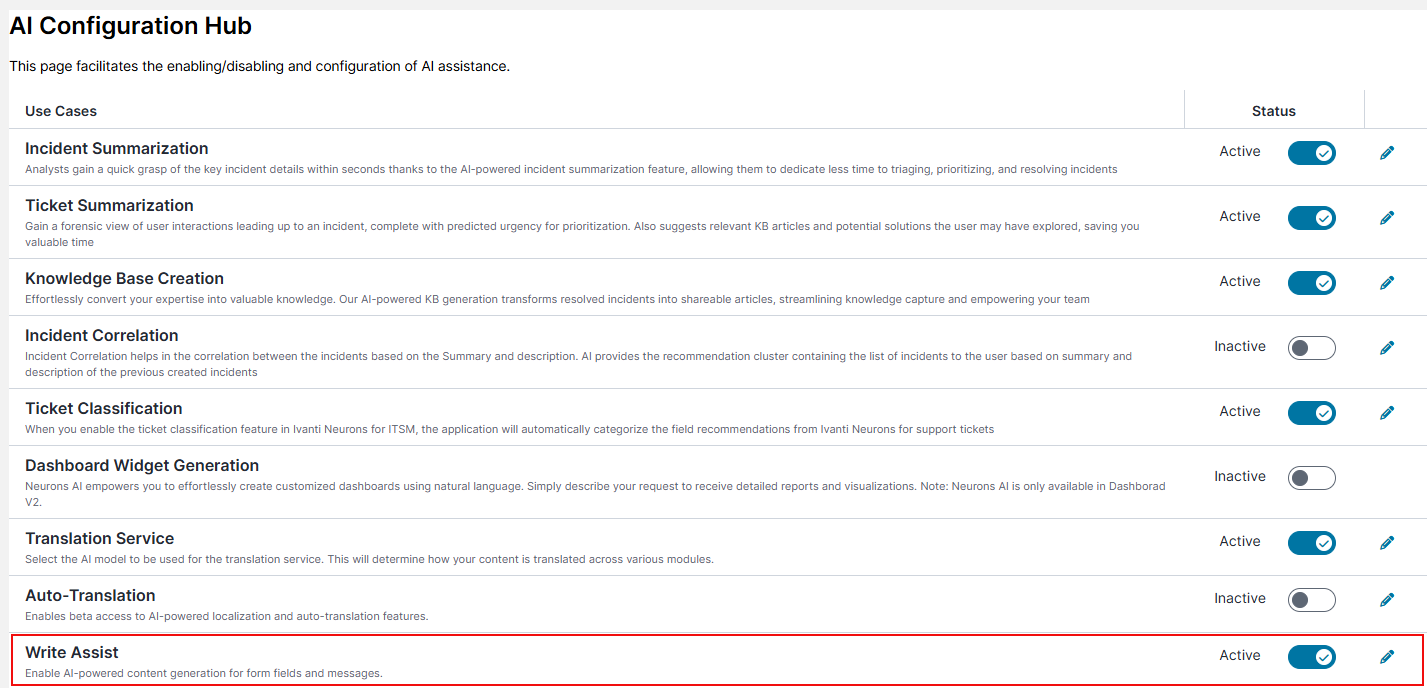
2.Go to the Configuration console, scroll to AI Configuration Hub and select it.
3.Set Write Assist to Active using the toggle button.
4.Click the Edit icon ![]() besides the toggle button.
besides the toggle button.
5.Enable AI Write Assist using the following features:
•Field-Level Write Assist: Enhances content in HTML-based texts fields.
To enable the feature, refer Field-Level Write Assist.
•Email Assist: Generates AI-assisted draft content in email text fields.
To enable the feature, refer Email Assist.
6.Click Save.
Field-Level Write Assist
This feature provide assistance to enhance content in HTML-based text fields such as Description, Resolution, and others.
When enabled, it adds the AI Text Suggestion button to the HTML field's control properties. Users can click this button to improve the content they have entered in the text field.
1.Enable Field-Level Write Assist:
Set Field-Level Write Assist to Active using the toggle button.

2.Enhance a content using Field-Level Write Assist:
| a. | From the Home page, open any Workspace. For example, Incident Workspace. |
| b. | Double-click to open any specific record from the list. |
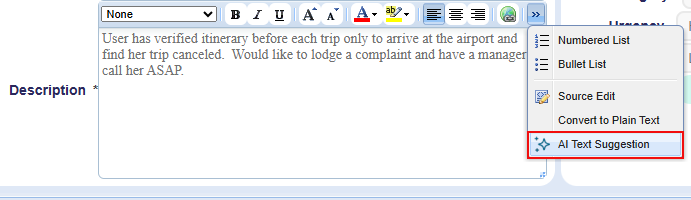
| c. | Enter you inputs in an HTML-based fields such as Description, Resolution, and others. |
| d. | Click the right-arrow icon and select the AI Text Suggestion option.
A new windows appears, displaying an initial text suggestion in a professional format (default). |
| e. | To further enhance the text, click the Refine dropdown and select the appropriate options from the list:
•Change tone to: Professional, Empathetic, Casual, and Neutral as per your preference. •Summarize: Brief main points of the current information. •Make shorter: Concise long text into a shorter version. •Make longer: Elaborate the content in detailed manner. |
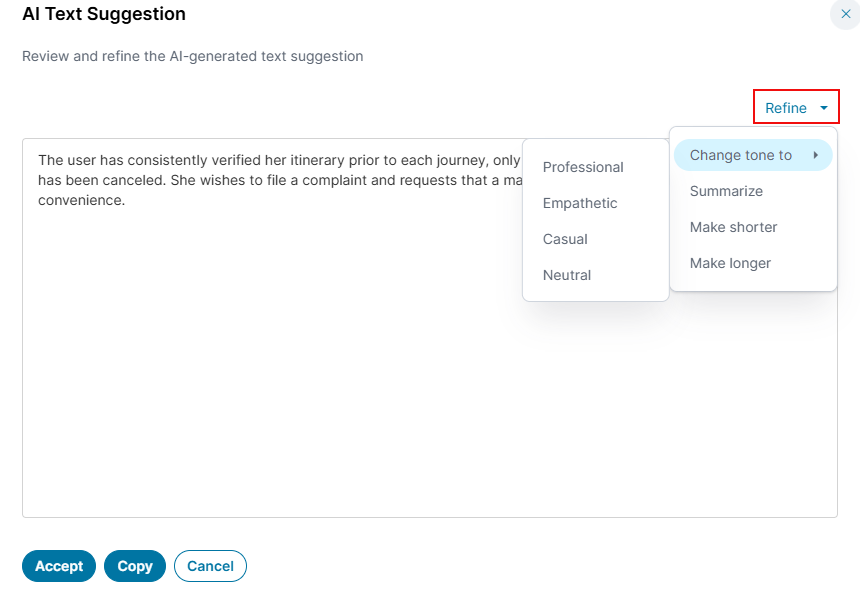
| f. | Click Accept to overwrite the field with enhanced text. Alternatively, click Copy to copy the text to your clipboard, and then paste it manually into the text box. |
Email Assist
This feature is an AI-powered tool designed to help users quickly generate email drafts.
When enabled, it adds the Email Assist button to the email form. Users can click this button to generate an email draft automatically.
To enable, configure, and use the feature, do the following:
1.Enable Email Assist:
| a. | Set Email Assist to Active using the toggle button.
|
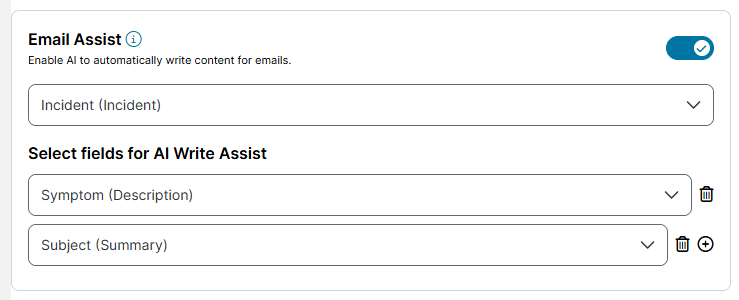
| b. | From the first dropdown, select the business object where you want to enable the Email Assist feature. |
| c. | From the Select fields for AI Write Assist dropdown, select the fields that will give context to the AI. This helps AI understand the email draft it has to generate. It is a mandatory field. Only the fields configured here will be considered for generating the email draft. |
| d. | Click the Add |
Once Email Assist is enabled, ensure that the Email Assist button is available in the email form. If it is missing, add it to the respective form. For more information, refer Enable Email Assist button:.
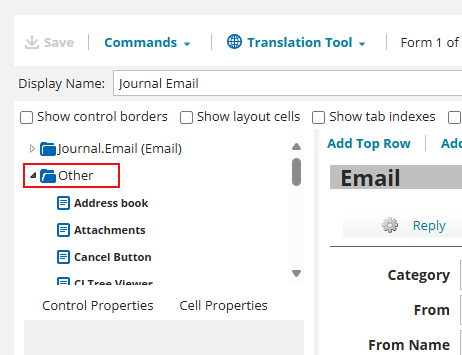
| a. | Go to the Configuration console, and open the Journal.Email business object. |
| b. | Under Forms, open the Journal.Email form. |
| c. | Expand the Other section, and locate the Write with AI button.
|
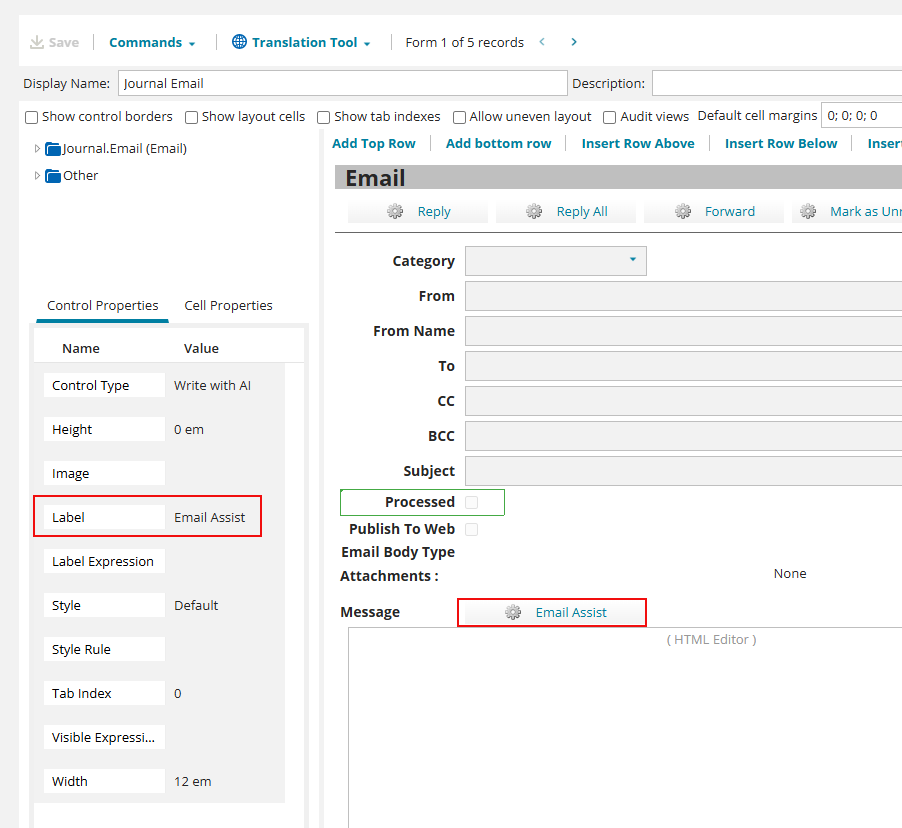
| d. | Drag the button and drop it to the desired location on the form. |
| e. | Under Control Properties, rename the label name to Email Assist for user clarity. Once changed, the button name changes to Email Assist.
|
| f. | Click Save to save the form. |
If the business object has a journal configured, the system includes it automatically. If not, it skips the journal.
For upgraded customers, the Email Assist button needs to be configured manually as given above.
This is a one-time configuration and you don't need to repeat it every time.
For out-of-the-box customers, the Email Assist button is available by default.
3.Enhance the content using Email Assist:
| a. | From the Home page, open any Workspace. For example, Incident Workspace. |
| b. | Double-click to open any specific record from the list. |
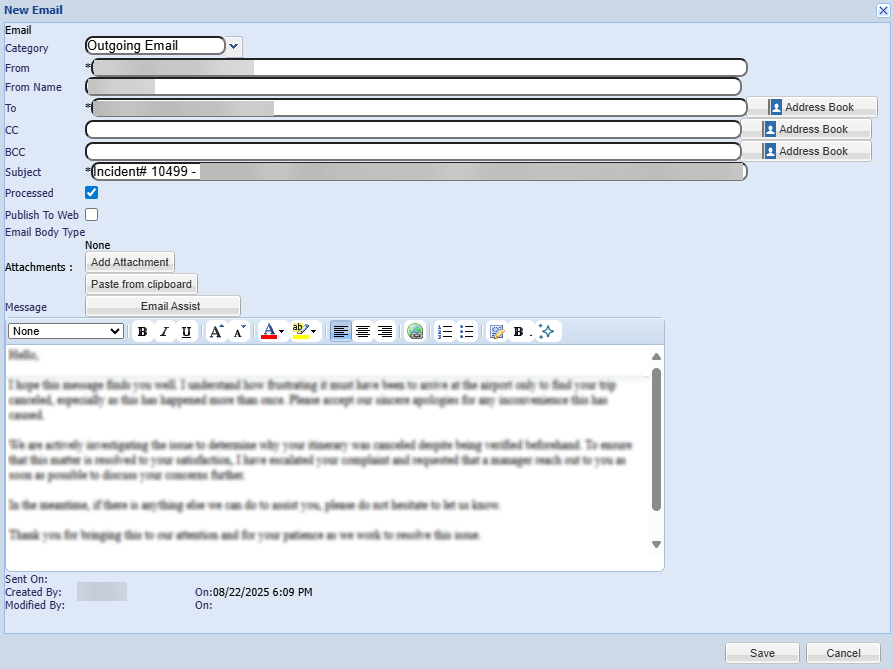
| c. | Under Journal, click the Add dropdown arrow and select Email to create a new email. A new window appears where you can compose the email.
|
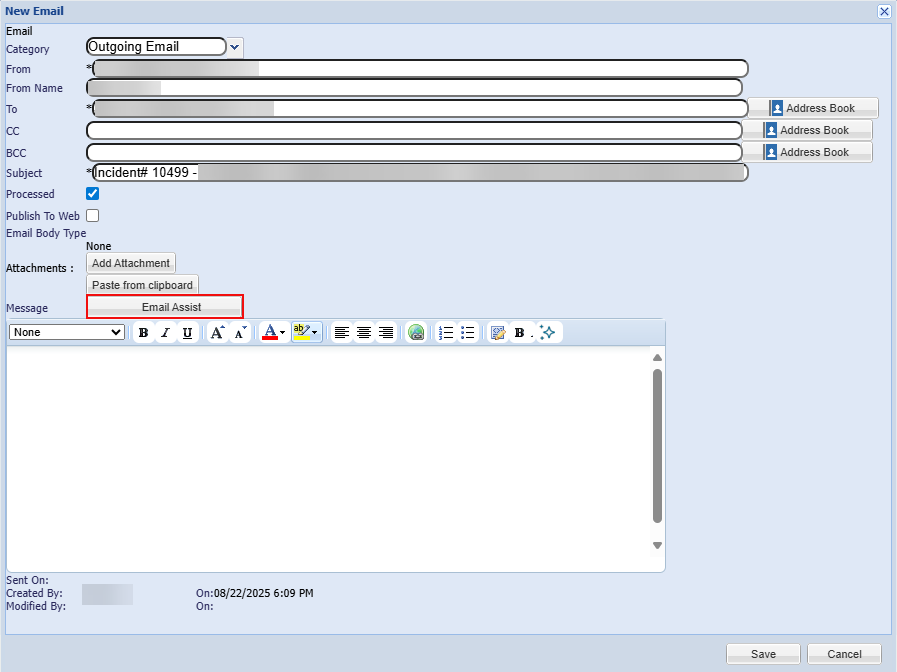
| d. | Click Email Assist. An incident overview is generated based on the record overview, configured fields, and the email conversation history in the Journal. |
| e. | Optionally, you can enter additional instructions in the text box to enhance the email draft. For example: "Generate an email in a polite manner." |
| f. | Click Generate Draft to generate the email draft. |
| g. | Click Copy to clipboard to copy the draft, and then paste it manually into the text box.
|