Microsoft Entra Integration
Role: Administrators.
Minimum Version: Ivanti Neurons for ITSM 2024.3.
The Entra ID Import feature allows you to manage your organization's workforce both full-time employees and contractors by maintaining user identities and access control. It also provides flexibility to customize the configuration according to your business needs.
Watch this video for a visual walkthrough of configuring and using the Microsoft Entra ID Import.
Configuring Microsoft Entra ID Import (5:55)
Importing from Microsoft Entra ID is currently not supported in FedRAMP environments, as the User Management Service is not available in these deployments.
Prerequisite
Before you configure the import, make sure you have the required details, which you can get from Microsoft Entra ID with the following Microsoft Graph API permissions, Group.Read.All, User.Read.All, and AdministrativeUnit.Read.All.
You need the following information:
•Client ID
•Tenant ID
•Client secret
Configuring Azure AD in ITSM
1.Log in to ITSM as an Administrator.
2.Open the Configuration console, scroll and select LDAP Integration > Entra ID Import.
The Entra ID Import Connections page is displayed.
3.Click Setup new Entra ID connection.
4.Enter information in the following tabs:
This tab captures the configuration required to connect ITSM with Entra ID. The remaining tabs are disabled until this step is complete.
| a. | Select the Enabled checkbox. |
| b. | Enter the following information: |
•Connection Name - Enter appropriate name (minimum of 5 characters).
•Client ID, Tenant ID, and Client secret - Enter appropriate details provided by Microsoft Entra.
•Graph API endpoint - Use the default or enter custom URL to connect to import users from the Azure portal by interfacing with Azure Active Directory (Azure AD).
•Token endpoint - Use the default or enter custom URL to request authentication tokens for secure access.
Use only supported URLs when configuring endpoints to match your domain requirements.
Only URLs listed in the Microsoft Graph national cloud deployments are supported. If you enter unsupported URLs, the test connection will fail and display an error.
•Select primary key - Select an option from Entra ID, UPN, and Email as the unique identifiers. You can also apply advanced query filters using the Azure AD HTTP request string.
For an example:
•endsWith(userPrincipalName,'@ivanti.com') and accountEnabled eq true
•(accountEnabled eq true and department eq 'IT') or city eq 'London'
| c. | Click Test Connection to validate the provided information. |
A success message confirms the connection details are correct.
| d. | Click Save. |
This saves the configuration, but the connection remains inactive until further steps are completed.
The Filter Management tab is used to setdefine and apply filter conditions using Entra ID fields to retrieve specific users or groups based on custom criteria. You can apply And, OR, and HttpString predicates.
Microsoft Graph SDK is used to connect to APIs. For more information, refer to Make API calls using the Microsoft Graph SDKs.
•AND predicate - In a filter query, AND predicate is used when you want the results to satisfy all filter conditions.
For example, if the filer query is set as,
•Condition 1 - AccountEnabled Equals True
•Condition 2 - City Equals London
The results will include only users whose account is enabled and whose city is London.
•OR predicate - In a filter query use OR predicate is used when you want the results to satisfy any one of the filter conditions.
For example, if the filter query is set as,
•Condition 1 - AccountEnabled Equals True
•Condition 2 - City Equals London
The results will include users who meet either condition users with account enabled, or users located in London.
•HttpString predicate - Use the HttpString predicate to define filter conditions using a string-based HTTP request.
For example, startsWith('S', displayName) and accountEnabled eq true.
The results will include users whose display name starts with "S" and whose account is enabled.
View and Manage Groups and Users
To filter and view data using the User filter type:
1.Select the User from the Filter type dropdown.
2.In the Filter Condition dropdown, select And, or OR, or HttpString predicates based on your requirement.
3.Enter the appropriate details and click Preview.
The Preview Entra ID import window appears, showing all users that match the selected filter criteria.
To filter and view users by groups:
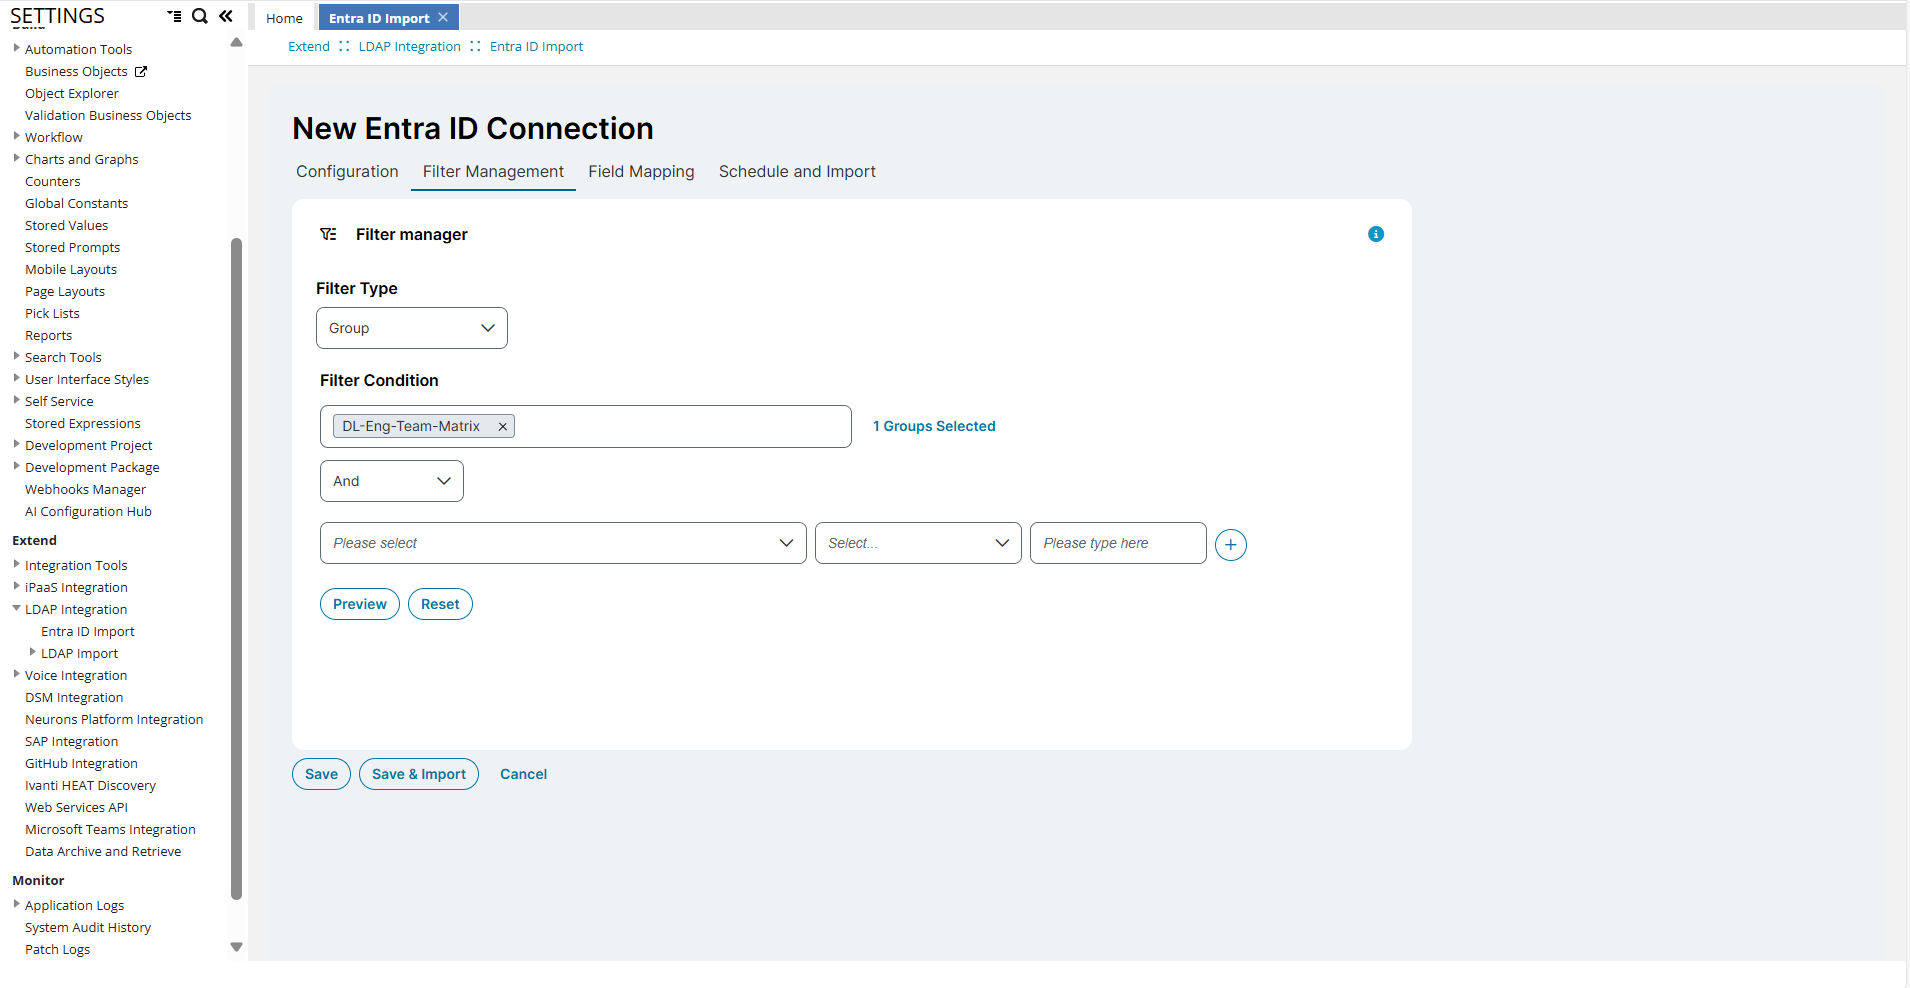
1.Select the Group from the Filter type dropdown.
2.In the Filter Condition dropdown, enter or select the desired one or more groups then click Ok.
A link appears showing the number of selected groups.
3.Click this link to view the selected group names.
• To remove a group, click Close icon next to it.
4.To add more filters, use the And, or OR, or HttpString predicate, define your filter query and then click Preview.
If you select User as the filter type, the queue displays progress messages immediately. If you select Group, the system adds messages to the queue only after it finishes retrieving all users from Azure portal.
The system updates user information and its relationships only when the user belongs to any of the selected group.
For more information on filter queries and predicates, refer to Microsoft Graph - Use the $filter query parameter and Microsoft Graph - Advanced query capabilities on Microsoft Entra ID objects.
This tab is used to set the field mappings from ITSM to Entra ID. It consists of both existing and new field mappings for a connection.
| a. | Click Add Mapping. |
| b. | Select appropriate mappings from ISM Employee Field and map it to Entra ID Fields. |
| c. | Choose the Mapping Type: |
•Map - Choose from available options.
•Fixed Value - Enter a static value.
| d. | To prevent a field from being updated during import, select the Do not update checkbox next to the mapping. |
This tab allows you to set a schedule or initiate an immediate import. You can also enable the import of administrative units.
•Choose a schedule from the Schedule list to run the import as per the time in the selected schedule.
or
•Choose Save and Import to run the import immediately.
•Select the Import Administrative Units checkbox to import administrative units in the database.