Setting up ITSM users for authentication via the Neurons Platform
This feature is Early Access only and may not be available in your environment. For more information, please contact your Customer Success Manager.
How it works
Referring to the image shown below, a standalone IvantiNeurons for ITSM tenant uses a direct connection to the authentication provider.
In the case of an ITSM tenant which has been setup to benefit from access to globally available features (example: Portfolio Landing Page, Global Announcements), the ITSM tenant ALWAYS uses OpenID Connect (OIDC) authentication to connect to the Neurons Platform. This means that, regardless of which authentication method you wish to use for your users (SAML with Entra ID, Okta or PingOne for version 2024.4, or LDAP, PingFederate in the future), ITSMconnects to the Login App within the Neurons Platform using OIDC.

Unless access is explicitly granted in both products, it is expected that the Neurons Platform administrator sets up the authentication providers on the Neurons Platform and the ITSM administrator ensures that ITSM users are enabled to use external authentication via OIDC on their tenant as described below.
Prerequisites
-
Users need a converged tenant that has access to all available products. The Site Reliability Engineering (SRE) team sets up your tenant for you so that OIDC authentication is already available.
-
To verify that OIDC is set up, open the Configuration console, and select Security Controls > Authentication Providers. You should see an entry similar to this:

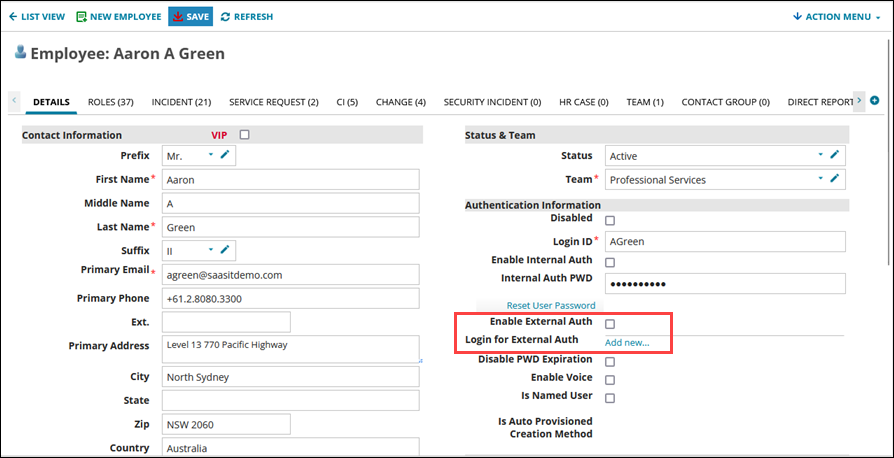
To enable authentication for a single ITSM user:
-
Open the Configuration console and select User and Permissions > Users.
-
Select the user.
-
Select Enable External Auth.
-
Select Add New to the right of Login for External Auth.
-
Enter the user's email address as their Login.
-
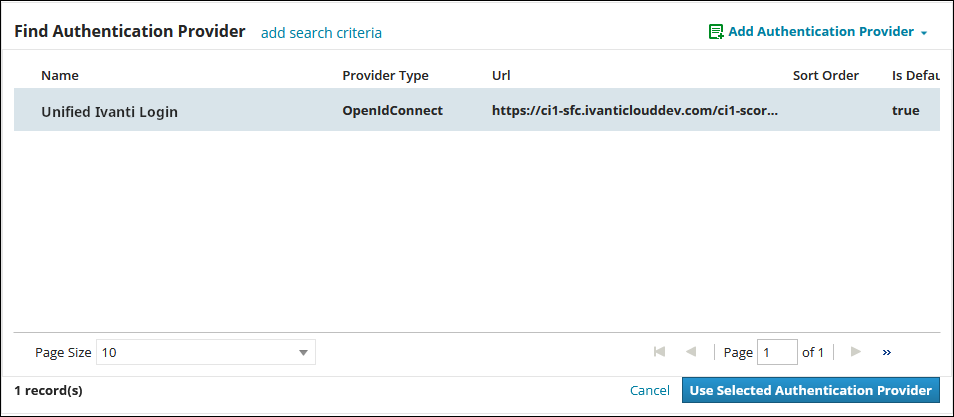
Start to type Uni and select from the list of providers that appears or select the search icon.
-
Select Unified Ivanti Login from the Find Authentication Provider screen.
-
Click Use Selected Authentication Provider.
-
Click Save.
The user now has access to all the unified product experience features.
To enable authentication for multiple ITSM users:
You can invite several users to log in to a new authentication provider by sending out a URL in an email. Refer to Logging in or Accessing Records Using URLs.