To Configure Allowed HTML Tags and Attributes
Role: Administrator
Minimum Version: Ivanti Neurons for ITSM 2025.3
You can now enable support for specific HTML tags and attributes, such as <object>, <iframe>in HTML type fields across all business objects. Common use cases include embedding advanced HTML formatting or video objects into Incident, Knowledge, and Problem records. This feature allows users to embed custom HTML content safely.
Background
The ITSM application sanitizes HTML content using the DOMPurify library during UI rendering. By default, DOMPurify removes all potentially malicious or unwanted HTML tags and attributes to ensure secure display of user generated content.
Some business scenarios may require specific HTML elements, such as <object>, <iframe>. To support these cases, this feature allows administrators to configure a list of allowed tags and attributes, effectively whitelisting only the required HTML elements for those scenarios.
This feature helps organizations maintain a secure-by-design application and gives administrators control over which HTML content is preserved during sanitization. You can define allowed tags and attributes at the field level to minimize exposure.
Additional notes on HTML Sanitization behavior
Currently, you can enable configurable HTML sanitization in the following two areas:
-
Business object fields: Fields set to type HTML are sanitized to prevent cross-site scripting (XSS) and other security vulnerabilities.
-
Journal emails and journal notes: When configured as HTML fields, these components are sanitized to ensure secure rendering and proper handling.
Journal notes are currently stored as text fields but render as HTML inside a flex component. This is unintended behavior and introduces a potential security risk. To follow secure practices, administrators must do one of the following:
-
Convert journal notes to HTML fields: This allows the system to apply proper sanitization and reduce the risk of XSS attacks.
For detailed information on future changes to DOMPurify behavior and global constant defaults, see Whitelisted HTML Tags and Attributes (DOMPurify).
Blacklisted HTML Attributes
The application permanently blocks the following attributes to protect against cross-site scripting (XSS) and other security vulnerabilities. These blacklisted items are hard-coded and cannot be overridden through configuration.
The following items are blacklisted:
-
Attribute values containing scripting keywords:
javascript, jscript, vbscript, expression
-
Event-driven attributes:
onclick, ondblclick, onmousedown, onmousemove, onmouseout, onmouseover, onmouseup,
onkeydown, onkeypress, onkeyup, onabort, onerror, onload, onunload, onresize,
onscroll, onblur, onchange, onfocus, onreset, onselect, onsubmit, onpointerover
These tags and attributes are blacklisted for the current release (2025.4). The product team is still finalizing and the blacklist may change in a future release.
Whitelisted HTML Tags and Attributes (DOMPurify)
Ivanti Neurons for ITSM uses the DOMPurify library to sanitize HTML input fields and ensure secure rendering of user-generated content. DOMPurify relies on a default whitelist to determine which HTML tags and attributes are permitted.
This topic provides an overview of the default whitelist behavior in DOMPurify version 1.0.8, which is used in release 2025.3 onwards.
Overview:
DOMPurify uses an internal whitelist that defines which HTML tags and attributes are considered safe. Any tag or attribute not included in this list is automatically removed during sanitization.
You can define additional tags and attributes using Allowed Tags/Attributes configuration.
Whitelisted HTML Tags and Attributes:
The following are examples of tags and attributes whitelisted by DOMPurify. This list is not exhaustive and is based on version 1.0.8.
Common HTML Tags (Whitelisted by Default)
<a>, <abbr>, <b>, <blockquote>, <br>, <caption>, <cite>, <code>, <col>, <colgroup>, <dd>, <del>, <dfn>, <div>, <dl>, <dt>, <em>, <h1>–<h6>, <hr>, <i>, <img>, <ins>, <kbd>, <li>, <mark>, <ol>, <p>, <pre>, <q>, <s>, <samp>, <section>, <small>, <span>, <strong>, <sub>, <sup>, <table>, <tbody>, <td>, <tfoot>, <th>, <thead>, <tr>, <u>, <ul>, <var>, <style>, <base>, <xml>, <script>, <applet>, <embed>, <iframe>
Common HTML Attributes (Whitelisted by Default)
abbr, align, alt, axis, bgcolor, border, cellpadding, cellspacing, char, charoff,
cite, class, clear, cols, colspan, color, compact, coords, datetime, dir, face,
headers, height, href, hreflang, hspace, id, ismap, lang, longdesc, name, nohref,
noshade, nowrap, rel, rev, rows, rowspan, rules, scope, shape, size, span, src,
start, summary, tabindex, target, title, type, valign, value, vspace, width
-
data-* and aria-* attributes are also whitelisted by default. You can control them using DOMPurify options ALLOW_DATA_ATTR and ALLOW_ARIA_ATTR.
-
Any tag or attribute not explicitly defined in your configured whitelist (or not supported by DOMPurify) is removed automatically during rendering.
The following procedure describes how to configure allowed HTML tags and attributes for the Incident workspace.
Create a HTML Tags and Attribute Set
-
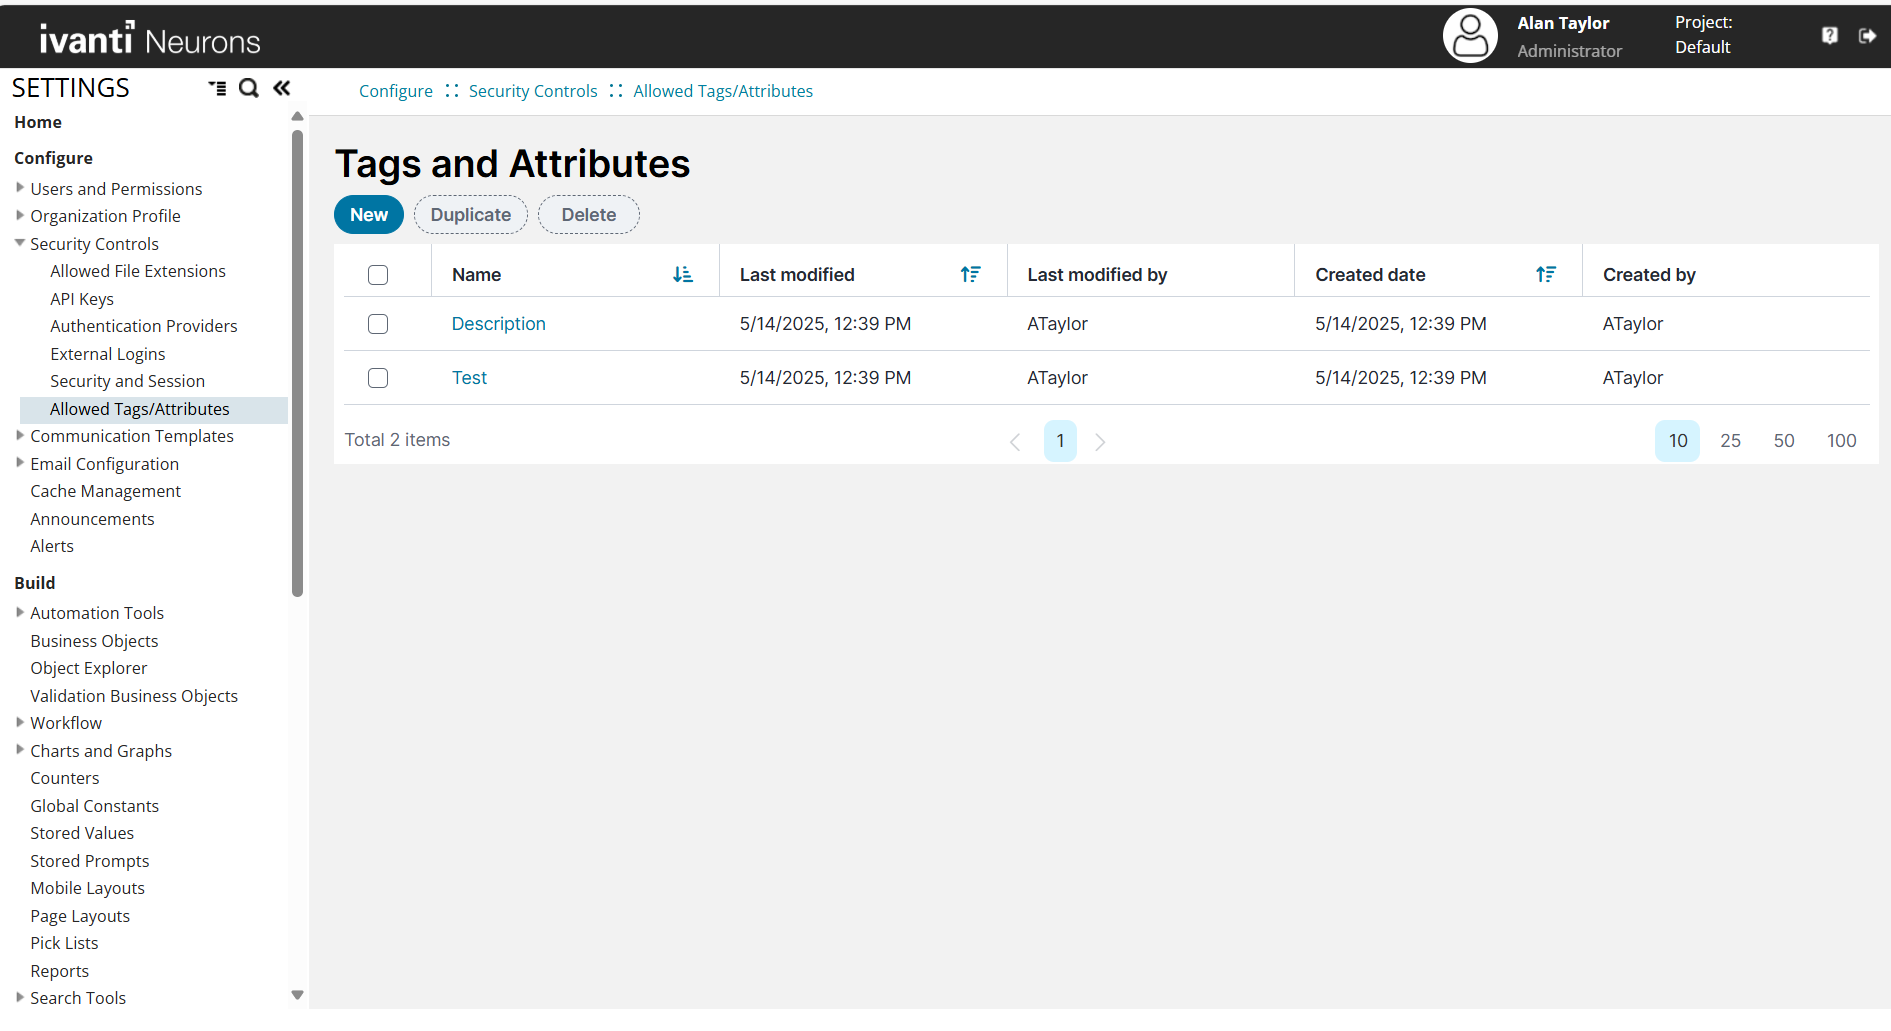
Go to Settings > Configure > Security Controls > Allowed Tags/Attributes.

-
Click New.
-
In the Name field, enter a descriptive name (for example, Description).
-
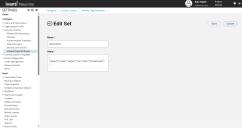
In the Value field, add the allowed tags and attributes in JSON format:
{
"object": ["data", "type", "width", "height"]
}
-
Click Save.

Only the tags and attributes in this new set will become unblocked when applied to a field. Any unspecified tags and attributes defined in the default set will continue to be blocked.
Configure the Description field to Use HTML Viewer
After assigning a tag and attribute whitelist to an HTML field, you must configure how the field is rendered in the form. In this case, the Description field within the Incident business object is updated to use the HTML Viewer control to correctly display allowed HTML tags.
To configure the field on the form:
-
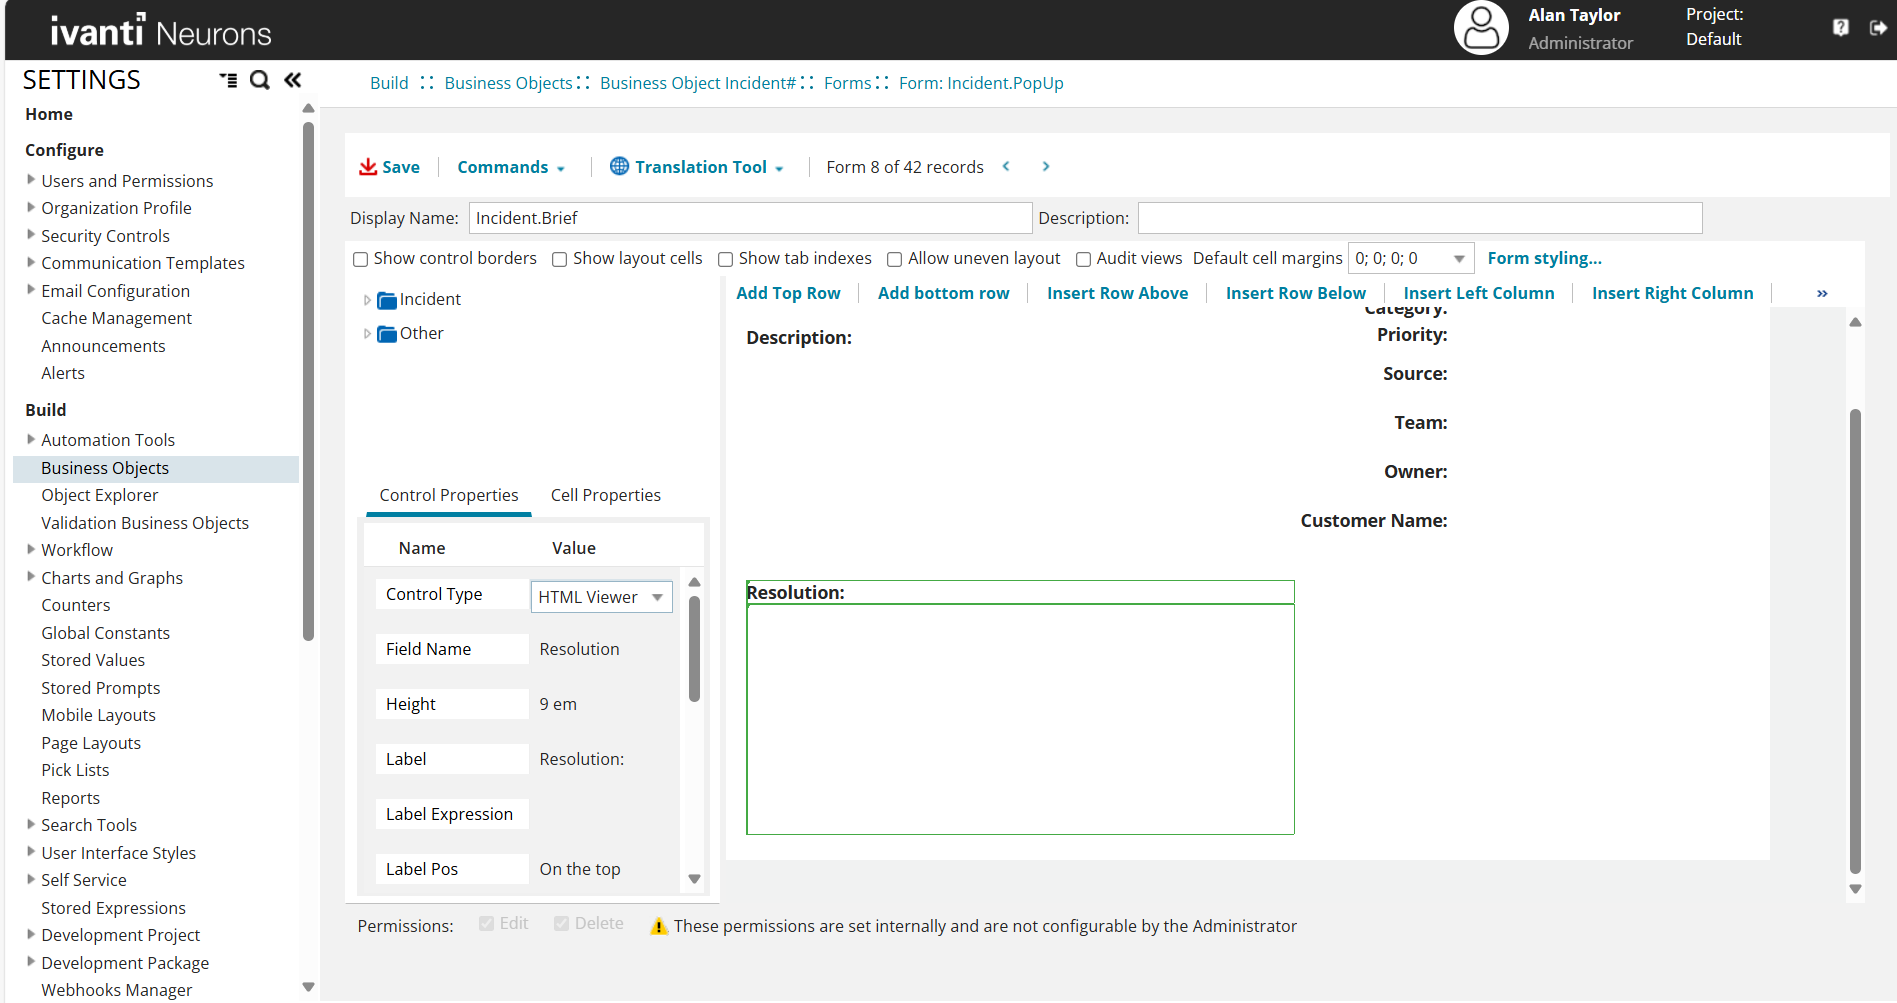
Navigate to Build > Business Objects > Incident > Forms.
-
Open the form named Incident.PopUp.
-
In the form layout, select the Description field
-
In the Control Properties pane on the left, locate the Control Type field.
-
From the dropdown list, select HTML Viewer.
-
Click Save.
Apply Whitelist to an HTML Field
-
Navigate to Build > Business Objects > Incident > Fields.
-
Locate and select the desired field (for example, Symptom).
-
Set the Field Type as HTML.
-
In the Set Name field, select the appropriate html tag set (for example, Description) from the dropdown.
_thumb_0_128.png)
-
Click Save.
.png)
Use Configured HTML Tags in the Incident Workspace
After configuration is complete, you can add HTML content to the configured field using the Source Edit option.
Add HTML Content to the Description Field
-
Navigate to the Home page.
-
Select Incident on the navigation bar to open the Incident workspace.
-
Select the appropriate incident record.
-
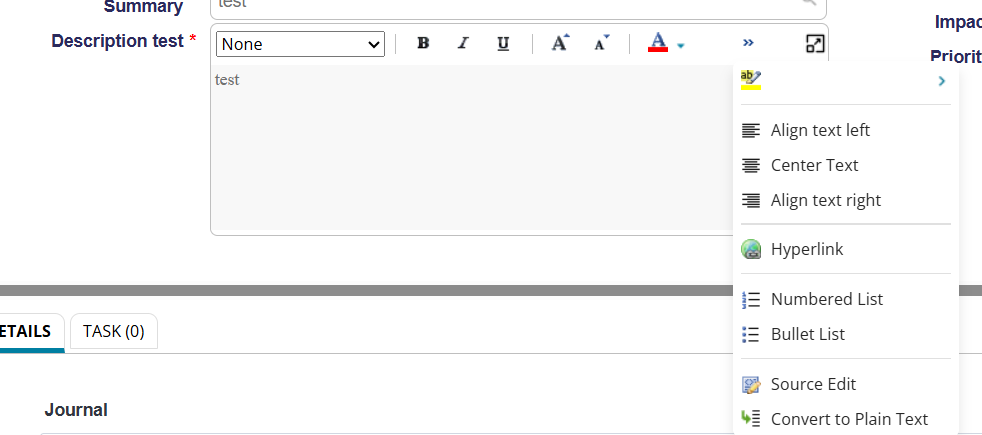
In the Description field, click the double arrow
 icon to expand the editor.
 -
In the expanded panel, click Source Edit.

-
Enter the required HTML code using the allowed tags and attributes.
<object width="1590" height="560" title="Client Software" data=https://www.html-seminar.de/ frameborder="0"></object>
-
Click Save.
You can view the configured HTML content in the Description field on the Incident form, rendered according to the assigned tag and attribute settings.
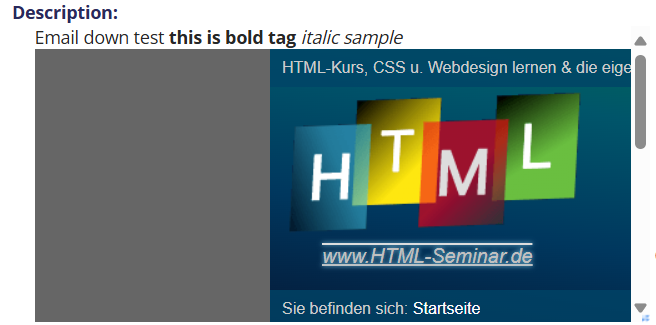
Only the HTML tags and attributes that are explicitly configured in the assigned tag set will be retained. Any disallowed tags or attributes will be removed automatically during rendering the Description field.
The following procedure describes how to configure allowed HTML tags and attributes for the Knowledge workspace.
Create a HTML Tags and Attribute Set
-
Go to Settings > Configure > Security Controls > Allowed Tags/Attributes.
-
Click New.
-
In the Name field, enter a descriptive name (for example, Description).
-
In the Value field, add the allowed tags and attributes in JSON format:
{
"object": ["data", "type", "width", "height"]
}
-
Click Save.
Only the tags and attributes in this new set will become unblocked when applied to a field. Any unspecified tags and attributes defined in the default set will continue to be blocked.
Configure the Answer field to Use HTML Viewer
After assigning a tag and attribute whitelist to an HTML field, you must configure how the field is rendered in the form. In this case, the Answer field within the Knowledge business object is updated to use the HTML Viewer control to correctly display allowed HTML tags.
To configure the field on the form:
-
Navigate to Build > Business Objects > Business Object FRS_Knowledge#QandA > Forms.
-
Open the form named Form FRS_Knowledge.QandA.ArticleView.
-
In the form layout, select the Answer field
-
In the Control Properties pane on the left, locate the Control Type field.
-
From the dropdown list, select HTML Viewer.
-
Click Save.

Apply Whitelist to an HTML Field
-
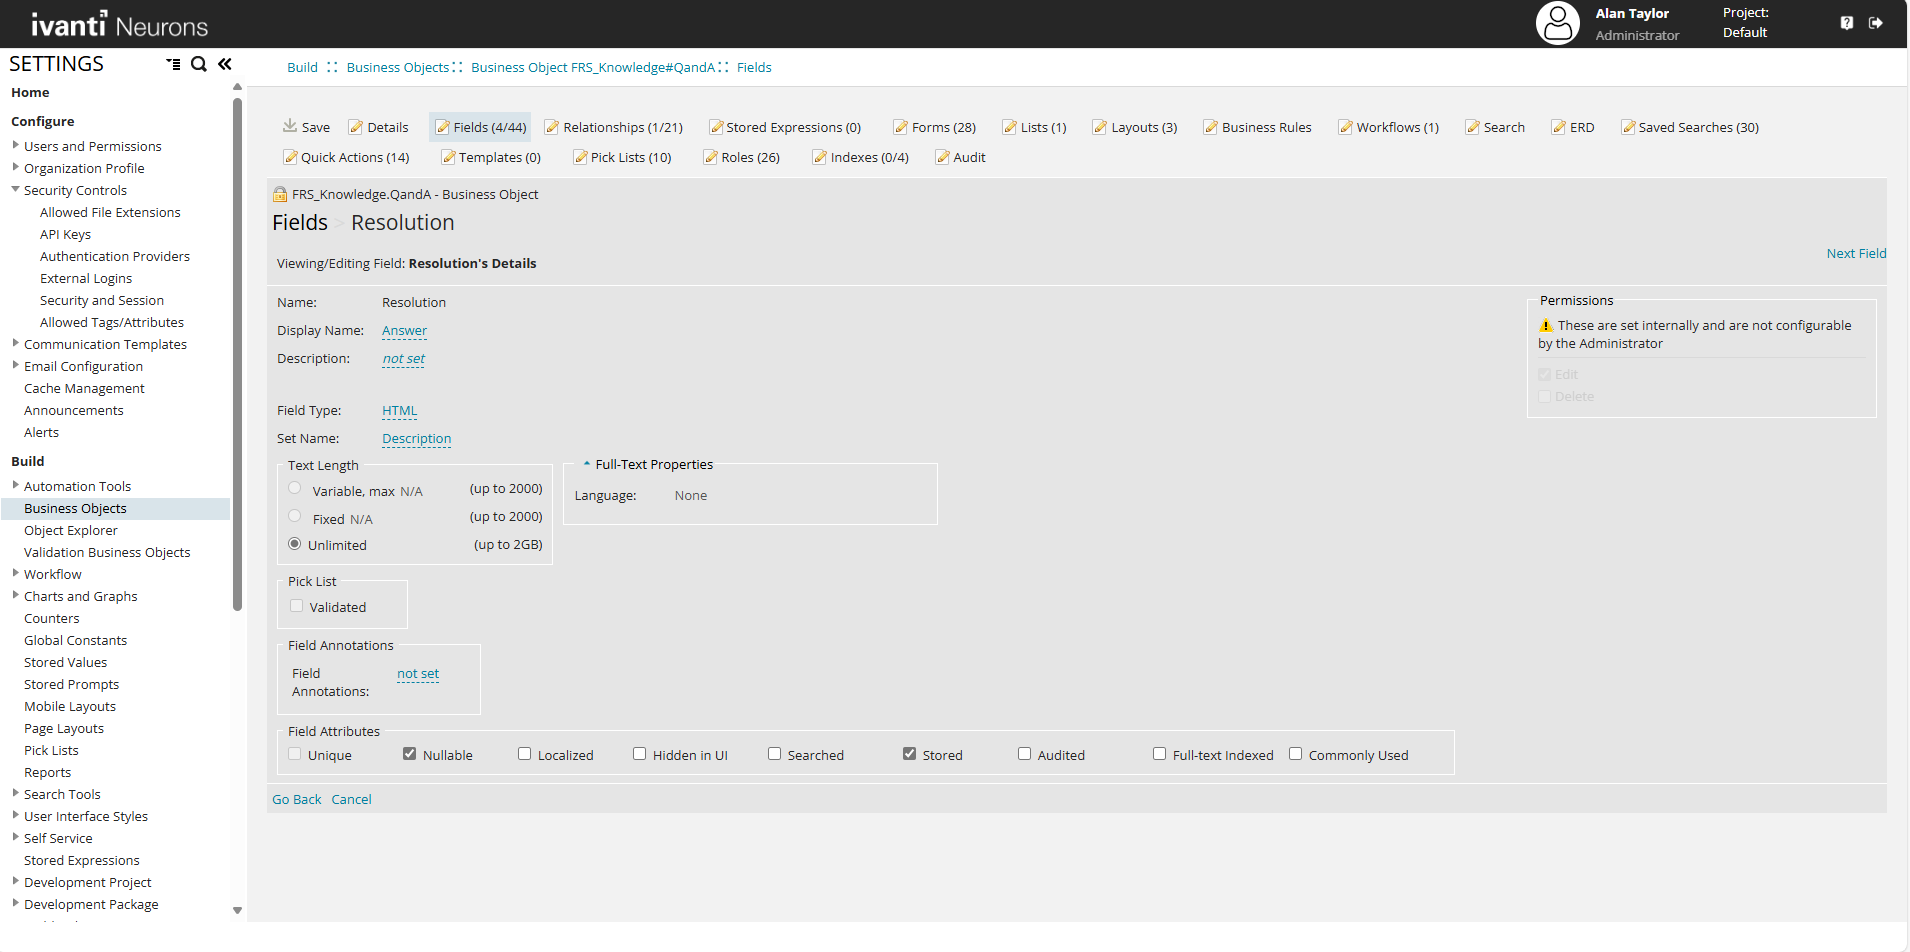
Navigate to Build > Business Objects > Business Object FRS_Knowledge#QandA > Fields.
-
Locate and select the desired field (for example Field Name, Resolution).
-
Set the Field Type as HTML.
-
In the Set Name field, select the appropriate html tag set (for example, Description) from the dropdown.
-
Click Save.
Use Configured HTML Tags in the Knowledge Workspace
After configuration is complete, you can add HTML content to the configured field using the Source Edit option.
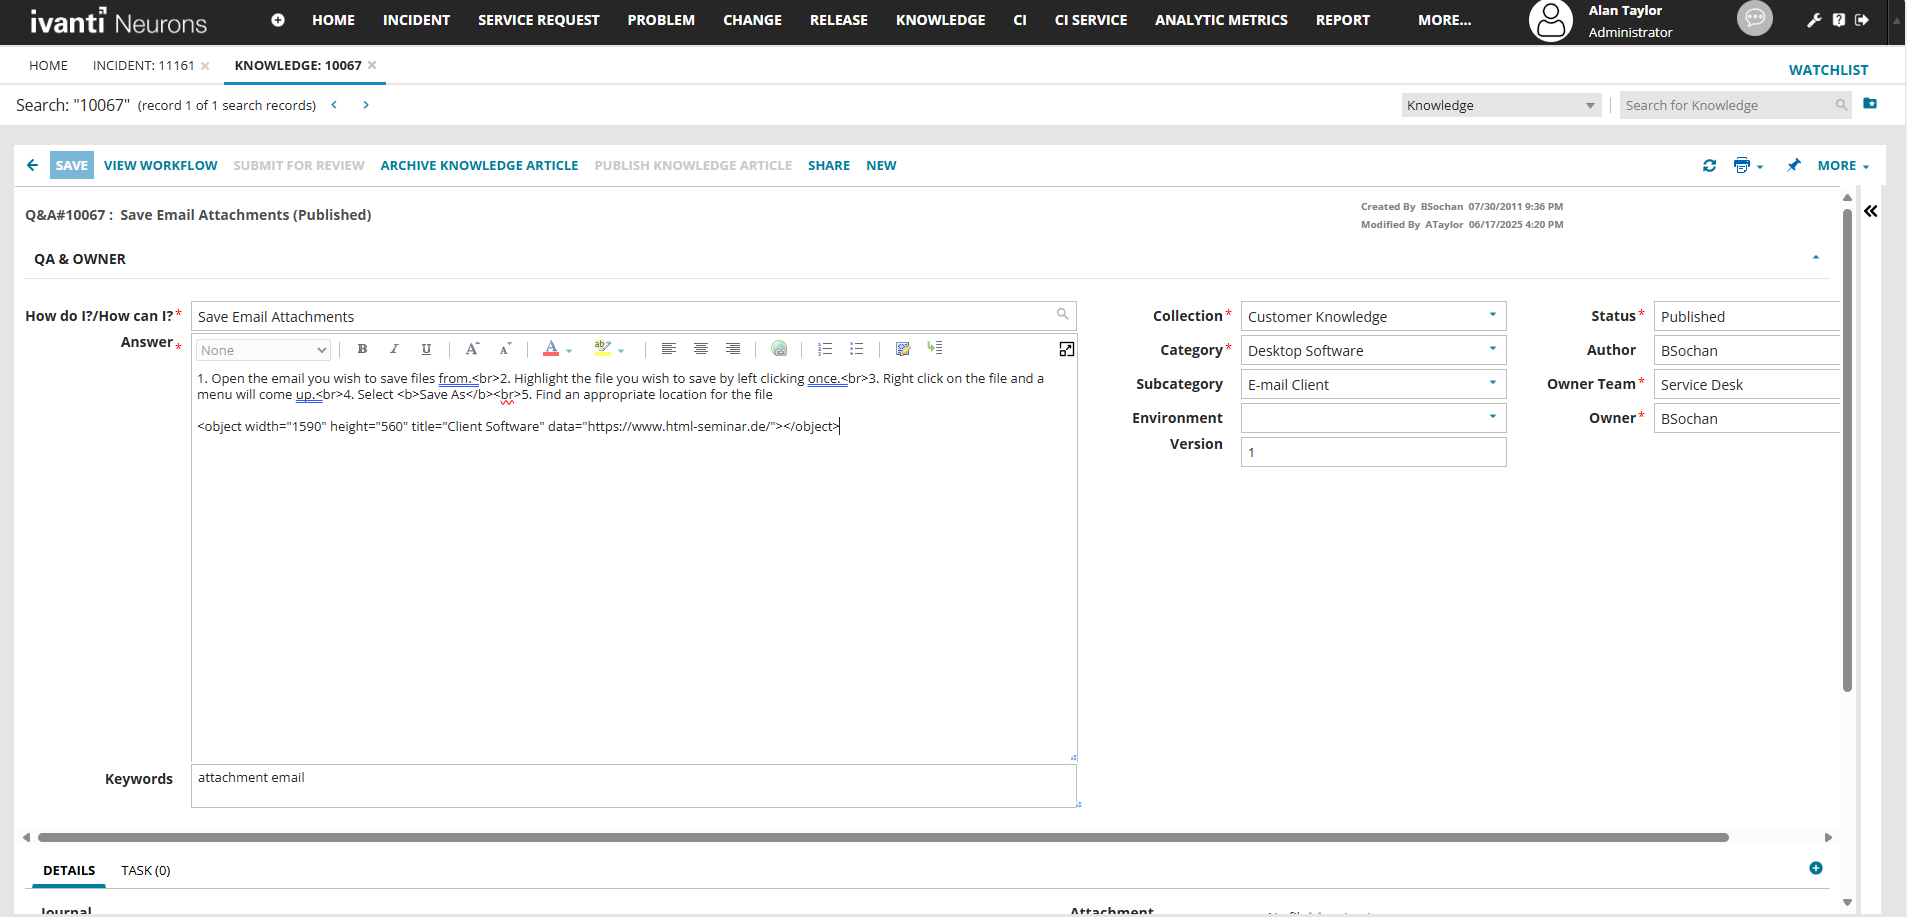
Add HTML Content to the Answer Field
-
Navigate to the Home page.
-
Select Knowledge on the navigation bar to open the Knowledge workspace.
-
Select the appropriate record.
-
In the Answer field, click the double arrow
icon to expand the editor. -
In the expanded panel, click Source Edit.

-
Enter the required HTML code using the allowed tags and attributes.
<object width="1590" height="560" title="Client Software" data=https://www.html-seminar.de/ frameborder="0"></object>
-
Click Save.
You can view the configured HTML content in the Description field on the Incident form, rendered according to the assigned tag and attribute settings.

Only the HTML tags and attributes that are explicitly configured in the assigned tag set will be retained. Any disallowed tags or attributes will be removed automatically during rendering the Answer field.
The following procedure describes how to configure allowed HTML tags and attributes for the Problem workspace.
Create a HTML Tags and Attribute Set
-
Go to Settings > Configure > Security Controls > Allowed Tags/Attributes.
-
Click New.
-
In the Name field, enter a descriptive name (for example, Description).
-
In the Value field, add the allowed tags and attributes in JSON format:
{
"object": ["data", "type", "width", "height"]
}
-
Click Save.
Only the tags and attributes in this new set will become unblocked when applied to a field. Any unspecified tags and attributes defined in the default set will continue to be blocked.
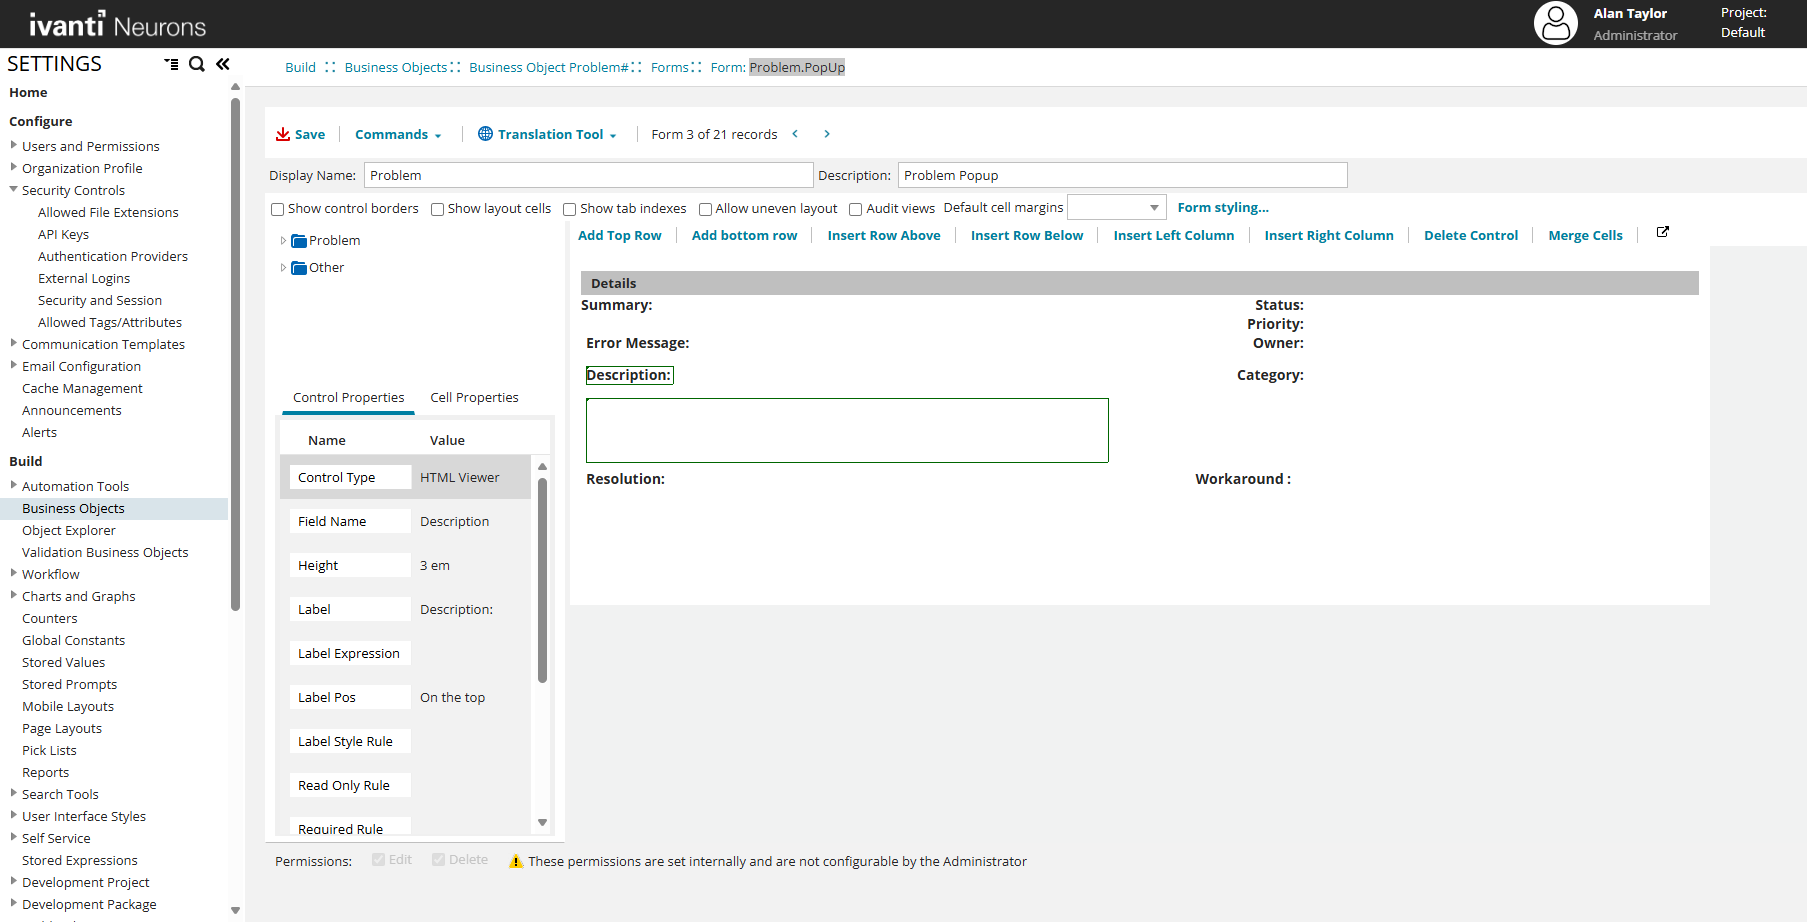
Configure the Description field to Use HTML Viewer
After assigning a tag and attribute whitelist to an HTML field, you must configure how the field is rendered in the form. In this case, the Answer field within the Knowledge business object is updated to use the HTML Viewer control to correctly display allowed HTML tags.
To configure the field on the form:
-
Navigate to Build > Business Objects > Business Object Problem > Forms.
-
Open the form named Form Problem.PopUp.
-
In the form layout, select the Description field
-
In the Control Properties pane on the left, locate the Control Type field.
-
From the dropdown list, select HTML Viewer.
-
Click Save.
Apply Whitelist to an HTML Field
-
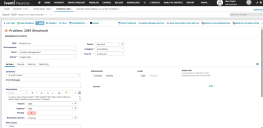
Navigate to Build > Business Objects > Business Object Problem > Fields.
-
Locate and select the desired field (for example Field Name, Description).
-
Set the Field Type as HTML.
-
In the Set Name field, select the appropriate html tag set (for example, Description) from the dropdown.
-
Click Save.

Use Configured HTML Tags in the Problem Workspace
After configuration is complete, you can add HTML content to the configured field using the Source Edit option.
Add HTML Content to the Answer Field
-
Navigate to the Home page.
-
Select Problem on the navigation bar to open the Problem workspace.
-
Select the appropriate record.
-
In the Description field, click the double arrow
icon to expand the editor. -
In the expanded panel, click Source Edit.
-
Enter the required HTML code using the allowed tags and attributes.
<object width="1590" height="560" title="Client Software" data=https://www.html-seminar.de/ frameborder="0"></object>
-
Click Save.

You can view the configured HTML content in the Description field on the Incident form, rendered according to the assigned tag and attribute settings.

Only the HTML tags and attributes that are explicitly configured in the assigned tag set will be retained. Any disallowed tags or attributes will be removed automatically during rendering the Description field.