Working with the CI map
The Configuration Item (CI) map displays a CI or a service in a visual workflow. You can view the related services or connected CIs (upstream and downstream). You can also view the relationships between CIs such as Dependent on, Hosted on, or Managed by in your organization. This provides a holistic view of the CI, its related services, and relationships between connected CIs.
Each block in the CI map represents a related CI. This map of the relationships gives you insight into the impact of service interruptions at various upstream and downstream points, enabling you to better manage your service network and to isolate potential point-of-service failures quickly.
Sign in to the application as a Configuration Manager, Discovery Manager, or Discovery Analyst to work with CI maps.
These instructions refer to several different workspaces with similar names. The CI Service workspace reflects services available for CIs. The Configuration Item and CI workspaces search for assets rather than for services. Some of these procedures can be performed from any of these workspaces while others (for example, the CI map tree) can only be accessed from the CI Service workspace.
Understanding the CI map icons
The icons on the CIs in the map show the item's links to indicate its possible impacts to related items. Hover over the icon to see how many Changes, Incidents, or Problems are linked to the CI.
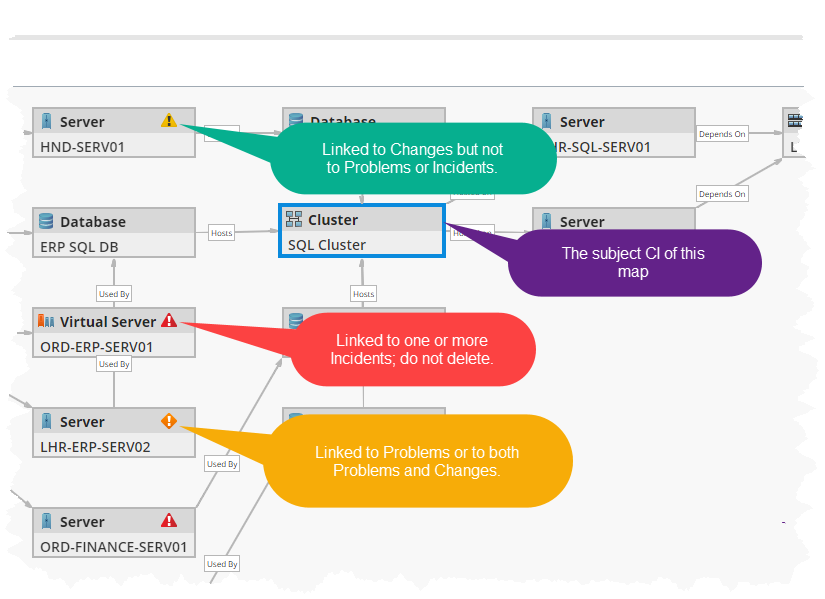
These icons don't reflect the status of the CIs; instead, they show what kinds of items are linked to the CI.
-
Yellow triangle: The CI links to Changes, but there are no linked Incidents or Problems.
-
Red triangle: The CI links to Incidents; do not delete this CI. The CI might also link to Changes or Problems.
-
Orange diamond: The CI links to Problems or Changes.
-
Blue outline: The CI is the subject CI of this map.
-
Computer
-
Desktop
-
Laptop
-
Server
-
Virtual client
-
Virtual server
-
-
General asset
-
BatchJob
-
Cluster
-
Document
-
Middleware
-
ProductivityApp
-
System
-
VOIP
-
-
Infrastructure
-
Access Point
-
Database
-
Firewall
-
Generator
-
Hub
-
Phone
-
Rack
-
Router
-
SAN
-
Switch
-
UPS
-
Video conference
-
-
Mobile device
-
Wearable
-
Tablet
-
Smart phone
-
-
Peripheral device
-
USB
-
Scanner
-
Projector
-
Printer
-
Hard drive
-
Fax
-
Display
-
Viewing a CI map
To view a CI map:
-
Open a CI workspace. You can view the CI map from the CI, Configuration Item, or CI Service workspaces. The application displays a list of CIs.
-
Double-click an item to view the record details.
-
Select CI Map or Service Map.
Hover over the CI to view its type and sub-type.
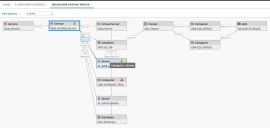
Sample CI map - Web Hosting Service Map
CI maps should have no more than 350 links; additional links degrade performance.
-
Select View Options to change the layout or show relationships:
-
Choose a horizontal or vertical layout.
-
Always show relation: Select to show relationships among items on the map.
-
-
Select the number of levels to view. In large CI maps, you might want to view only one or two levels.
-
Select an item on the CI map to view its details.

To center the CI map on a specific item without leaving the current map, right-click the item, then select Centralize and Redraw. The application redraws the map with a blue line around the CI you selected to indicate that it is now the central focus of the map.
Viewing a CI outage impact
To view the impact of a CI outage from the CI map:
-
Right-click a CI, and select Show outage impact.

The application shows the impact of an outage.

This service is disabled. 
This service is impacted. -
To revert to the original view, right-click the CI and choose Hide outage impact.

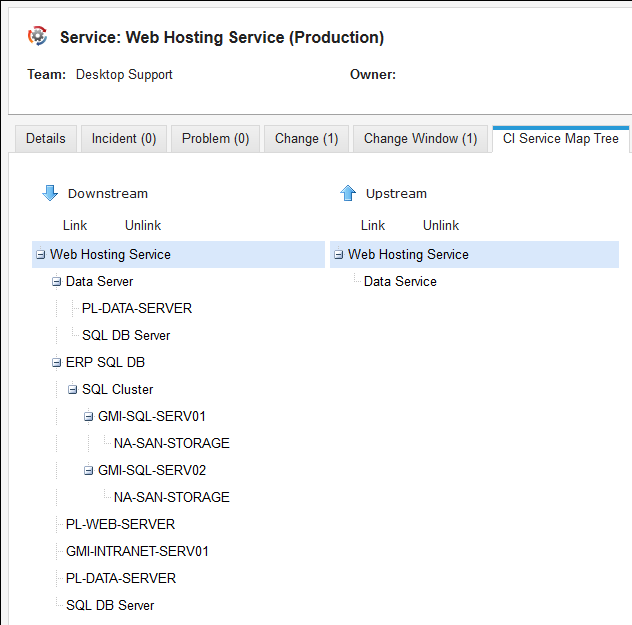
Viewing a CI map tree
To view the upstream and downstream relations for a given CI:
-
Open the CI Service workspace. The application displays a list of CIs.
Only the CI Service workspace allows you to access the CI map tree.
-
Double-click an item to view the record details.
-
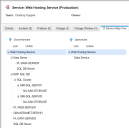
Within a CI record, select the CI Service Map Tree tab. CIs that are downstream of the current CI are listed on the left side, while upstream CIs are on the right.
Refer to Dependency Mapping.
Mapping a CI
Link or unlink upstream and downstream relations to a given CI under the CI Service Map Tree tab.
On a CI map, outages propagate upstream. It's important that you take this into account when deciding if you should create a downstream or upstream link.
-
Open the CI Service workspace. The list of objects appears.
Only the CI Service workspace allows you to access the CI map tree.
-
Within a CI record, select the CI Service Map Tree tab.
-
Click the link icon
 under Downstream or Upstream. The relationship window appears.
 -
Select the relationship to create a link and click Link.
-
The CI record that you selected appears in the tree view. Any related CIs appear as parents or children (as defined when the CIs were linked) to the CI in the tree.
When you search for a CI to link while mapping, only CIs defined in the CI Named Rel Constraints and which can be logically linked are displayed. Refer to Defining constraints for CI relationships.
Defining a CI relationship
Using the CI Named Rel Data workspace, you can add a short description to define logical relation between CIs. This description appears on the CI map viewer showing how one CI is related to another (for example, hosted on, connects to, or runs on).
For example, a child record connected to a parent record (upstream) contains the description Hosted on, while the parent record connecting to a child record (downstream) contains the description Hosts.
-
Open the CI Named Rel Data workspace to display a list of relationships.
-
The Child to Parent Link Name column displays the description for a child record related to a parent record (an upstream relationship).
-
The Parent to Child Link Name column displays the description for a parent record (a downstream relation) related to a child record.
-
At the bottom of the window, the Label for arrow from the Child to Parent Object field shows the upstream relationship. For example, it might say Hosted on.
-
The Label for arrow from Parent to Child Object field shows the downstream relationship. For example, it might say Hosts.
-
-
Double-click a record. The CI Named Rel Data edit page opens.
-
Change the labels as needed. For example, you could change Hosted on to Hosted by.
-
Select Save. The relationship name appears when you define a CI map.
Defining constraints for CI relationships
Using the CI Named Rel Constraints workspace, you can define logical relationships between parent and child CIs.
-
Open the CI Named Rel Constraints workspace. The list of constraints appears.
-
Select New. The CI Named Rel Contraints form appears.
-
Enter information into the fields.
-
Child: The child CI type such as database.
-
LinkName: The relation between the child and parent CI types such as runs on. This list is populated by the CI Named Rel Data workspace.
-
Parent: The corresponding parent CI type such as server.
-
Description: Optional. A description of the constraint.
-
-
Select Save.