Import Discovery Data from Ivanti Neurons
Role: Administrator
Overview
Neurons Platform Integration enables Ivanti Neurons device discovery data to flow into the ITSM CI workspace. Existing devices and automatically synchronizes newly discovered devices, keeping configuration item data accurate and up to date.
The Ivanti Neurons Asset Import Configuration process used to configure Neurons import is disabled from 2025.3 release. All device discovery integration is now handled exclusively through Neurons Platform Integration, providing a centralized, self-service experience for ITSM Administrators.
To configure Neurons import, refer Neurons Platform Integration After configuring Ivanti Neurons to Ivanti Neurons for ITSM Integration, the devices should start syncing in Neurons for ITSM based on the Neurons for ITSM scheduled connectors.
Post Import Verification
1.Log in to Neurons for ITSM as Administrator.
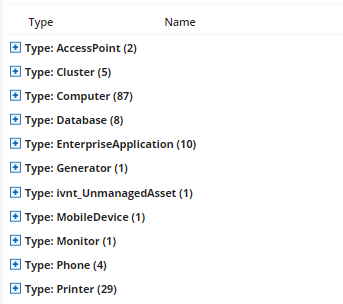
2. Open the CI workspace.
3.Ensure the newly imported devices appear in the CI workspace.
Imported Devices
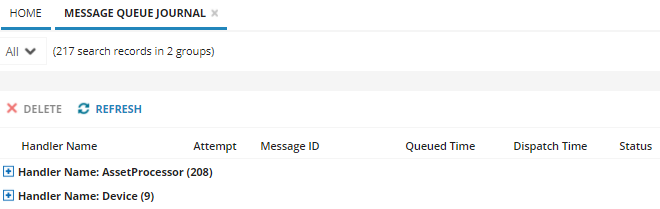
4.Open the Message Queue Journal workspace.
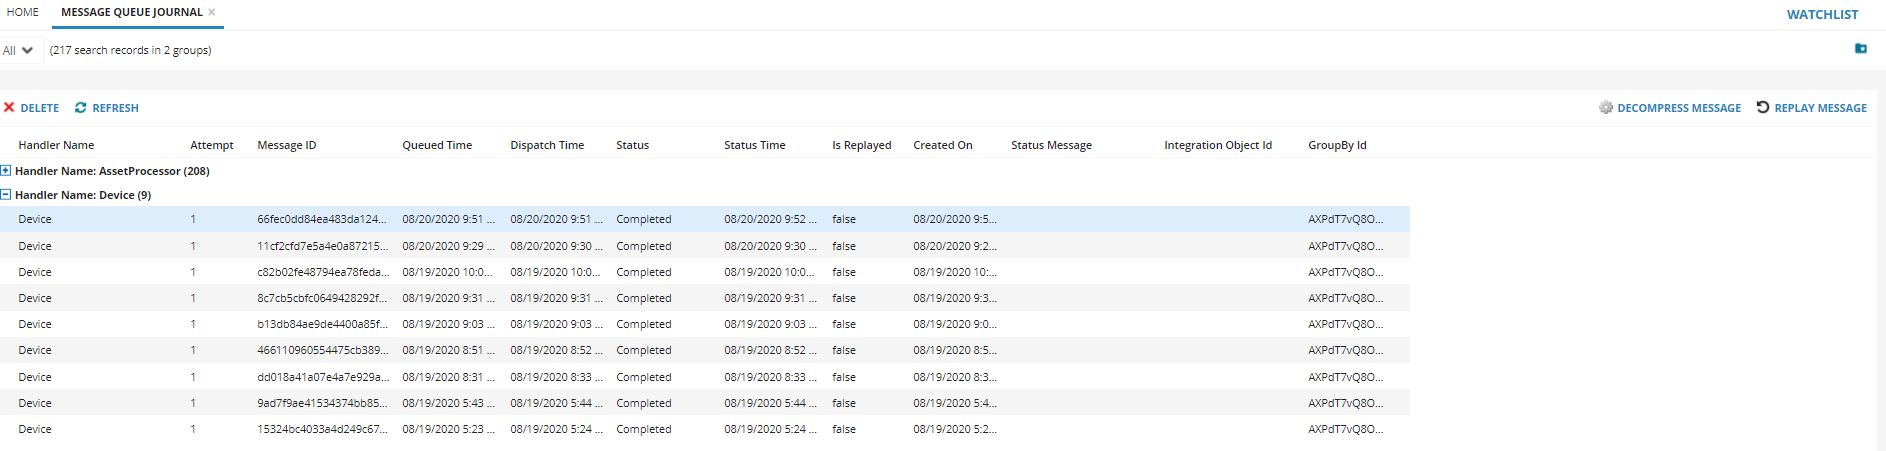
5.Review the Message Queue Journal workspace for the incoming device messages processed from the Ivanti Neurons.
Message Queue Journal
6.Run the Decompress Message Quick Action for a selected message in the Message Queue Journal workspace to view the discovered Device details.
Device Details
Initially by default, the Decompress Message Quick Action will be disabled for device messages. To enable the Decompress Message Quick Action of Message Queue Journal business object, follow the below steps:
1.Click Configure Application to go to the Configuration console.
2.From the Configuration Console, click Build > Automation Tools > Quick Actions to open the Quick Actions workspace.
3.Click Frs_MessageQueueJournal from the Action Manager list.
4.Click Quick Action tab.
5.On the left side panel, click Decompress Message.
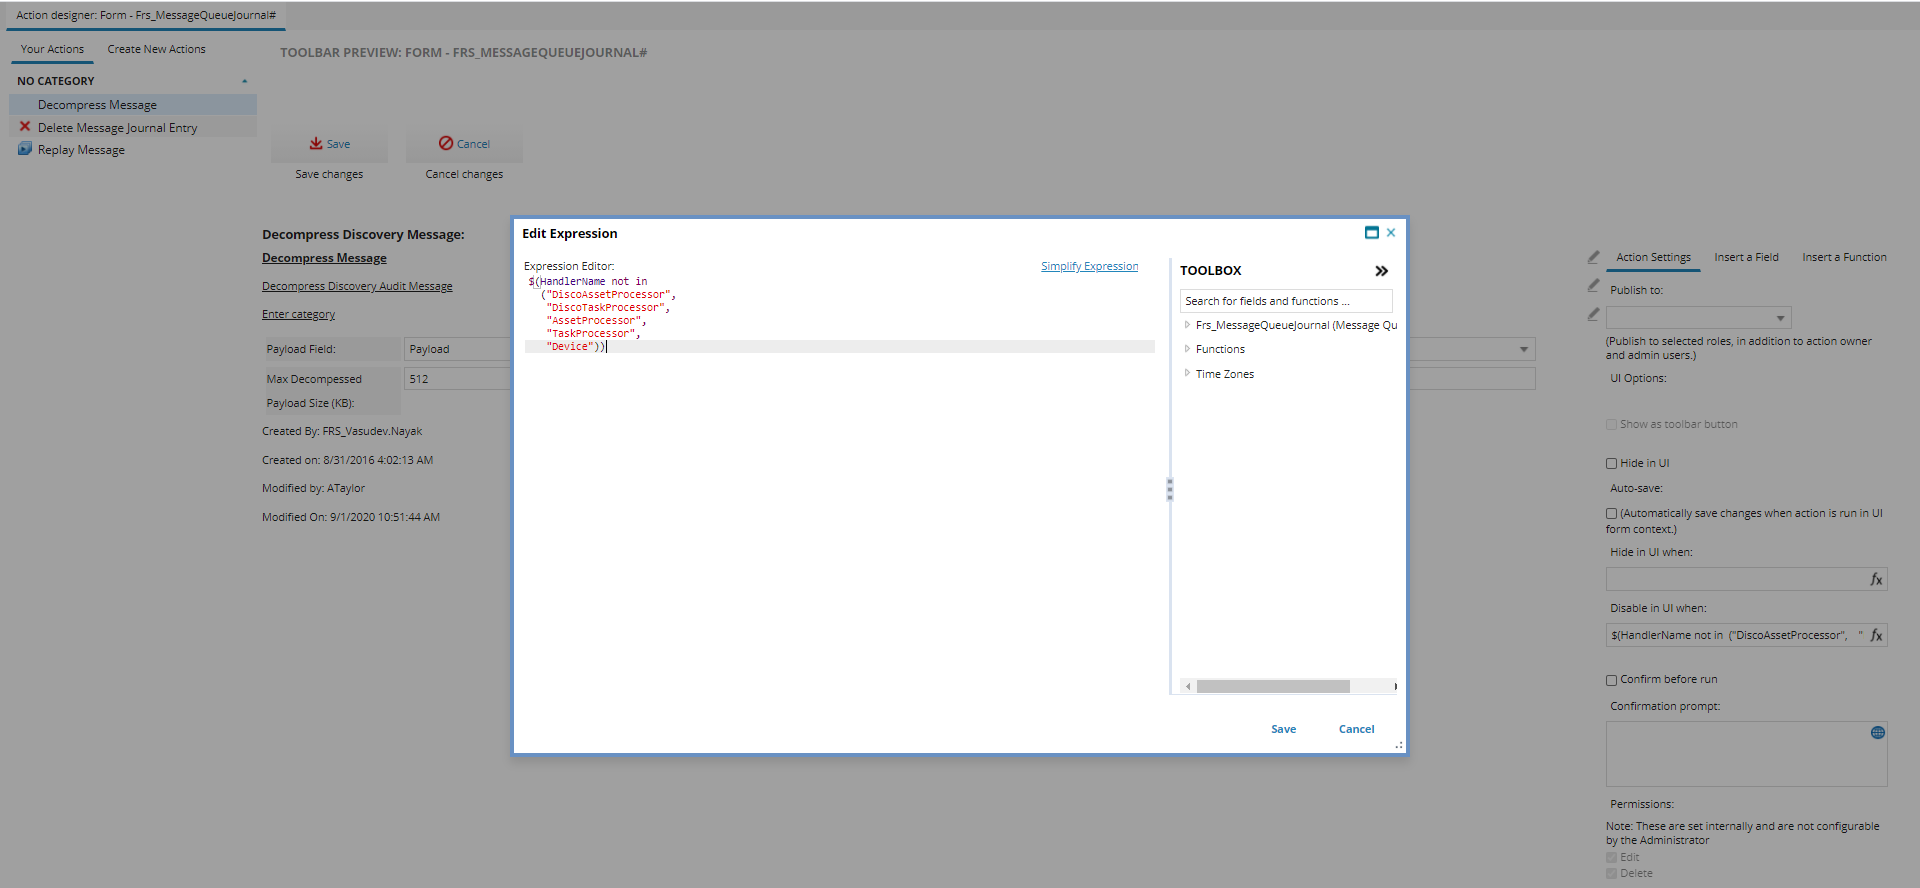
6.Click Edit to open the Edit Expression window.
7. Add Device type in Quick Action expression field “Disable in UI when” as shown below.
Edit Expression
Verifying as Asset Administrator
1.Log in to Neurons for ITSM as Asset Administrator.
2.Open the Hardware Asset workspace.
The list of assigned devices are displayed.
3.Select a device to view the details.
4.Select the Discovery tab, see Modified On field to view the last sync date and time of the device.
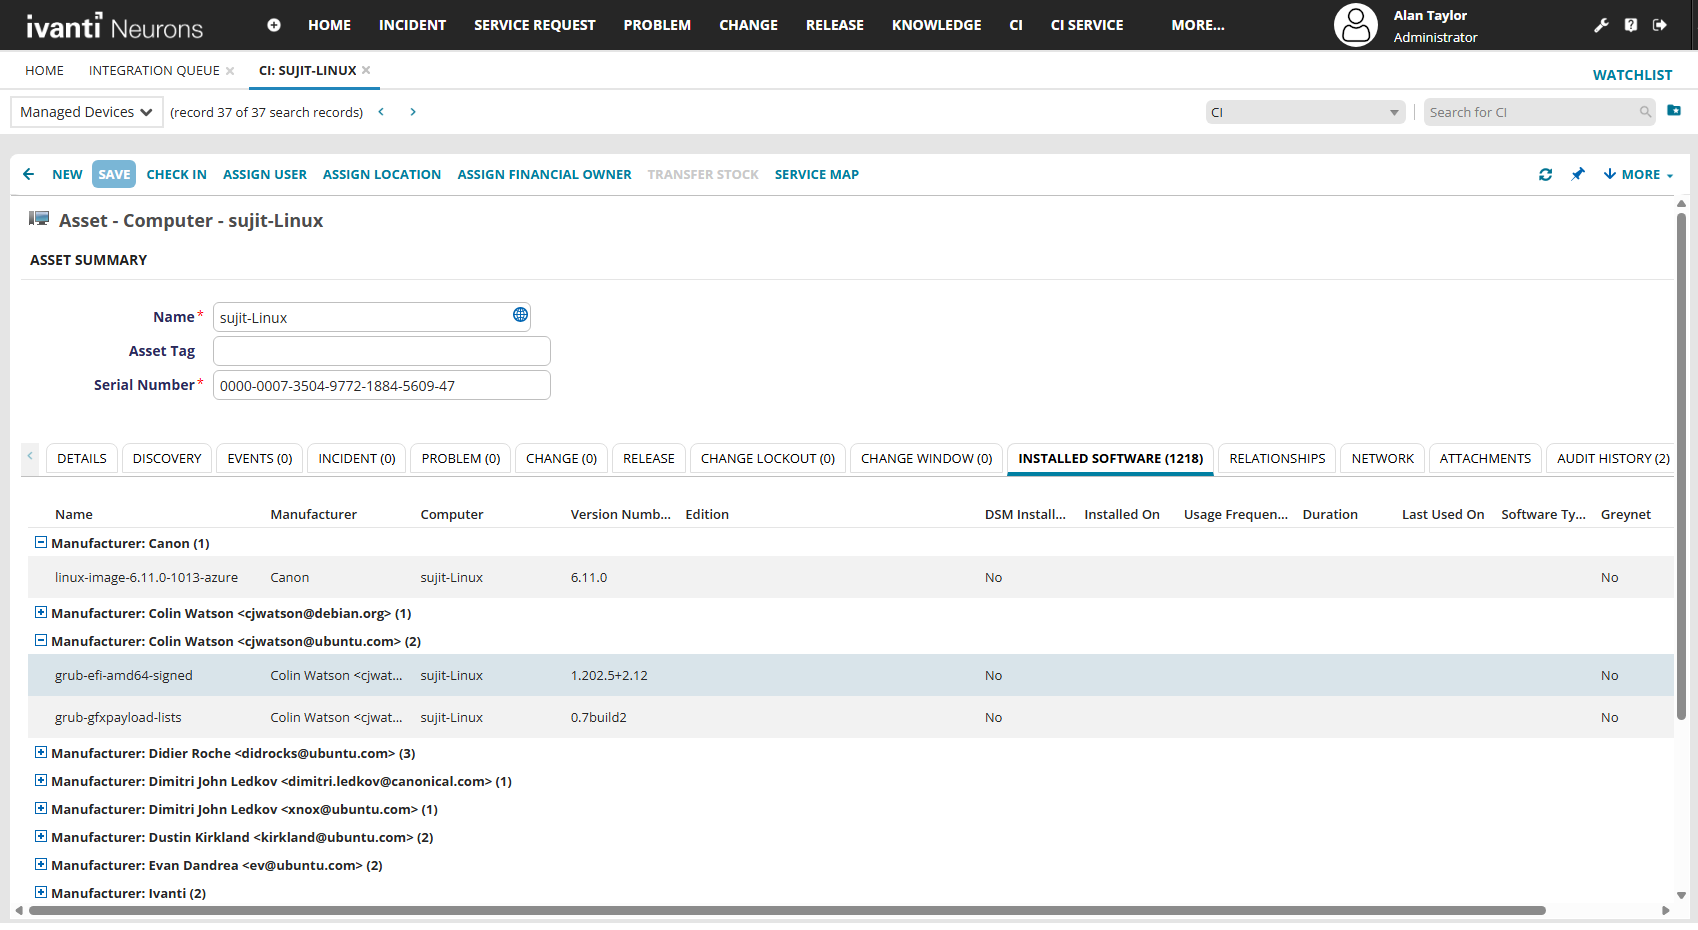
5.Select Licensable Software tab, to view list and count of software imported from Neurons. Software details modified such as title or other attributes in Neurons update in ITSM after syncing the device.
Customizing Asset Data Imports from Ivanti Neurons
Device Filter in Mapping
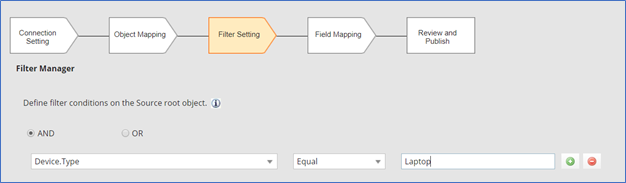
The Filter Manager in IN connector (Ivanti Neurons Connector- Device) enables filtering inflow of device types based on the filter criteria. For instance, an Administrator can select to import an Asset Type “Laptop” only by creating the filter value as “Laptop” as shown below:
Filter Manager
•The filter settings made during import remains saved for further import.
•Based on the filter settings, only those messages which are relevant to mapping will be processed by Neurons for ITSM tenant and rest of the messages will be discarded.
•The filter works only for single value filter per row. If the field selected in the left panel of the mapping results multiple values, then those filters will not work. It is advised to use the filter settings accordingly.
•Use only fields on the Device table in the filter.
Sample Mapping Scenarios
Use case 1: In the below screenshot, for mapping
<Portable > Computer> = <CIParentType> = <ComputerSystem.Property.CIType>
The asset imported from IN connector having Device.Type > Portable has mapped to parent type Computer in Neurons for ITSM and hence, device is imported under category “Computer”.
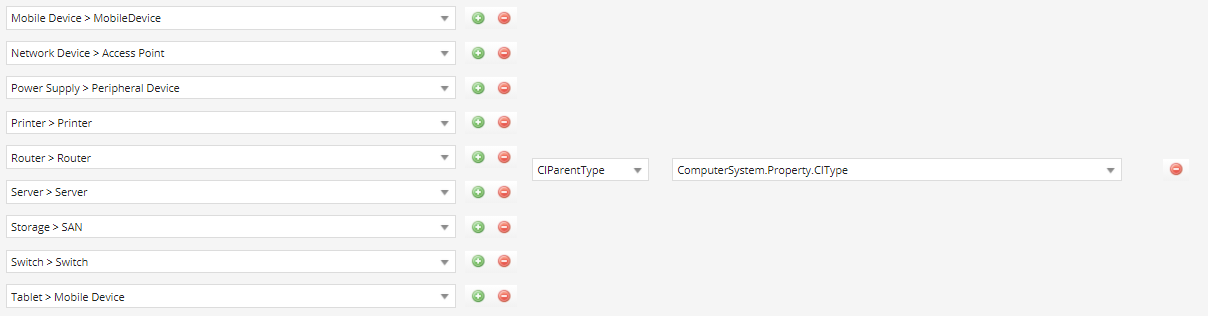
Use case 2: For instance,
<Laptop > Computer> = <CIParentType> = <ComputerSystem.Property.CIType>
If the required mapping does not exist for Laptop as shown below, then the device type "Laptop" will be moved to the default setting mentioned in Asset Processor Configuration workspace.
Use case 3: If CIParentType mapping is not defined in IN connector field Mapping section, then default setting mentioned in Asset Processor Configuration workspace will be considered.
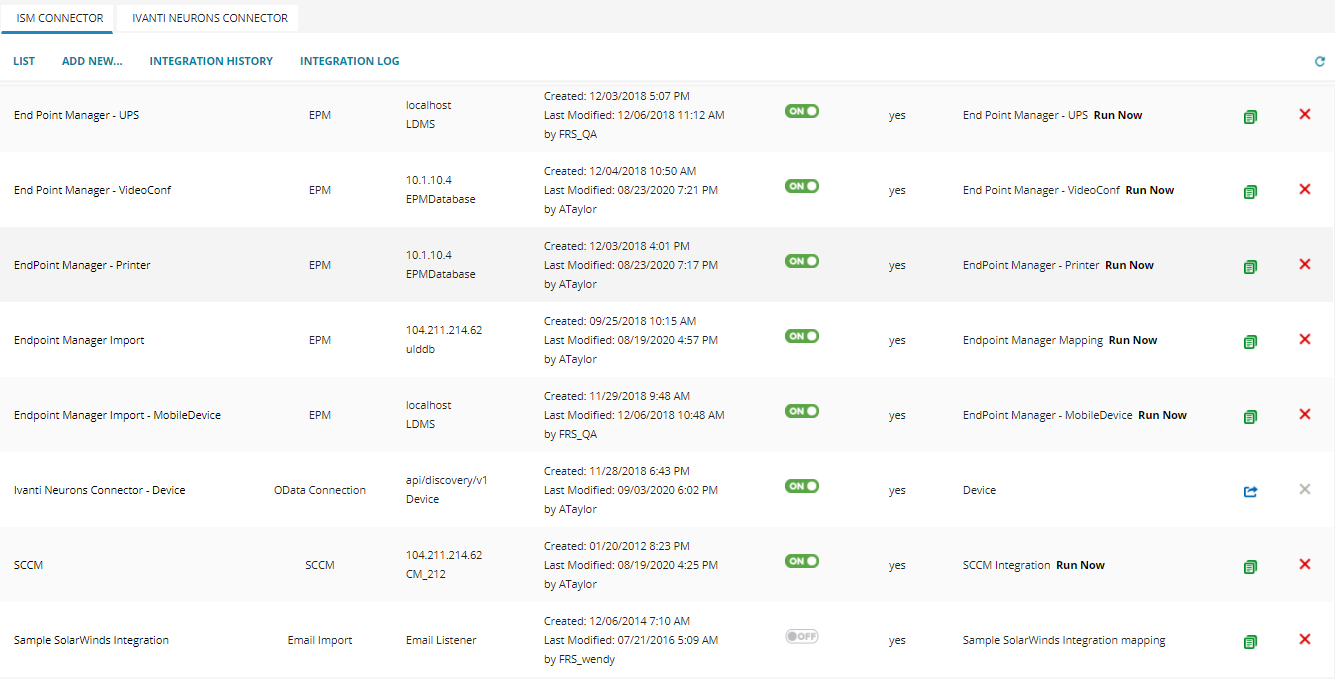
Export and Import Ivanti Neurons connector
An Administrator can now edit the mapping in IN Connector and export it as metadata package and import on other Neurons for ITSM tenants on demand. The exported connector will include the default Table selection, Filter option, and Field Mapping changes.
This functionality is intended to help the Asset Administrator to have controlled import in STG/UAT, verify the imported asset, and update the mapping before imported all the assets into the PRD landscape.
•This feature is applicable only for “Update” scenario, package exported from here will not create a new connection if connector does not exist.
•After importing the package, you are advised to review the changes once before start syncing the devices.
•Clone and delete actions for Ivanti Neurons Connector – Device is disabled or removed.
Non-Device type import support
The Administrator can import non-computer type devices to Neurons for ITSM. For instance, the Printer received from Ivanti Neurons can be imported as a Printer in Neurons for ITSM tenant.
Scheduling and Publishing Neurons Discovery Data Imports
Detailed instructions for scheduling and publishing the data imports can be found on the Scheduling API Data Sync from Ivanti Neurons for Discovery to Ivanti Neurons for ITSM help topic.
Microsoft Intune connector, MobileIron connector, and Airwatch connector can be configured and fetched from Ivanti Neurons to Neurons for ITSM.
To Map Device Software Data (Windows, macOS, and Linux)
The Ivanti Neurons Connector (Device) supports importing installed software information from Windows, macOS, and Linux (Ubuntu) devices. To ensure complete and accurate software data, configure the field mapping in the Data Import Connection workspace as described below.
Starting with release 2026.2, a new API synchronizes installed software data from Ivanti Neurons to Neurons for ITSM, ensuring that installed software records and counts remain consistent. The payload uses a unique Discovery ID to map each item to a corresponding product identifier while preserving key attributes such as title, manufacturer, and version, ensuring accurate and consistent data aligned with the user interface and existing workflows.
1.Log in to Neurons for ITSM as Administrator.
2.Open the Configuration console and select Extend> Data Import Connection.
3.In Data Source Manager, select Ivanti Neurons Connector – Device.
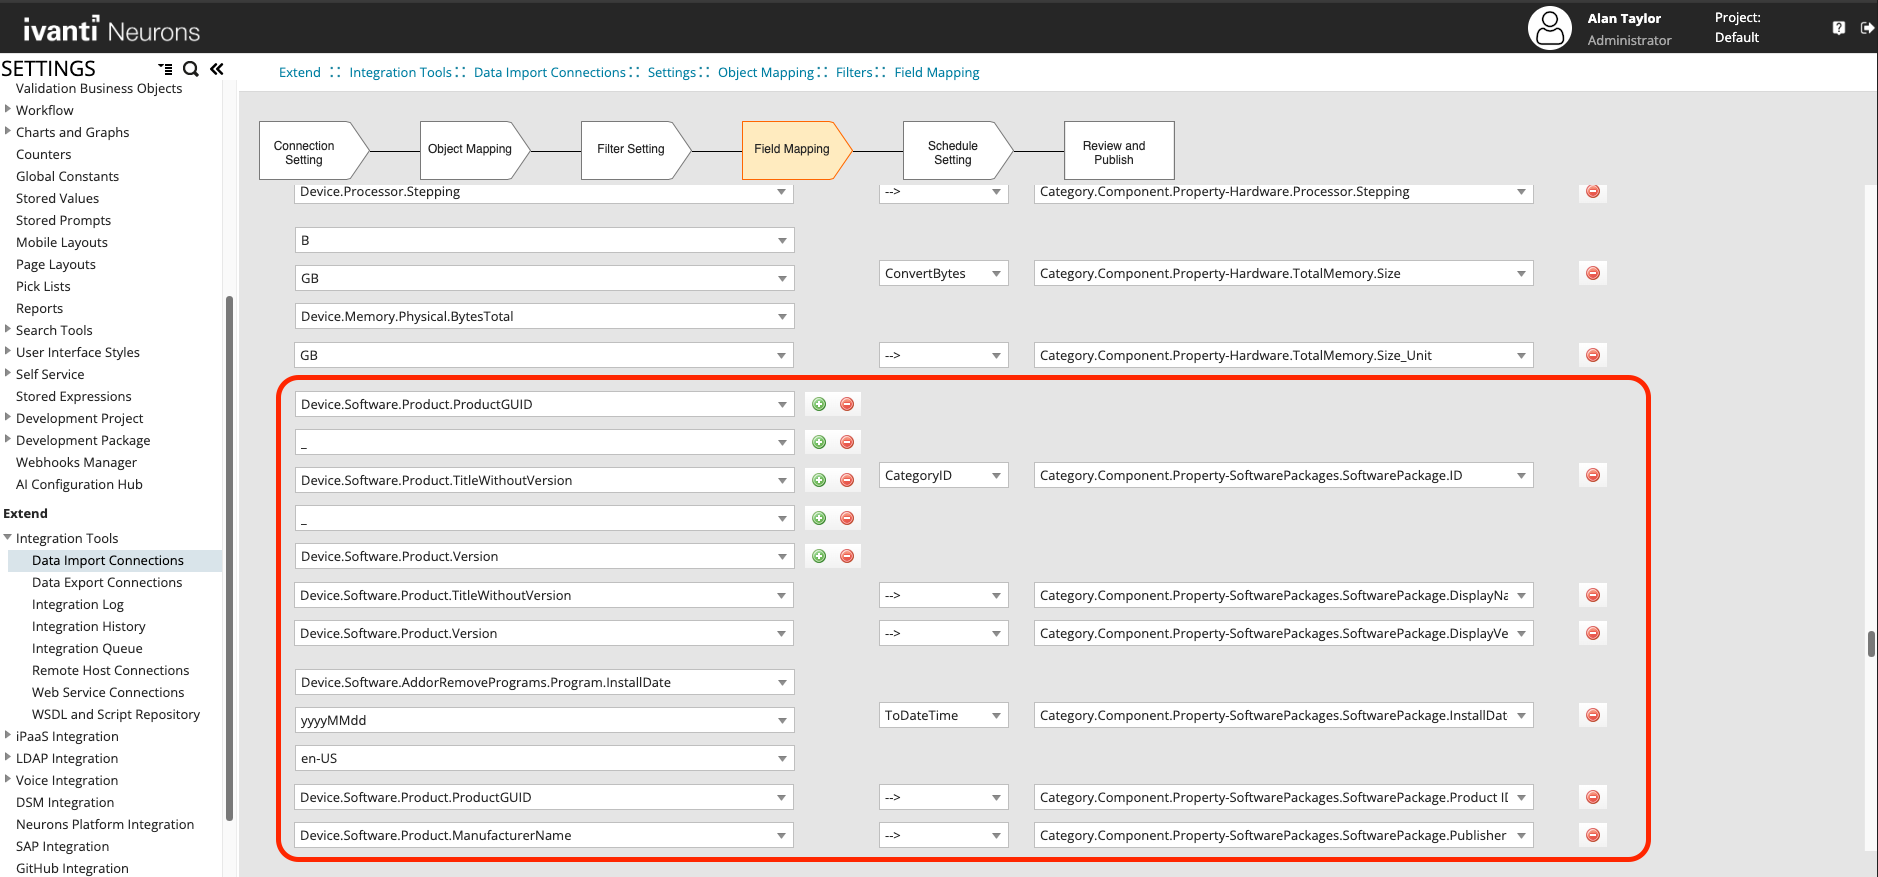
4.Select Device.Software.Product in the root table to use its key in field mapping.
5.Click Field Mapping, and select the fields from dropdown as shown in below table:
| Source Field | Mapping | Target Field |
|---|---|---|
| Device.Software.Product.ProductGUID | CategoryID | Category.Component.Property-SoftwarePackages.SoftwarePackage.ID |
| - | ||
| Device.Software.Product.TitleWithoutVersion | ||
| - | ||
| Device.Software.Product.Version | ||
| Device.Software.Product.TitleWithoutVersion | -> | Category.Component.Property-SoftwarePackages.SoftwarePackage.DisplayName |
| Device.Software.Product.Version | -> | Category.Component.Property-SoftwarePackages.SoftwarePackage.DisplayVersion |
| Device.Software.Product.ProductGUID | -> | Category.Component.Property-SoftwarePackages.SoftwarePackage.Product ID |
| Device.Software.Product.ManufacturerName | -> | Category.Component.Property-SoftwarePackages.SoftwarePackage.Publisher |
For More Information on Mapping
-
Common Mapping in ITSM for Device Sync
After applying the common mapping in ITSM for all device types, you can import devices from Ivanti Neurons. The installed software information for each operating system is updated automatically with accurate values.
-
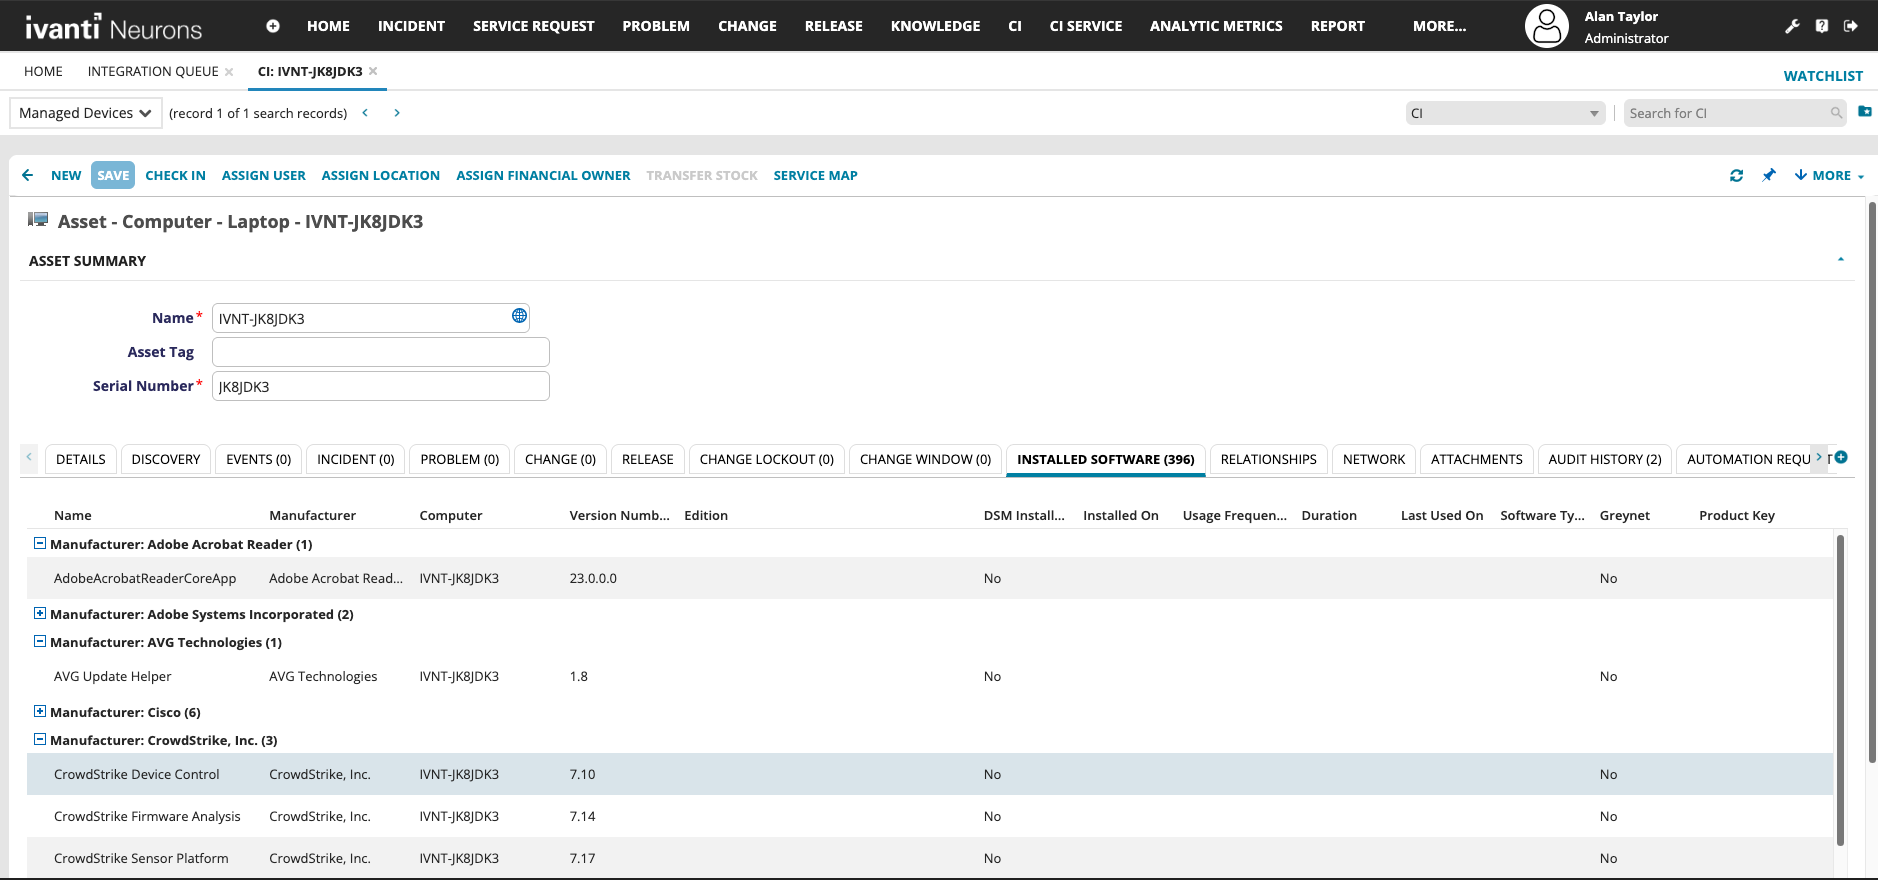
Windows Device CI with Installed Software
-
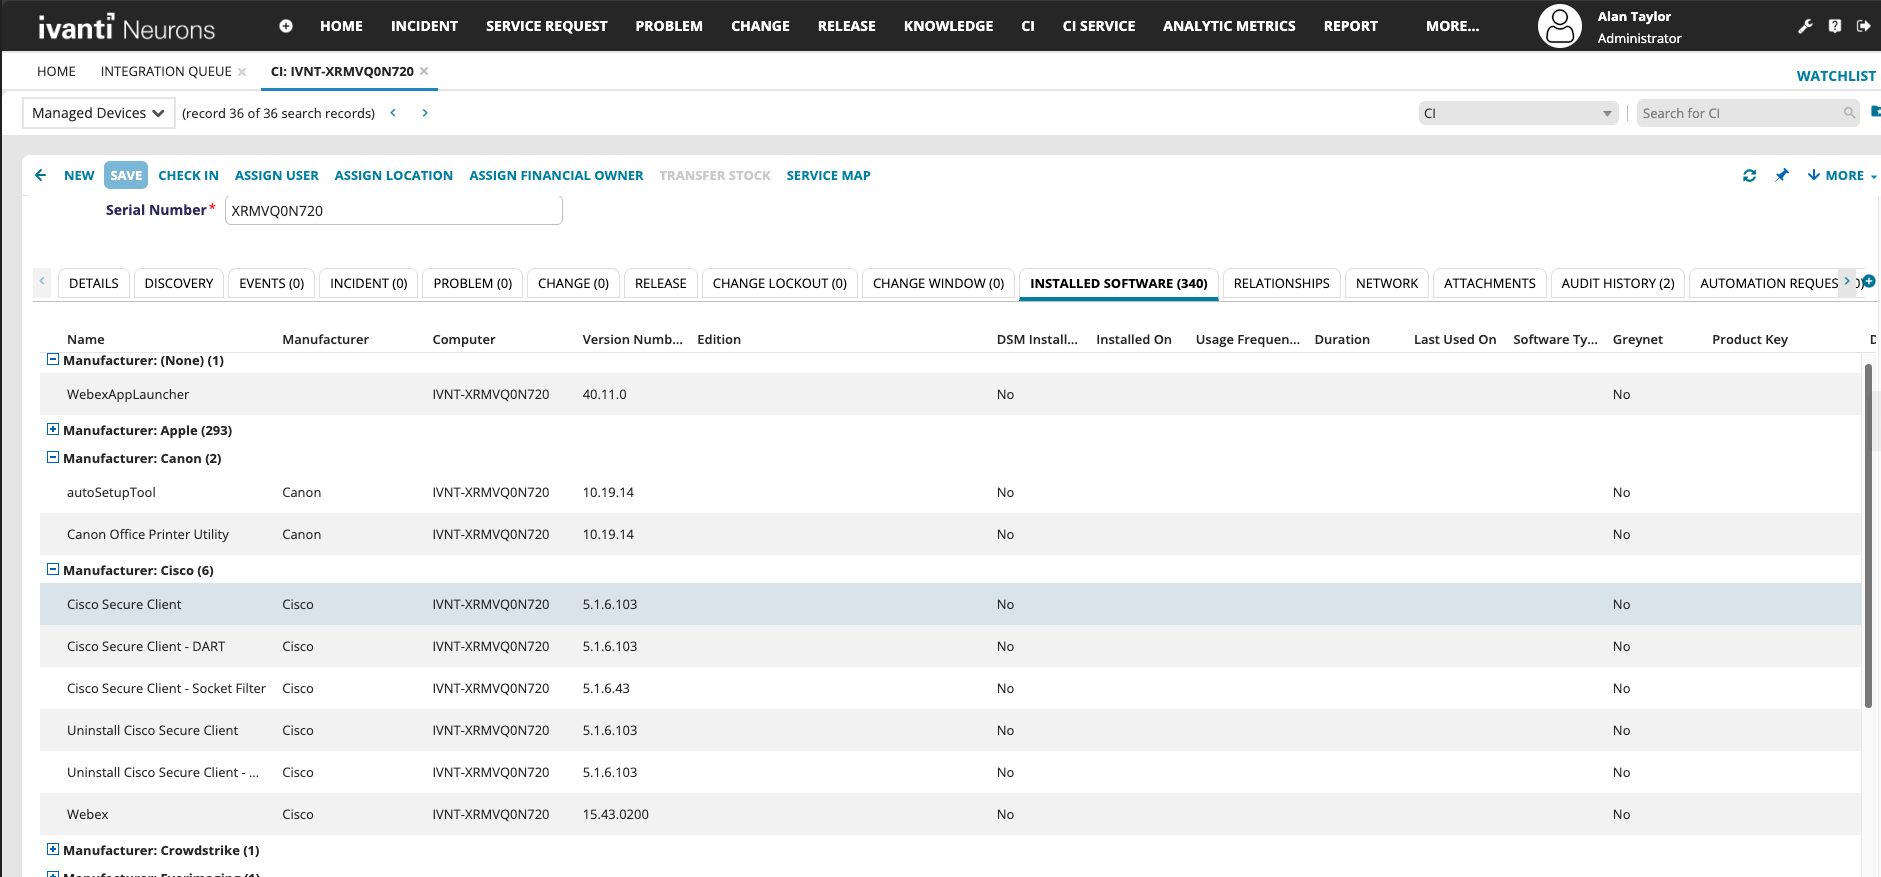
macOS Device CI with Installed Software
-
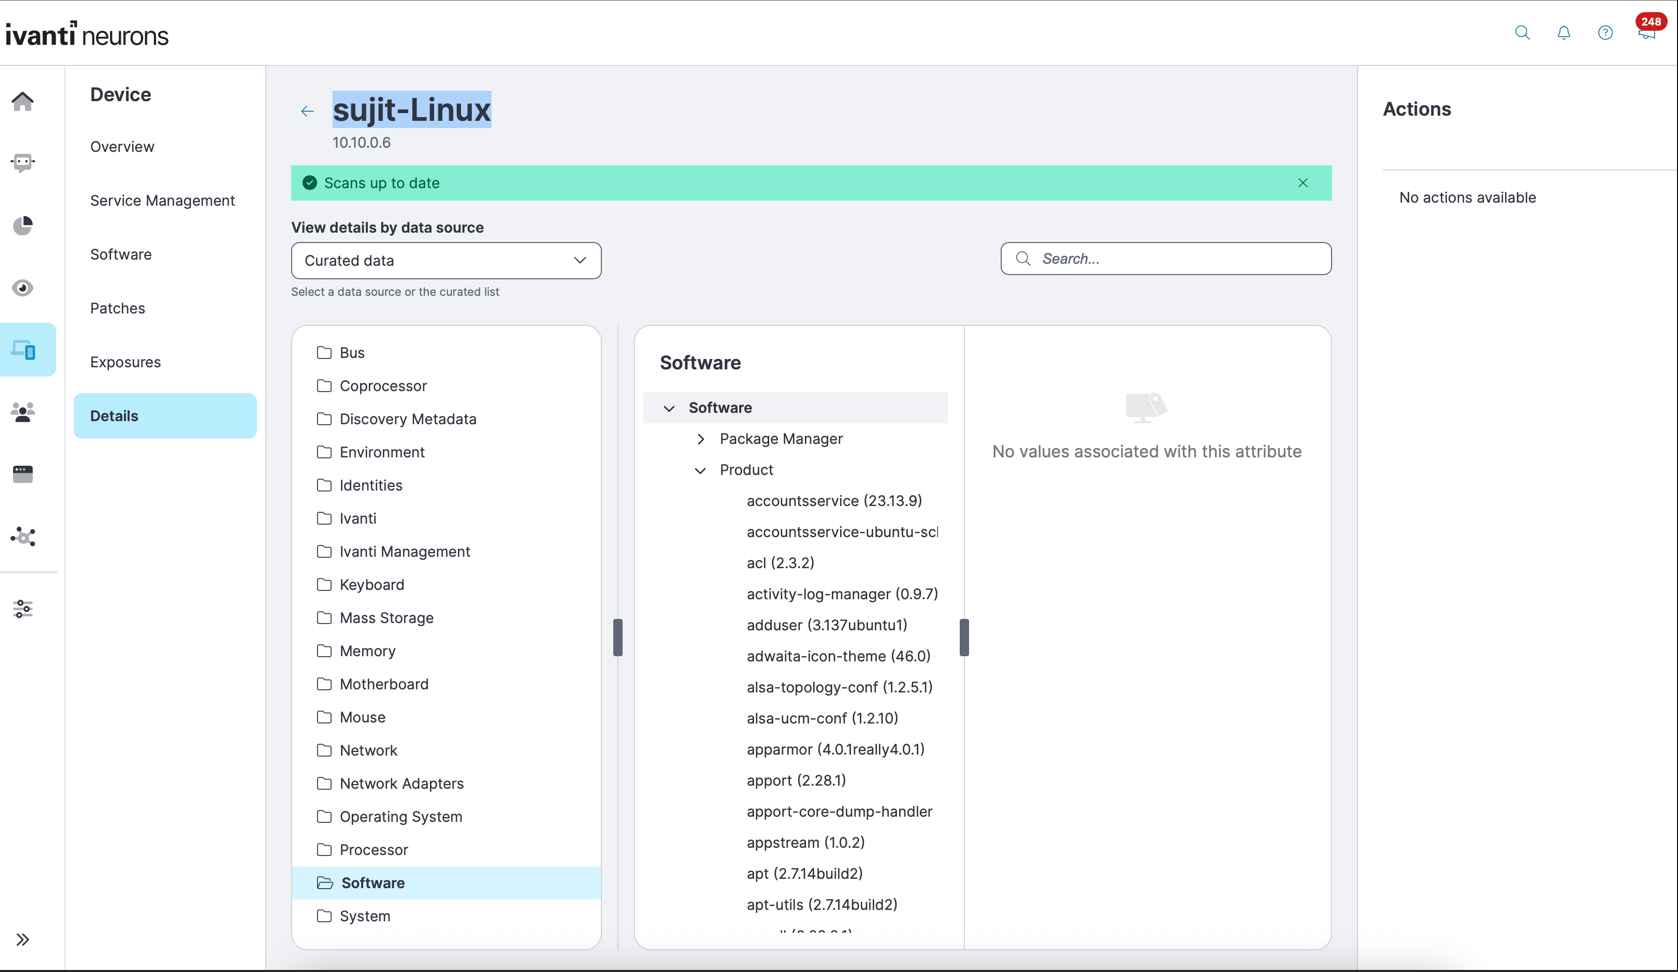
Ubuntu Device on Ivanti Neurons
-
Ubuntu Device CI with Installed Software