Cloning a Business Object
Role: Administrator
Minimum Version: Neurons for ITSM 2026.1
Feature Eligibility: To use this feature, reach out to your Ivanti Account Manager to enable the EnableCloneBO feature flag for you.
Cloning of business objects within Ivanti Production Cloud/Hosted Environments is disabled off-the-shelf and is not be supported. This feature is for Development, Staging, or UAT environment only. You can import the cloned business as a package into an Ivanti Production Cloud/Hosted environment.
The Clone Business Object feature allows you to create a new business object by using an existing one as a template. This process retains key configurations such as fields, layouts, grids, forms, and rules when setting up similar objects.
1.Log in to Neurons for ITSM as an Administrator.
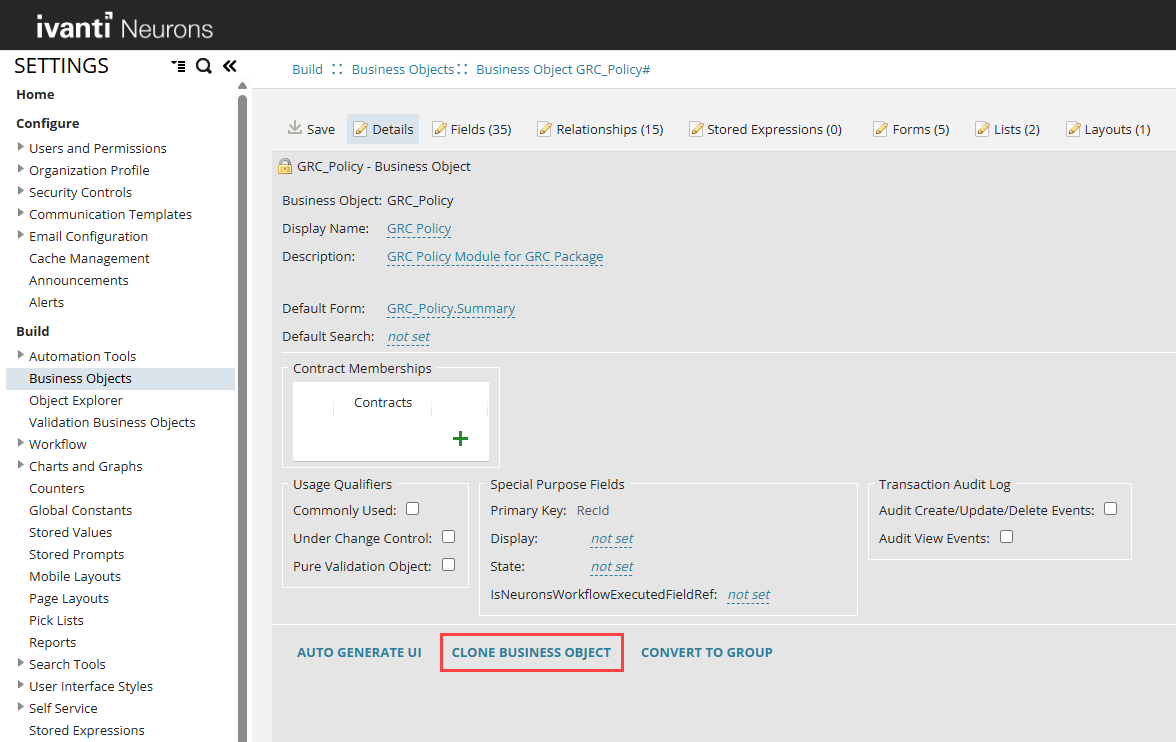
2.Open the Configuration console > Build > Business Objects > select the required business object such as GRC_Policy.
3.Under the Details tab click Clone Business Object at the bottom of the business object page.
4.Enter a name for the new business object in the New BO Name field and select the required fields to clone or Check All if all the fields are required.
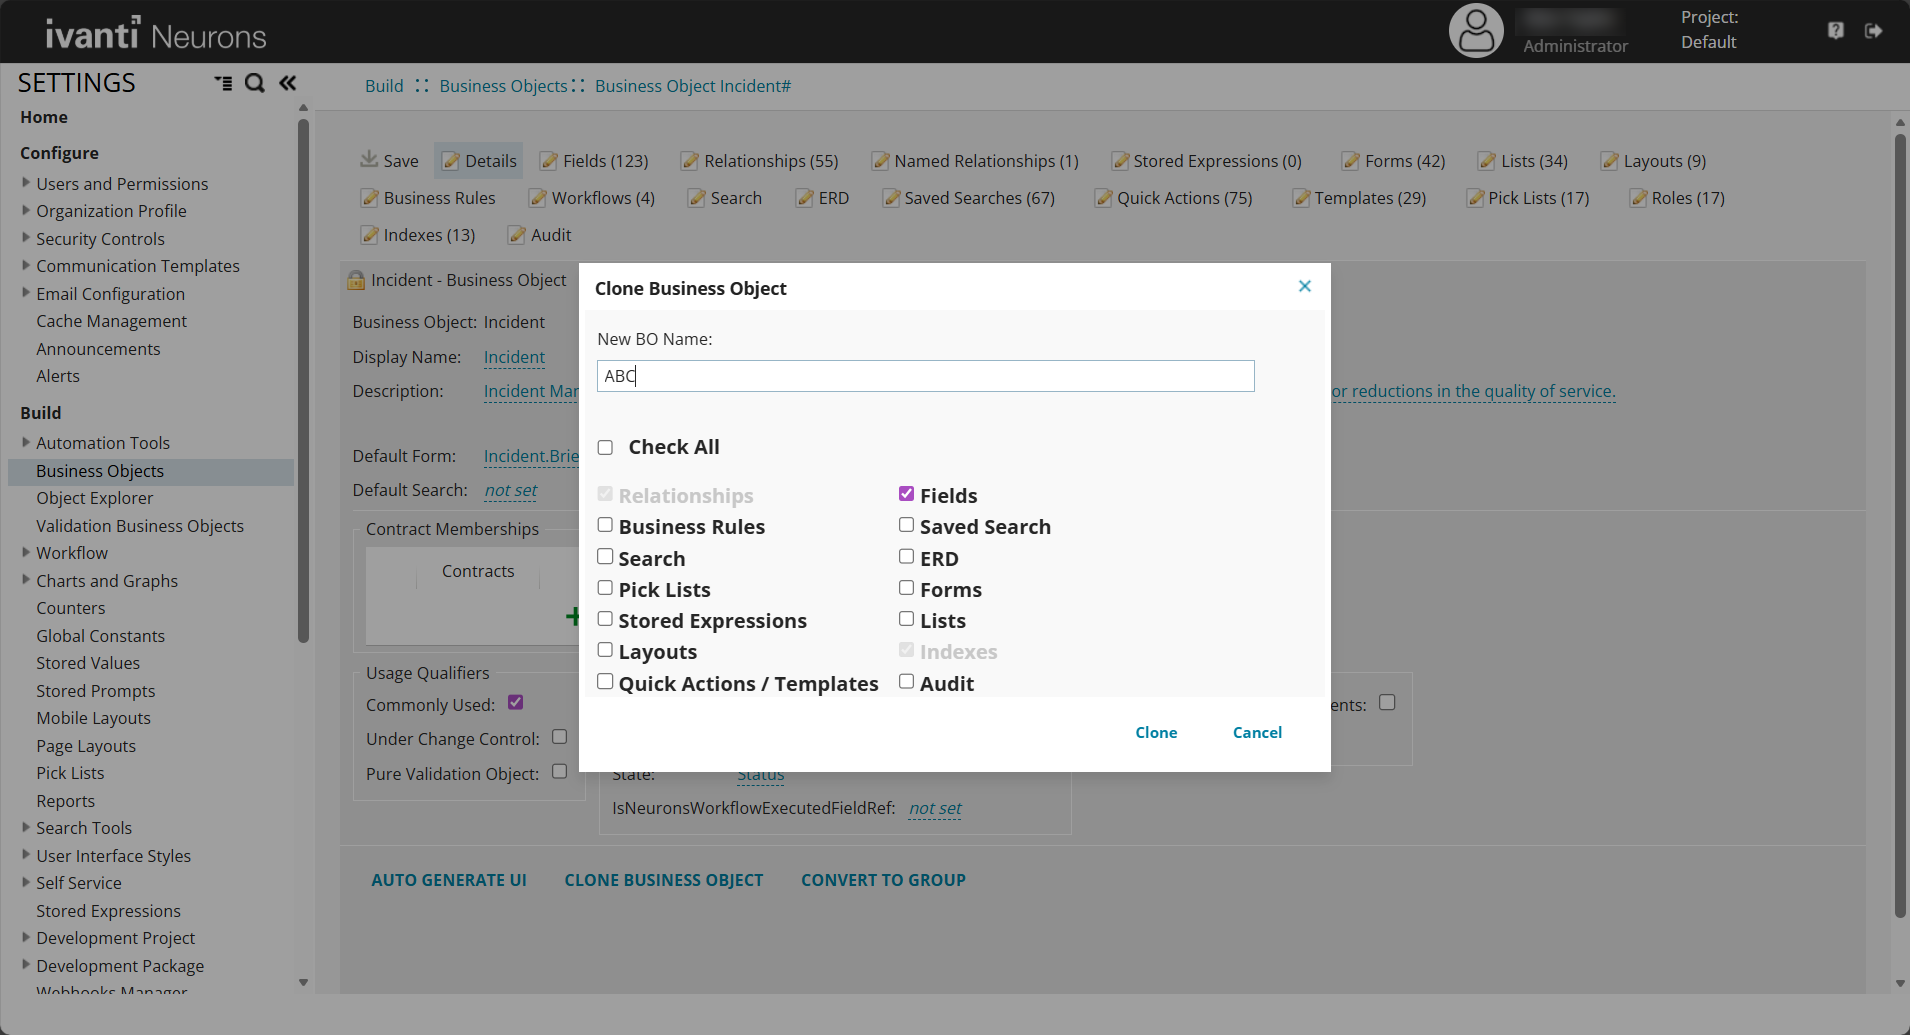
•When you select Check All, a dialog box appears so you can review auto-generated relationships. The cloning process captures relationships up to one level only. Create additional relationships manually if more levels are required.
•Business object names can include only letters, numbers, and underscores. They must not start with a number or contain special characters.
5.Click Clone and click OK in the success pop-up.
6.Open the cloned business object and click Save.
7.Select one of the following options in the Resolve Indexing Discrepancies dialog.
•Accept database indexes
Use the indexes stored in the database. This ensures the cloned business object matches the database structure. Choose this if you want the system to follow the existing database configuration.
•Accept metadata indexes
Use only the indexes defined in metadata. This ensures the cloned business object matches the metadata definition. Choose this if you want the system to follow the metadata configuration.
•Resolve later
Save the business object immediately and postpone resolving the indexing differences. The next time you open the business object, you will be prompted again to resolve the discrepancies. Choose this if you need to save quickly, but you must resolve the issue before you can continue working with the business object.
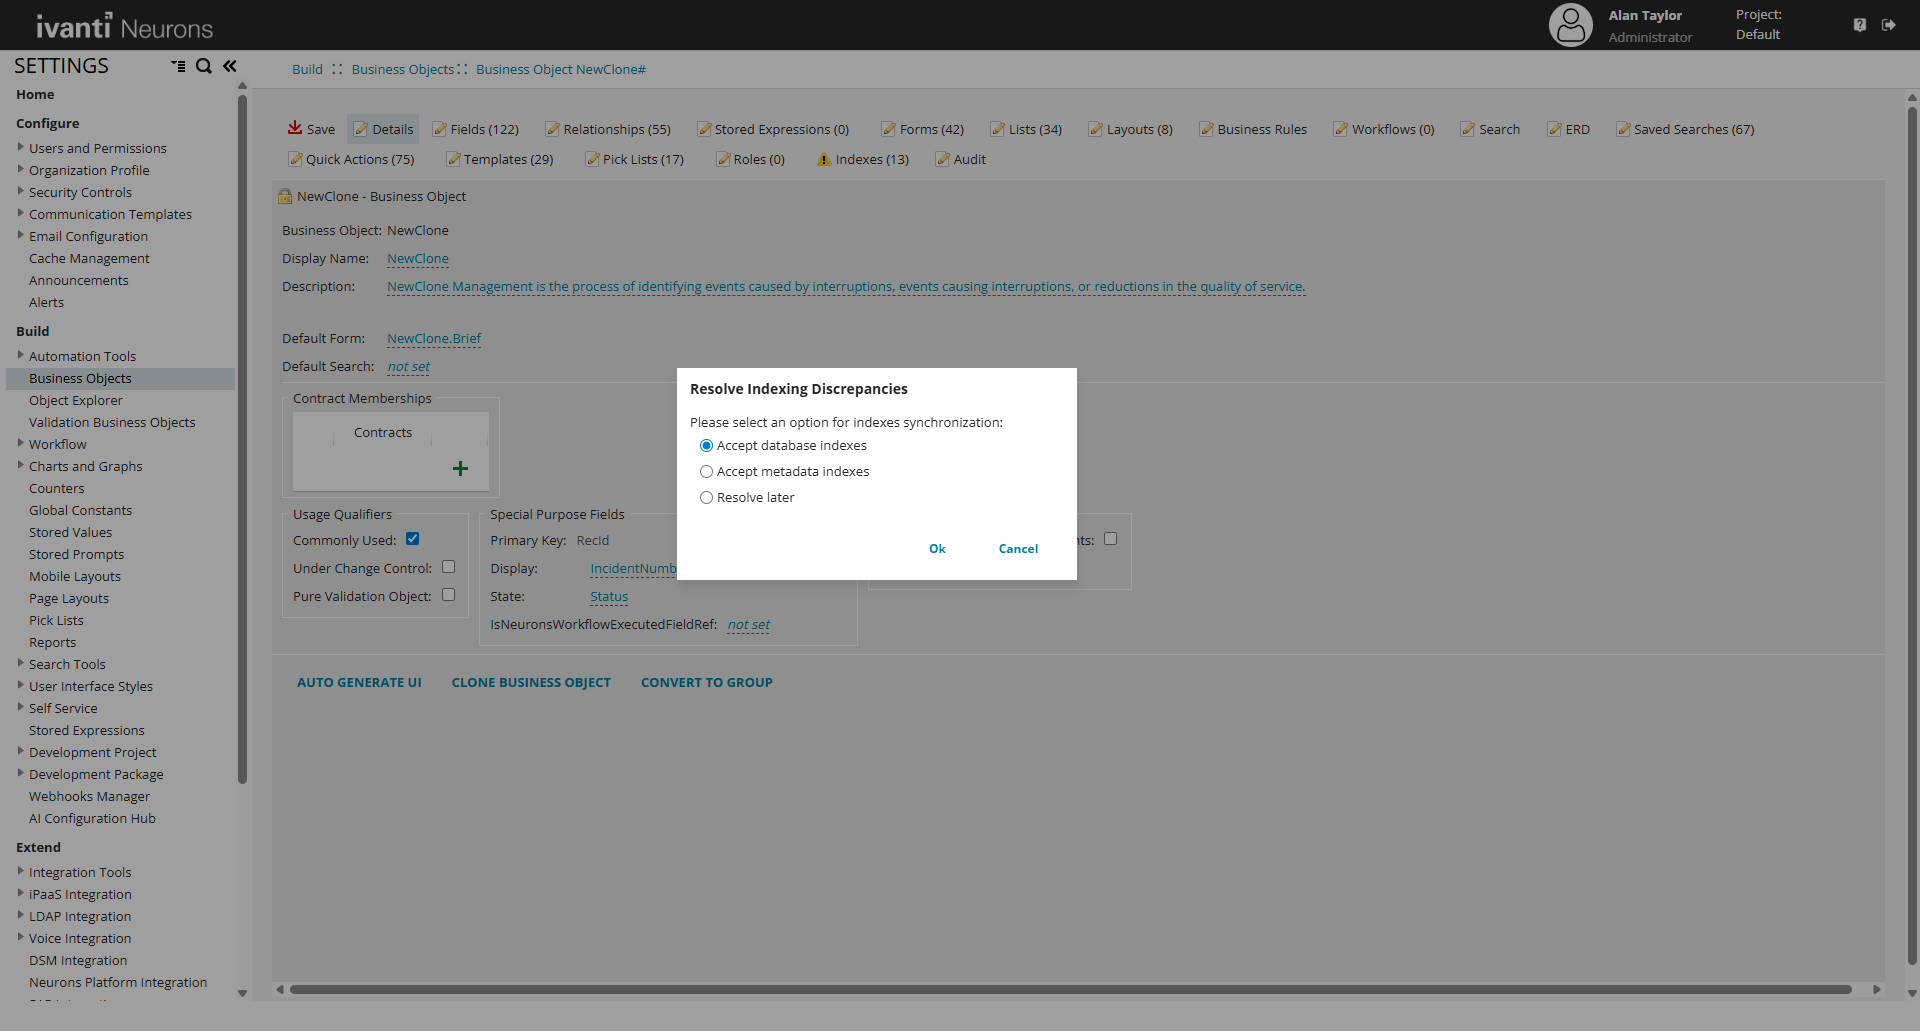
If an index is created in metadata but the database does not support it (for example, if the name is already in use or reserved), the database does not create the index. When the database and metadata become inconsistent, the application detects the discrepancy and prompts you to choose which version to use.
The cloning process also:
•Creates audit table for the Cloned Business Object if the audit tables exist for the original business object.
•Does not retain locked permissions of the original business object and can be freely modified.
Add Cloned Business Object to Top Level Tabs
To show the cloned business object in the Service Desk you need to add it to the Top Level Tabs of that particular role. For more information refer to Defining Top Level Tabs.
Handling Non-null Fields
•During cloning, any field that is null but used in an index is automatically converted to non-null on the clone.
•This conversion allows the index creation to succeed.
Apply Full permissions
Full permissions are applied to cloned business objects, to ensure users can edit fields and manage relationships.
•Grant full access to the table in the Frs_def_permissions database. This change allows users to make updates and save changes.
•Grant full permission to each field. so that users can make any changes.
•Grant full permission to reverse relationships.
•Update reverse relationship names to ensure uniqueness in the relationship designer names.
Cloning a Business Object example
Cloning an Incident Business Object requires adjusting null fields, relationships, and triggered actions to ensure the cloned object functions correctly.
1.Log in to Neurons for ITSM as an Administrator.
2.Complete the cloning process. For detailed steps, refer to Cloning a Business Object.
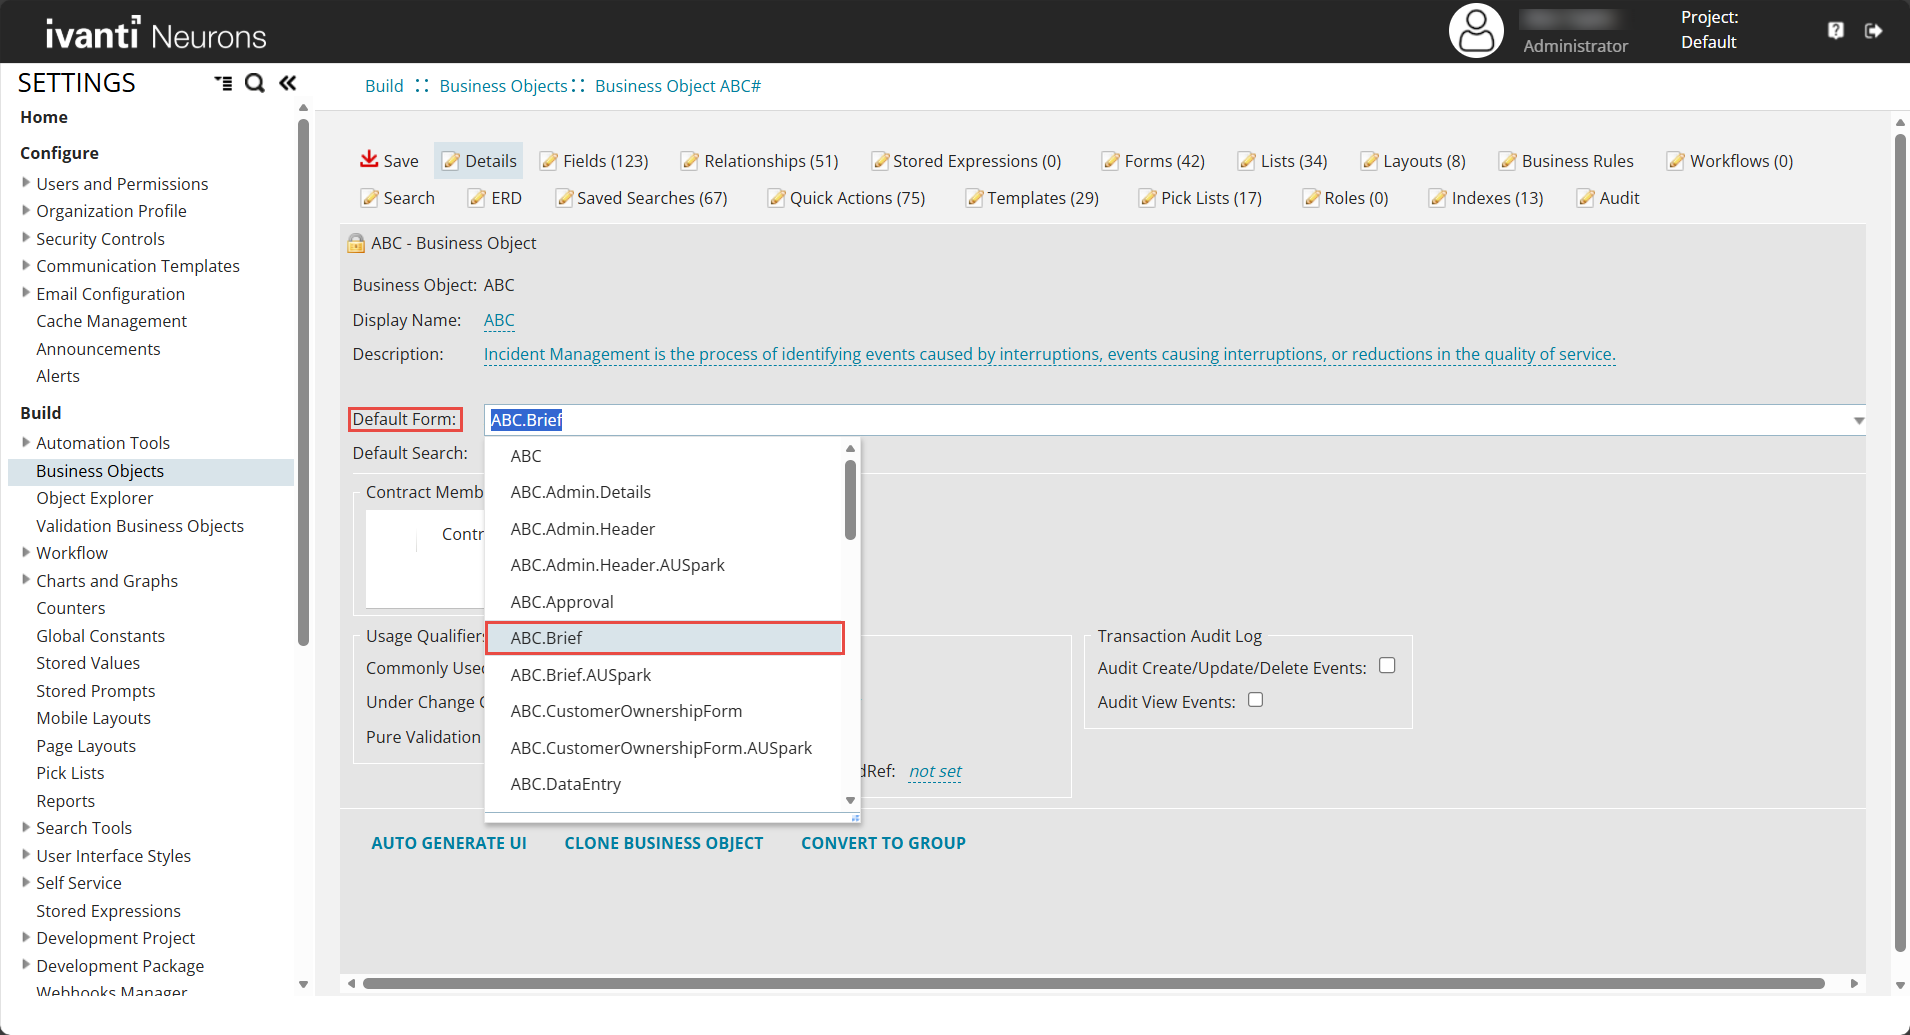
3.Open the Configuration console > Build > Business Objects > select the cloned business object> Details and
4.Set the default form to [name of the cloned business object].Brief.
5.Open Layout > [name of the cloned business object]Layout.ServiceDesk > formView_[name of the cloned business object].
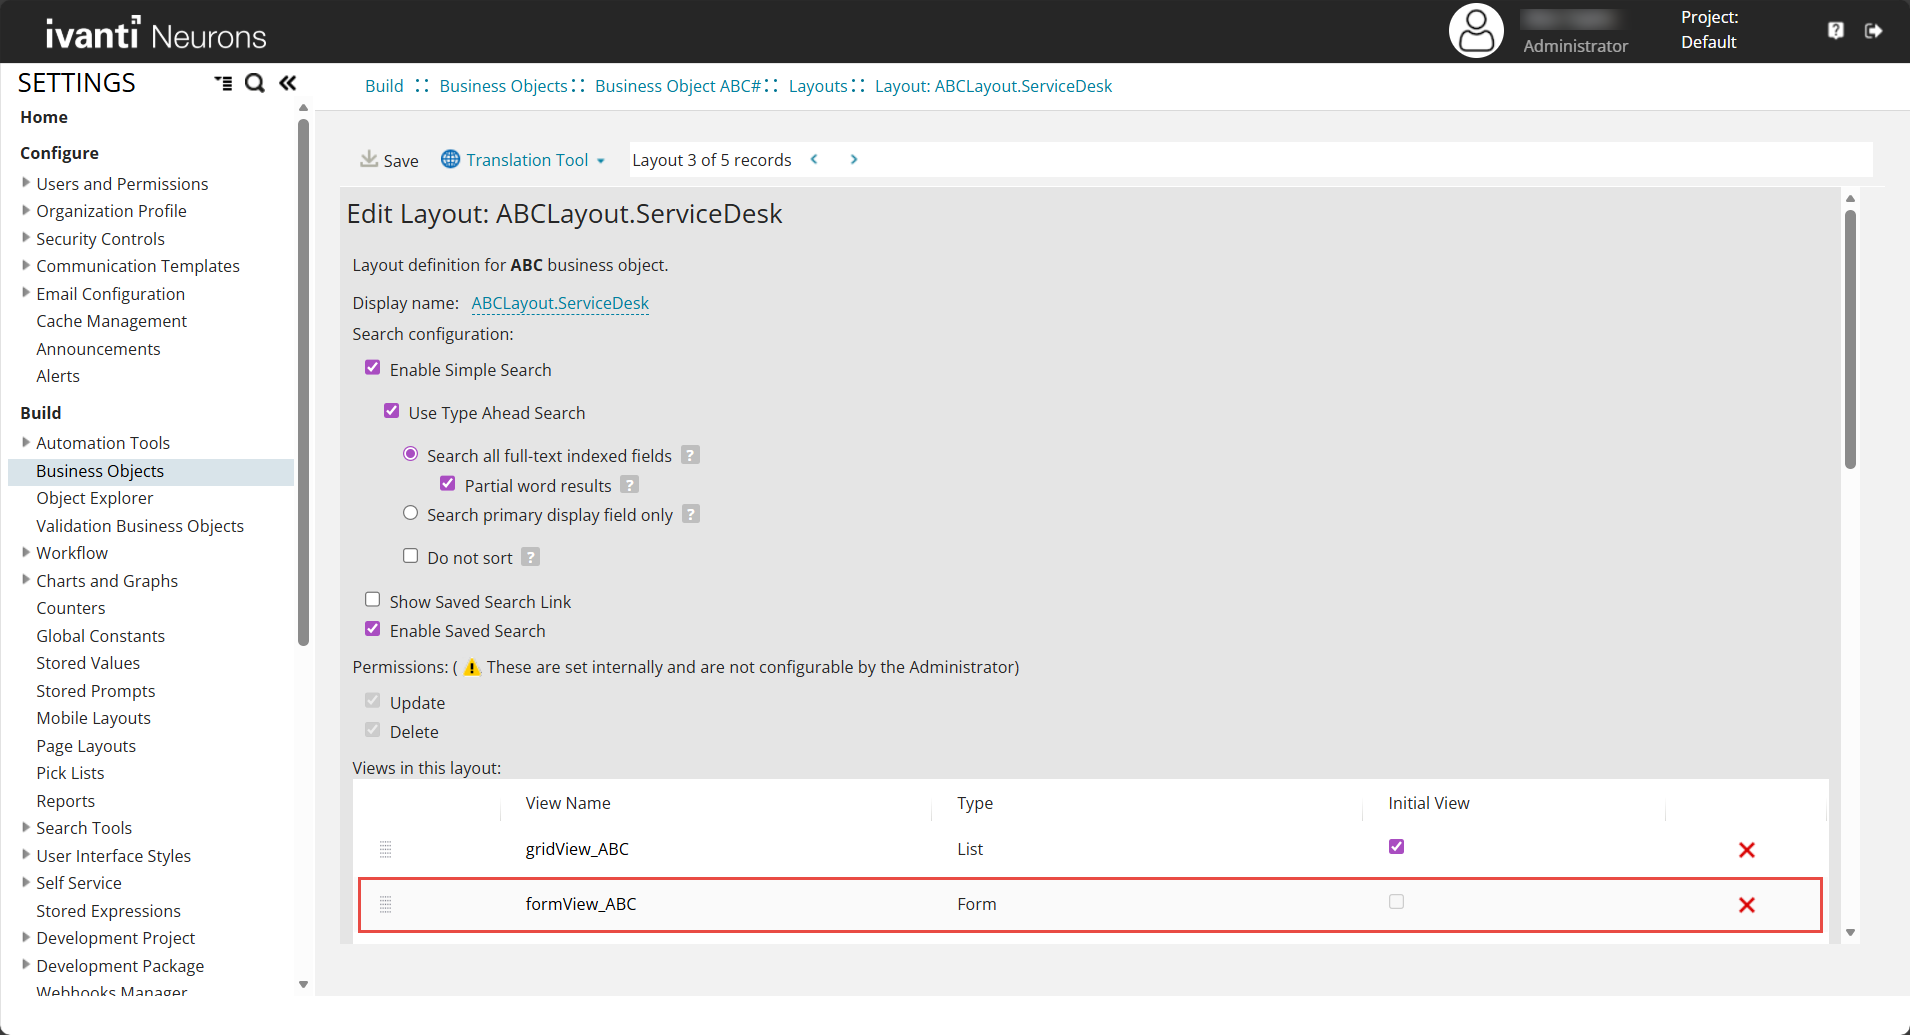
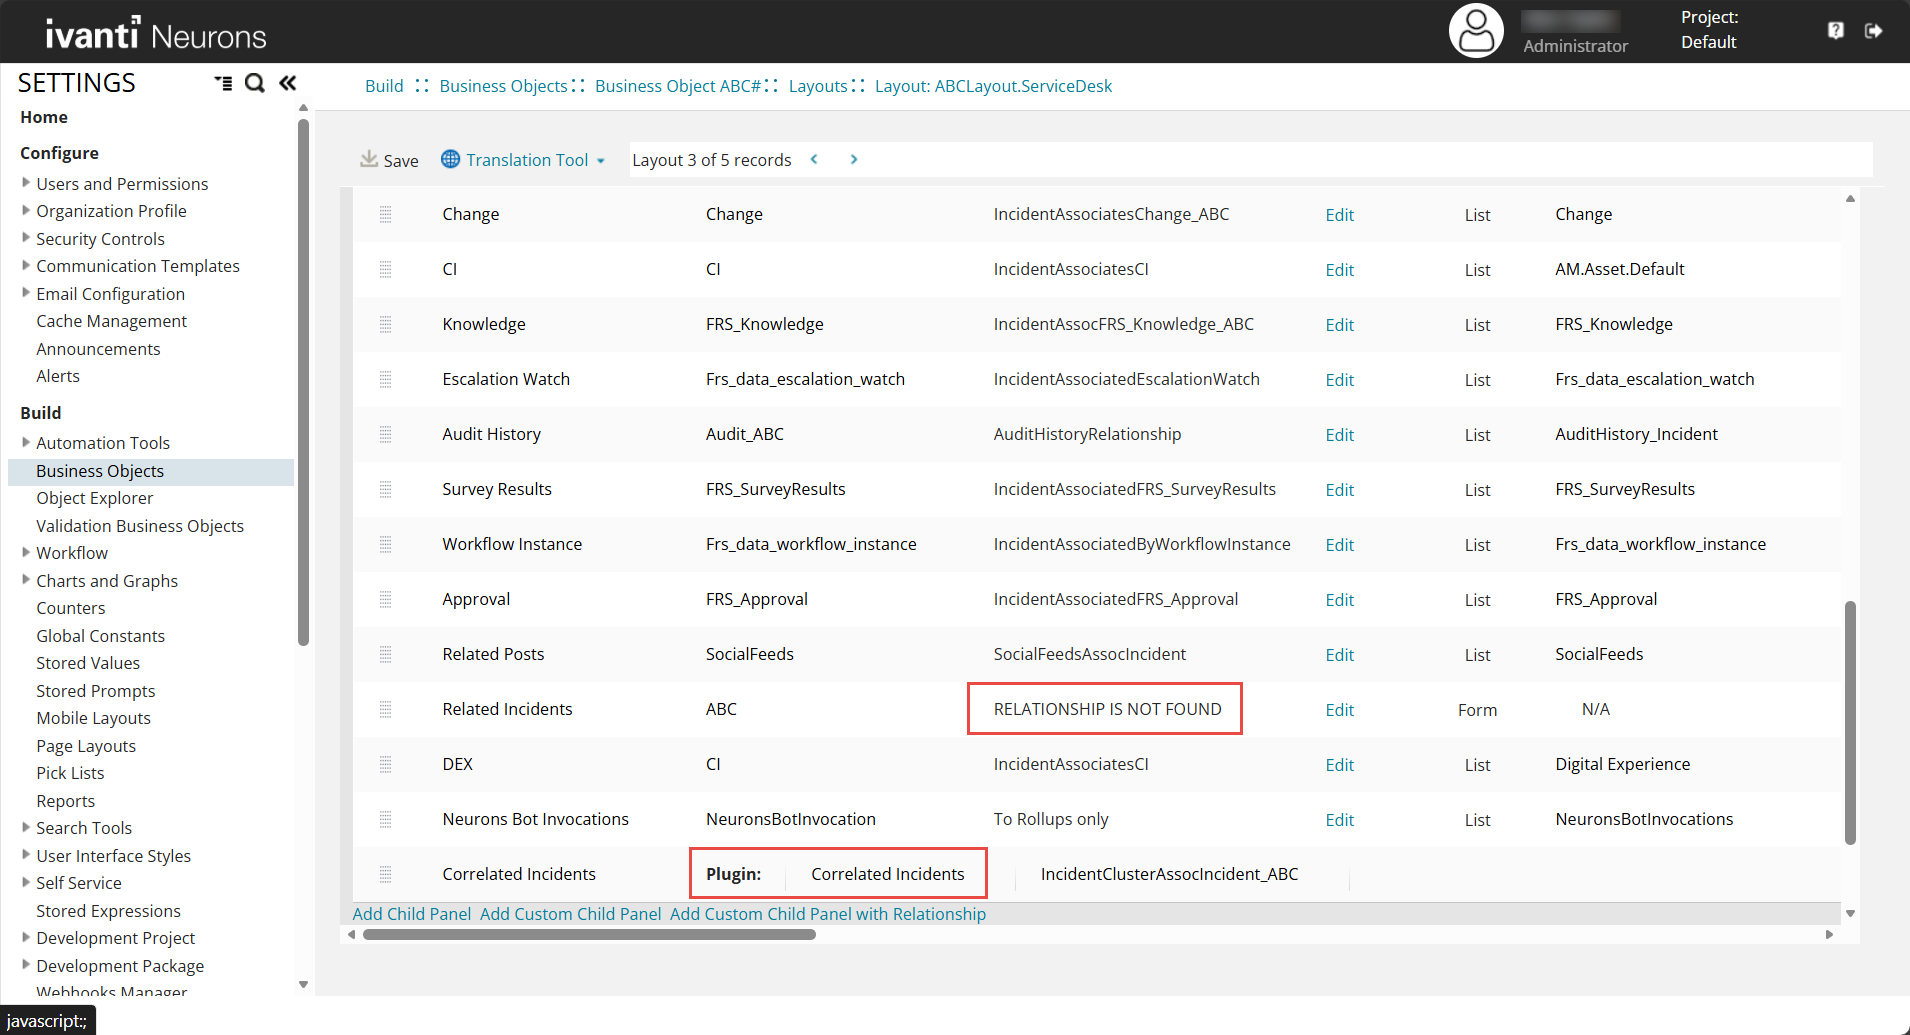
6.Fix or remove entries with the error RELATIONSHIP IS NOT FOUND.
7.Fix or remove Correlated Incidents because it contains a plugin.
8.Click Save.
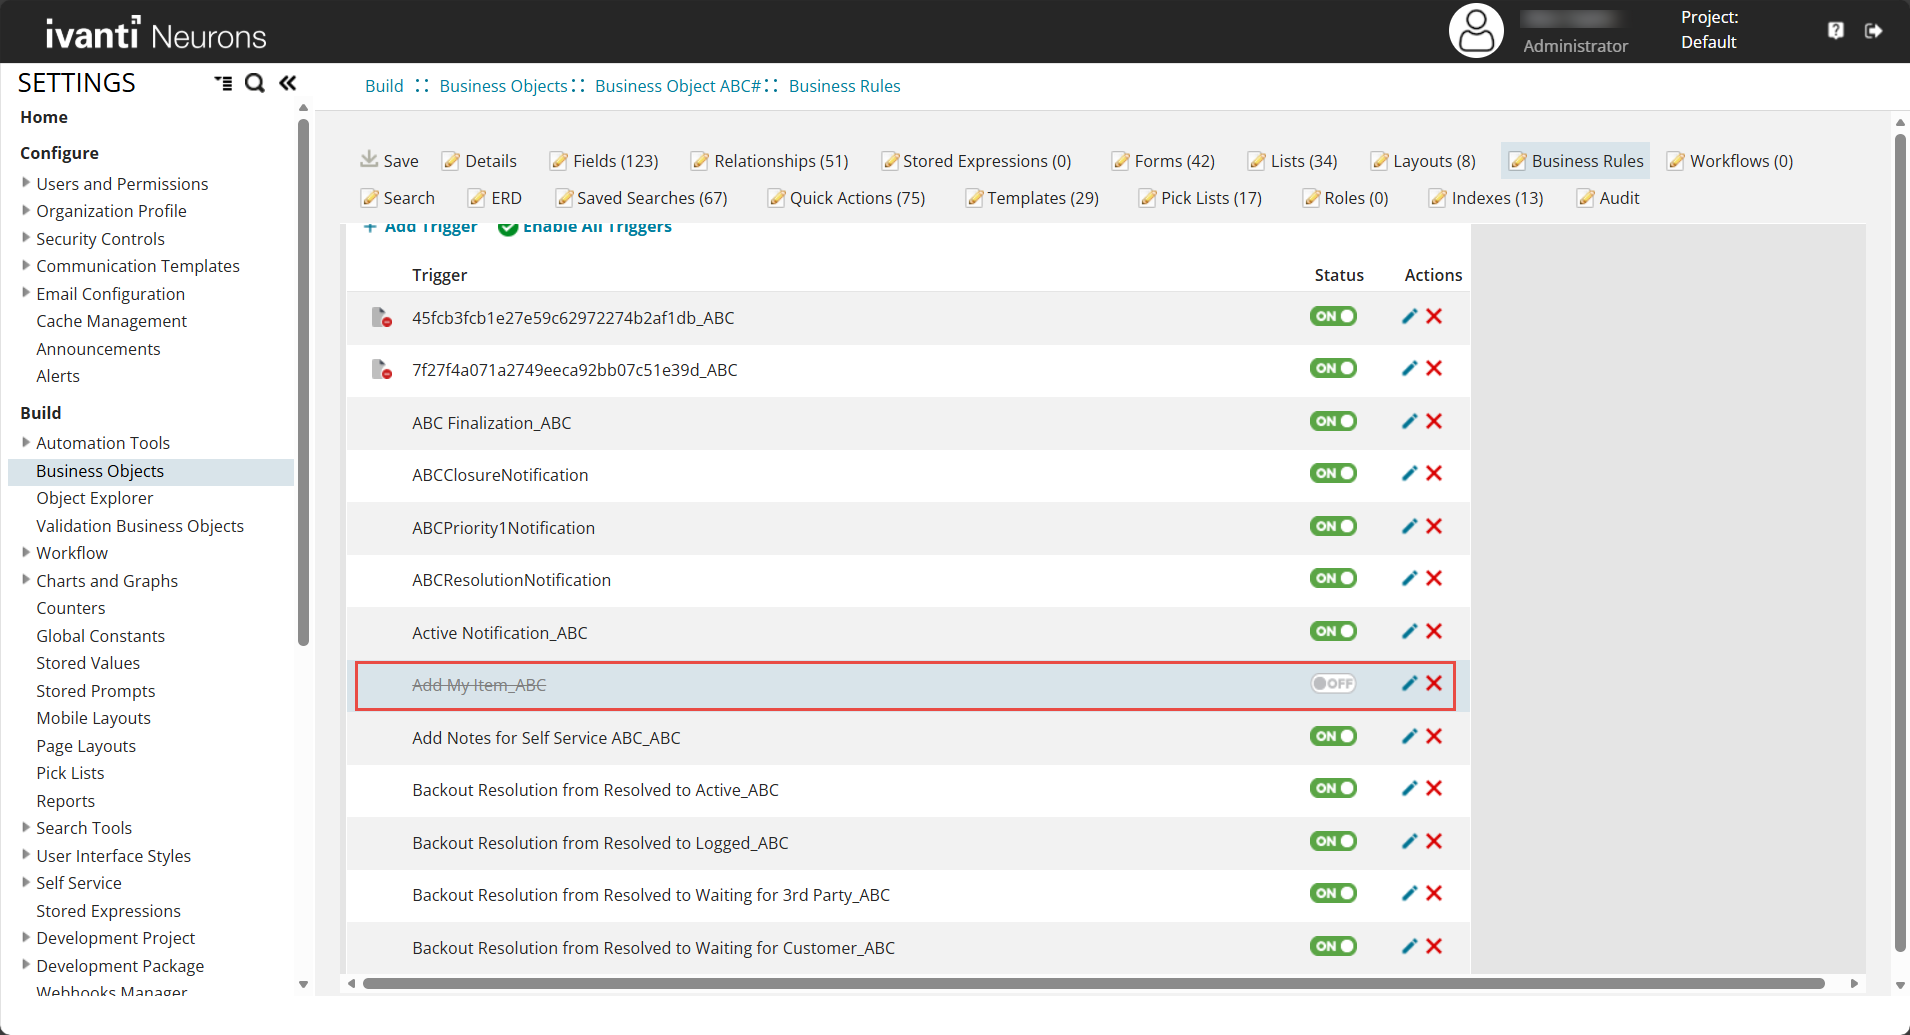
9.Navigate to Business Rules > Triggered Actions, and disable the following triggered actions
•Add My Item_[name of the cloned business object]
•Update My Item_[name of the business object].
10.Remove triggered actions for Master Incident.
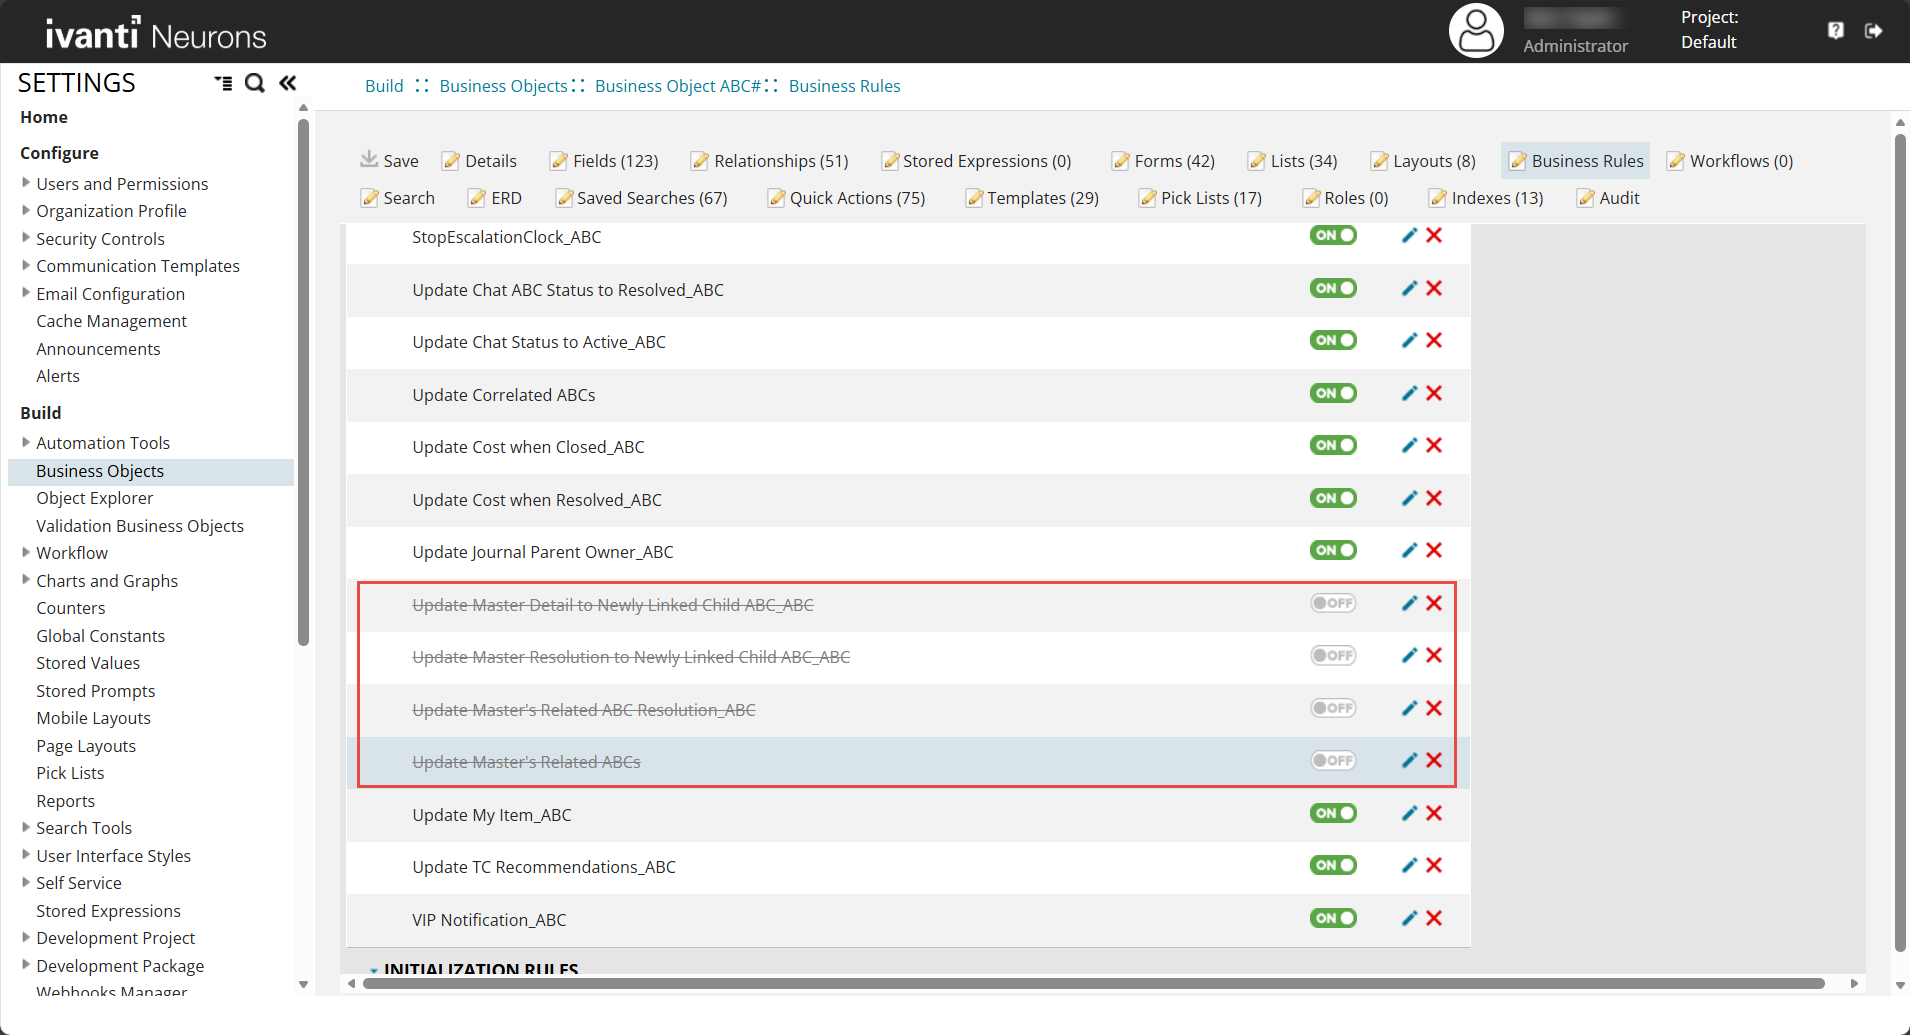
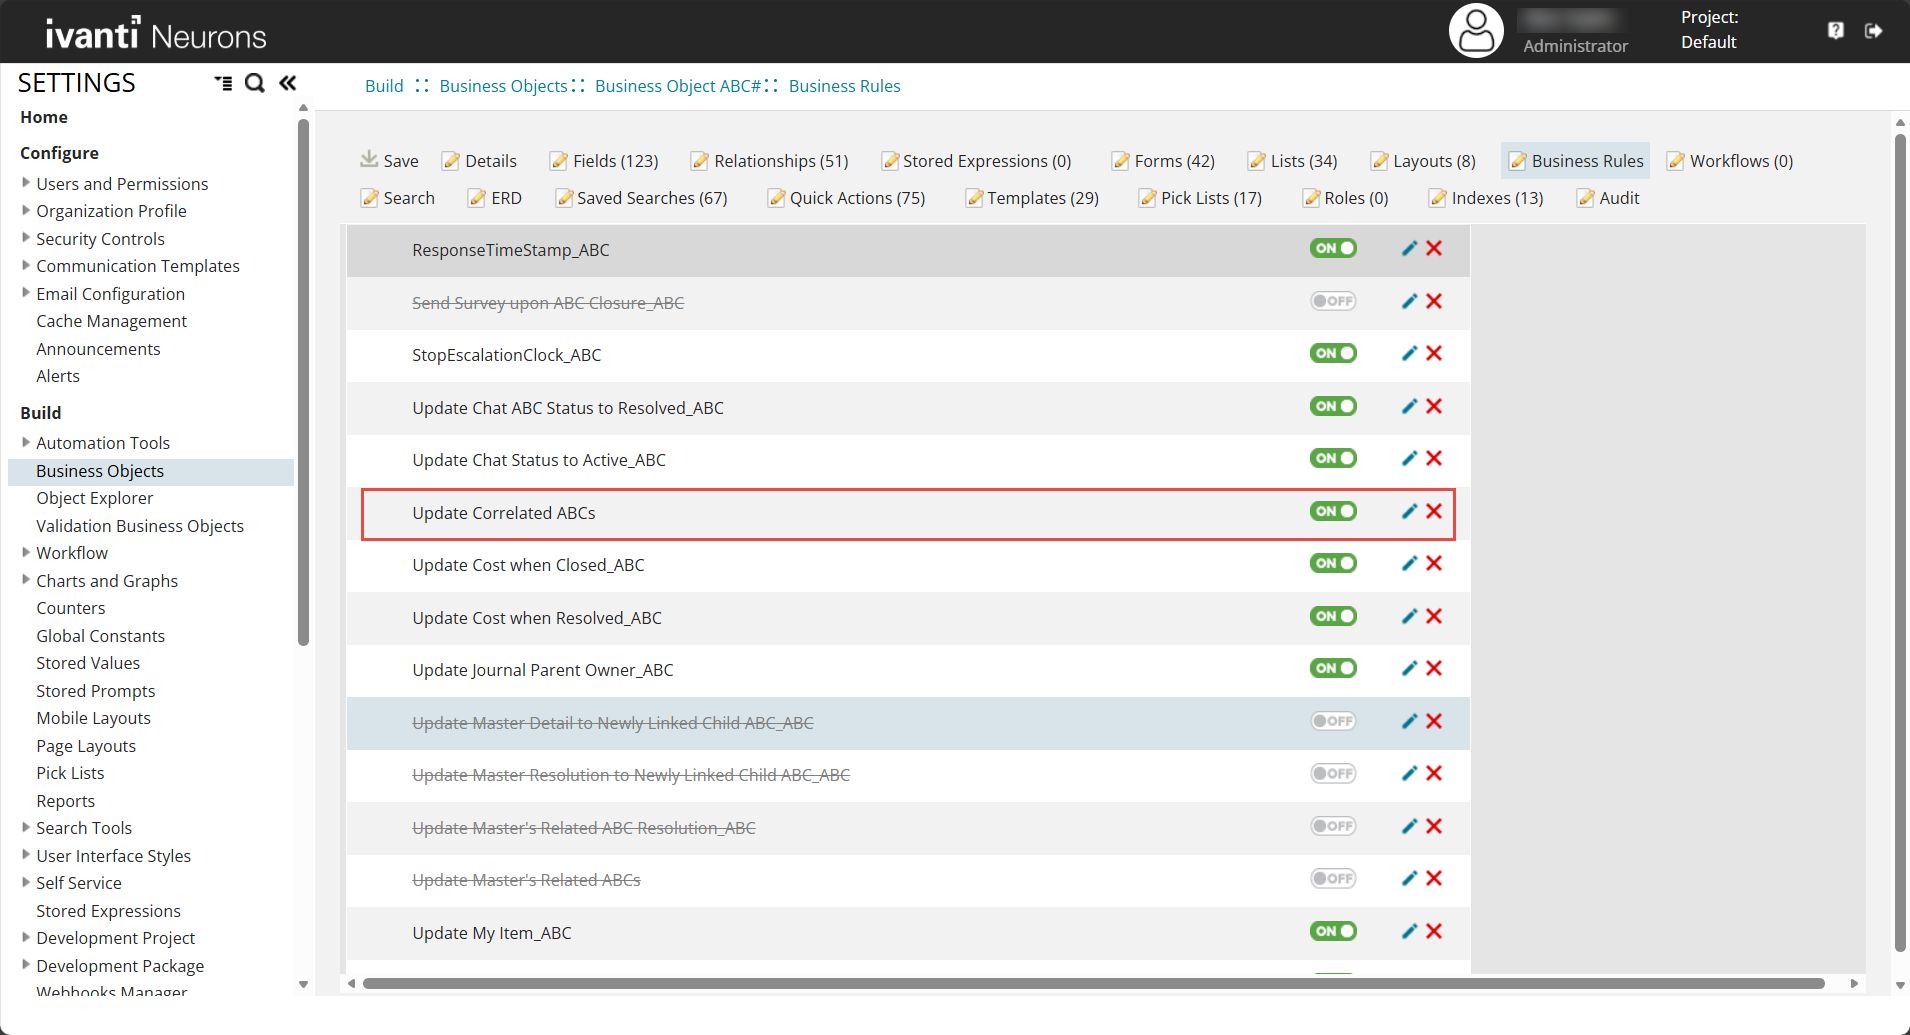
11.Disable the Update Correlated [name of the cloned business object] triggered action.
12.Update the quick action in the Resolve button inside [name of the cloned business object].DefaultForm form.
13.Add the new business object to the Top Level Tabs in Roles and Permissions. For more information refer to Defining Top Level Tabs.
You can now load the form and create records.
Limitations
•Clone Business Object works only with the standalone business objects. You cannot clone other type of business objects.
•Business object names can include only letters, numbers, and underscores. They must not start with a number or contain special characters.
•Clone Business Object is designed for simpler business objects.
•When used on very large and complex business objects (for example, an Incident with more than 50 relationships), the cloned business object may not function seamlessly because of the number and complexity of relationships. In such cases, manual steps are required to make the cloned business object functional.
•Cloning the Account business object has known issues that will lead to failed operation. Do not clone the Account business object.
•The cloning process copies all other components of the business object except for the following components which you will add or edit them manually:
•The Roles, Named Relationship, and Workflows are not copied during the cloning process. You have to configure the related roles and workflows manually.
•Relationships and Reverse Relationships can only be cloned to the first degree. Transitive relationships can not be cloned automatically and must be handled manually.
•Self relationships are not cloned, as attempting to do so can create false links between the original business object and the new business object, breaking functionality.
•Business rules may need manual updates if they fail due to removed relationships.
•Special form command buttons bound by action IDs must also be updated manually.
•Escalation is not functional when an incident is cloned. This can be fixed manually by updating relationships and business rules.
•Update all the scripts in Quick Actions to the newly cloned business object.
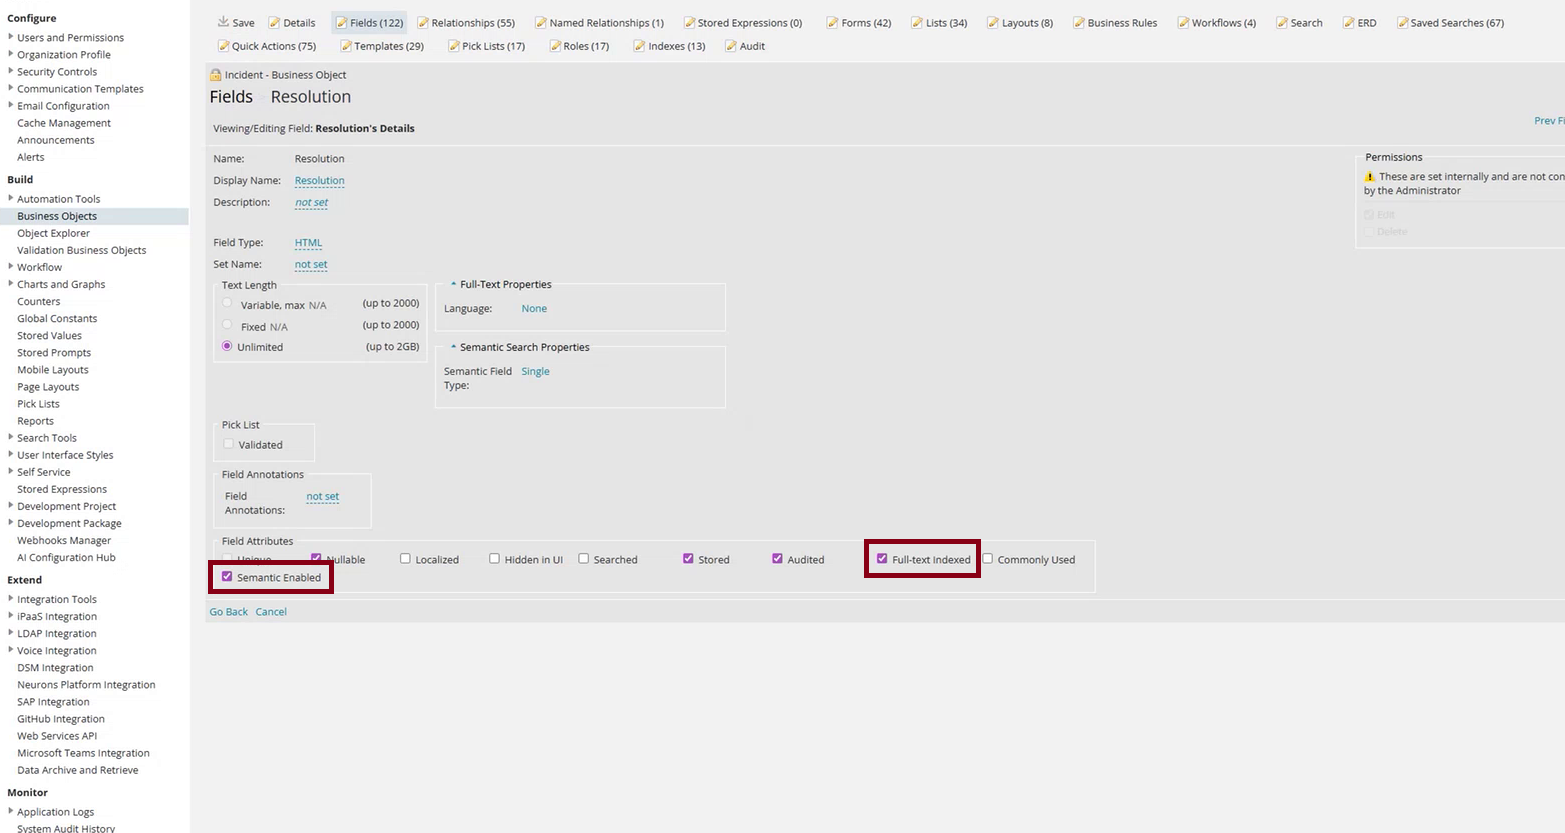
•For Fields except for Full-text Indexed and Semantic Enabled, all other field options or columns are cloned by default. You need to enable and configure these options manually after cloning.
•To enable Full-text Indexed and Semantic Enabled, in the Fields tab select the required field and select the Full-text Indexed and Semantic Enabled options.
•Clear the cache every time in order to see the cloned business object in the Business Objects tab and to view any additional or manual changes of the clone business object. To clear cache, go to Configuration console > Configure > Cache management and select Remove all cache items.
•Review both the cloned business object and any subsequent changes before deploying. Cloning a business object is a major operation.
•Use this feature only in development, staging, or test environments.
•Import your newly created business objects into production only after you have confirmed that they are functioning properly and as intended.