Managing Incidents
Managing incidents include the following functionalities:
•Creating incidents
•Viewing incidents
•Modifying incidents
You can create an incident in several ways:
•Using a blank form in the Incident workspace. Refer to Creating an Incident Using a Blank Form.
•Cloning an existing incident in the Incident workspace. Refer to Creating an Incident by Cloning an Existing Incident.
•Using a template in the Incident workspace. When you use a template, the application automatically fills in certain information, depending on the template that you use. You can do either of the following:
•Create an incident and then apply the template to it. Refer to Creating an Incident By Using a Template.
•Apply a template to an existing incident. Refer to Applying a Template to an Existing Incident.
•For an external contact. Refer to Creating an Incident for an External Contact.
1.Open the Incident workspace.
2.From the toolbar, click New Incident.
The blank form opens.
Creating a New Incident Using a Blank Form
3.Enter information into the fields. Refer to Viewing an Incident.
If the customer is not in the database, create a new customer record.
If you are creating the incident for an end user, set the status to active. When the incident is submitted by the user or through email, the status is logged.
4.Set the status to Active for incidents submitted by end users
5.Click Save.
•The application notifies the end user that the incident has been logged.
•The application notifies both the Service Desk Analyst and the Service Desk Manager about the incident assignment.
6.Click Refresh to view the resolution target values. Refer to About Resolution Details.
1.Log into the Service Desk console.
2.Open the External Contact workspace.
A list of external contacts opens.
3.Open the external contact record.
4.Click the Incident tab.
5.Click New Incident then select a template.
The Edit Incident window opens.
6.Enter the required information. Each template has various fields auto-filled with data.
7.Click Save.
For a list and description of the incident templates, refer to Default Incident Templates.
1.Log into the Service Desk console.
2.Open the Incident workspace.
3.Click New Incident > Templates.
4.Select a template that matches the incident.
A incident form opens.
5.Enter any additional information.
6.Click Save.
•The system notifies the end user, Service Desk Analyst and Service Desk Manager about the incident assignment.
Log into the Service Desk console.
1.Open the Incident workspace and open an existing incident.
2.From the Action Menu, select Form Actions > Clone Incident.
3.Select the incident status from the dropdown and click Ok.
•The system creates a copy of the incident.
•Child business objects (tasks, journal emails) are not copied.
•Fields override only as defined by the quick action.
4.Update other fields as required.
5.Click Save.
•The application notifies the end user that the incident has been logged.
•The application notifies both the Service Desk Analyst and the Service Desk Manager about the incident assignment.
When you apply a template to an existing incident, the system overwrites any existing data.
For a list and description of the incident templates, refer to Default Incident Templates.
1.Log into the Service Desk console.
2.Open an incident.
3.Perform one of the following:
•From the Action Menu, select Templates.
•From the toolbar, click Apply Template.
4.Select a template from the list. The system auto fills information for Category, Service, Impact, Urgency, and Summary fields.
5.Enter remaining data.
6.Click Save.
•The system notifies the end user, Service Desk Analyst and Service Desk Manager about the incident assignment.
1.Log in to the Service Desk console.
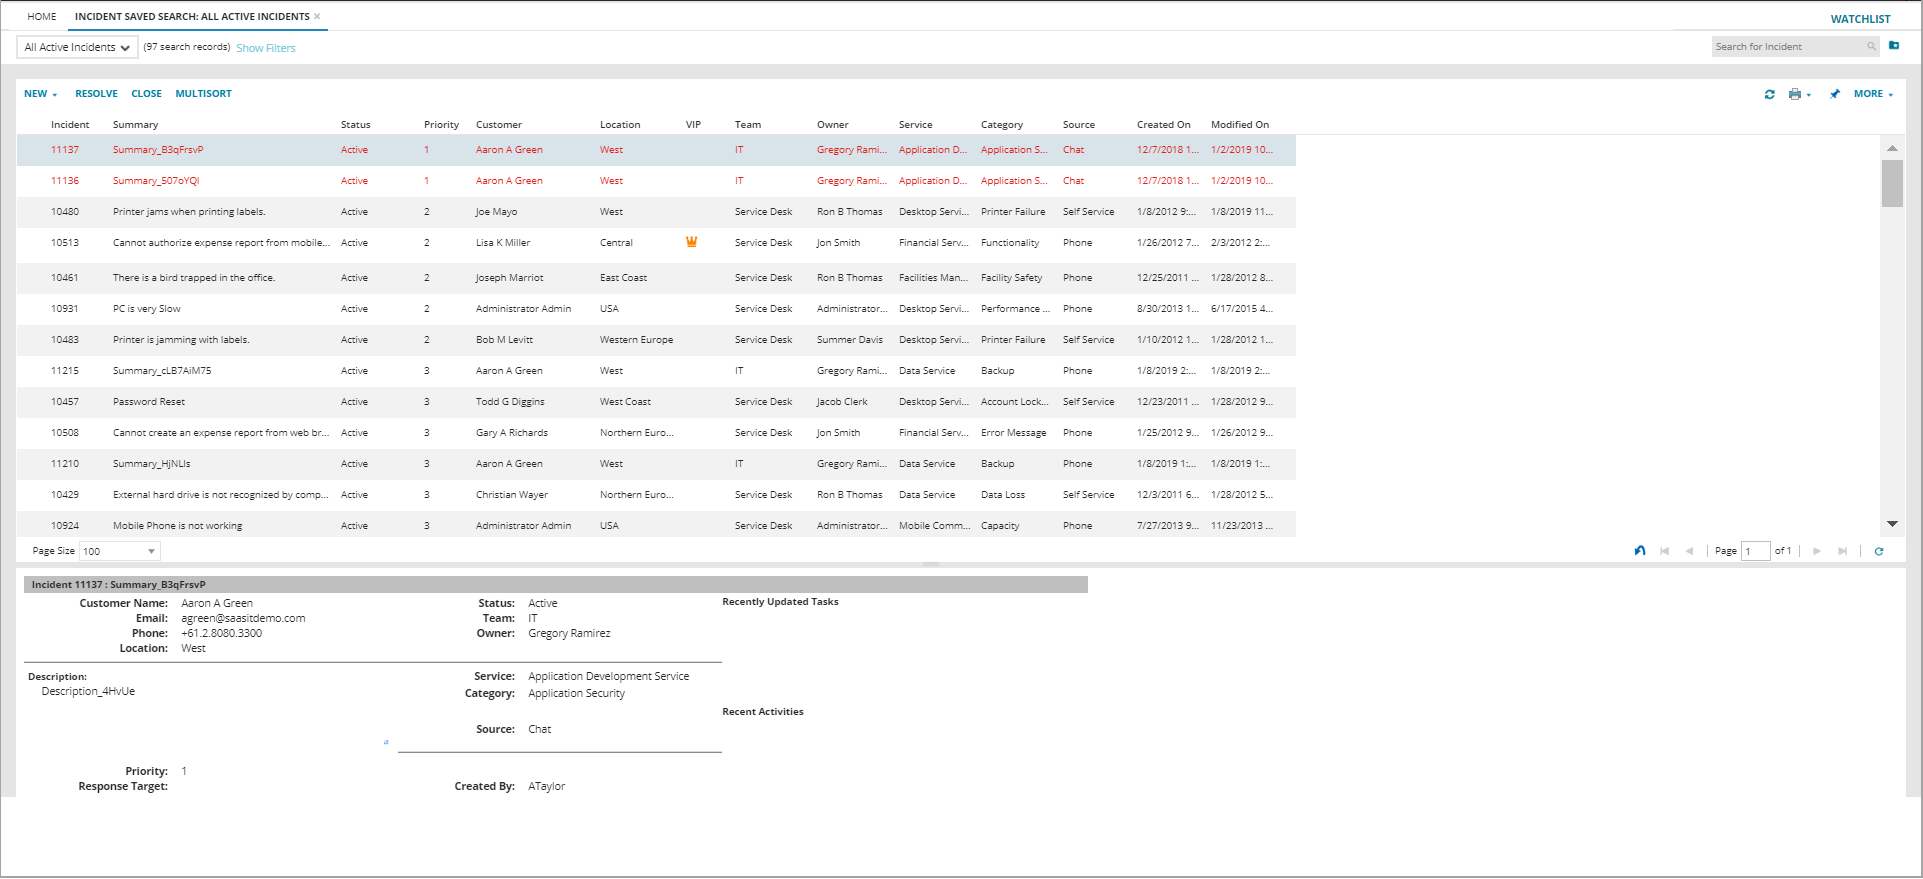
2.Open the Incident workspace.
The list of incidents is displayed.
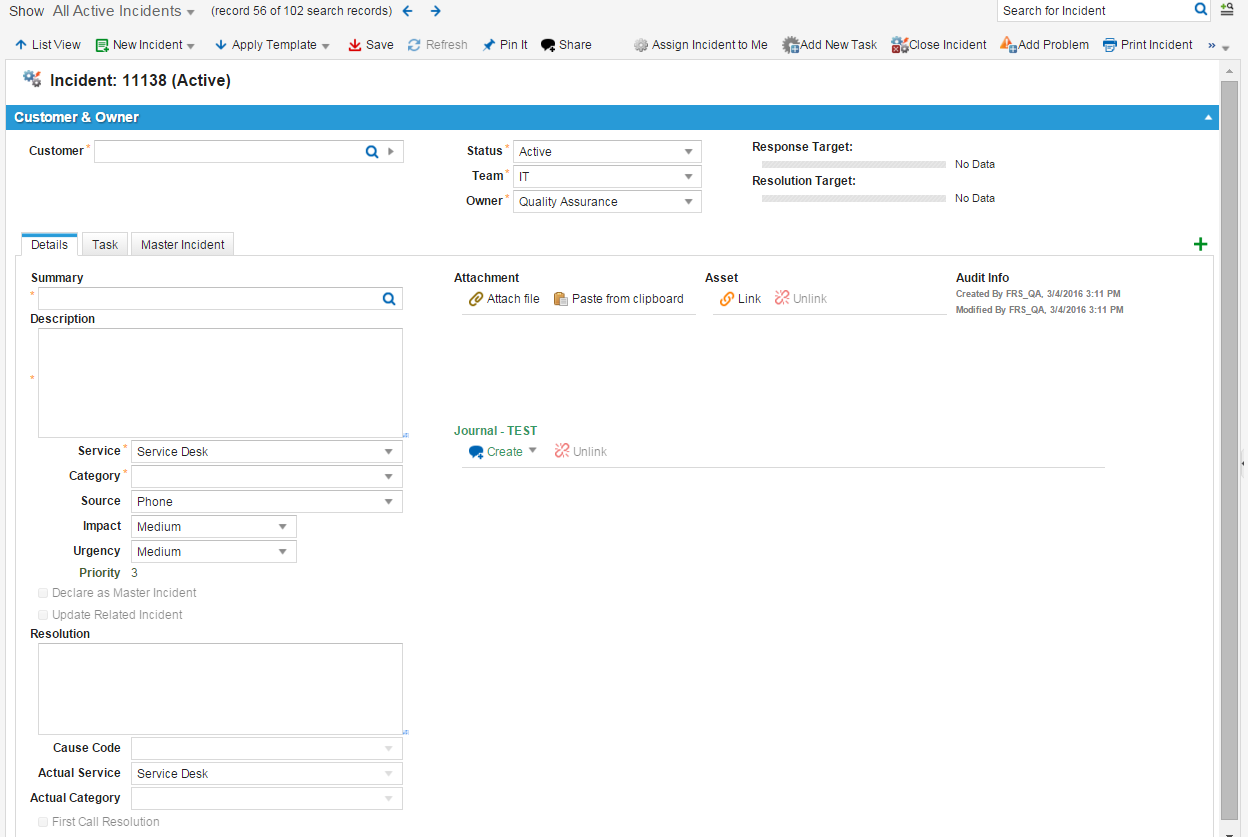
Incident Workspace
3.Open an incident to view its details.
Incident Details
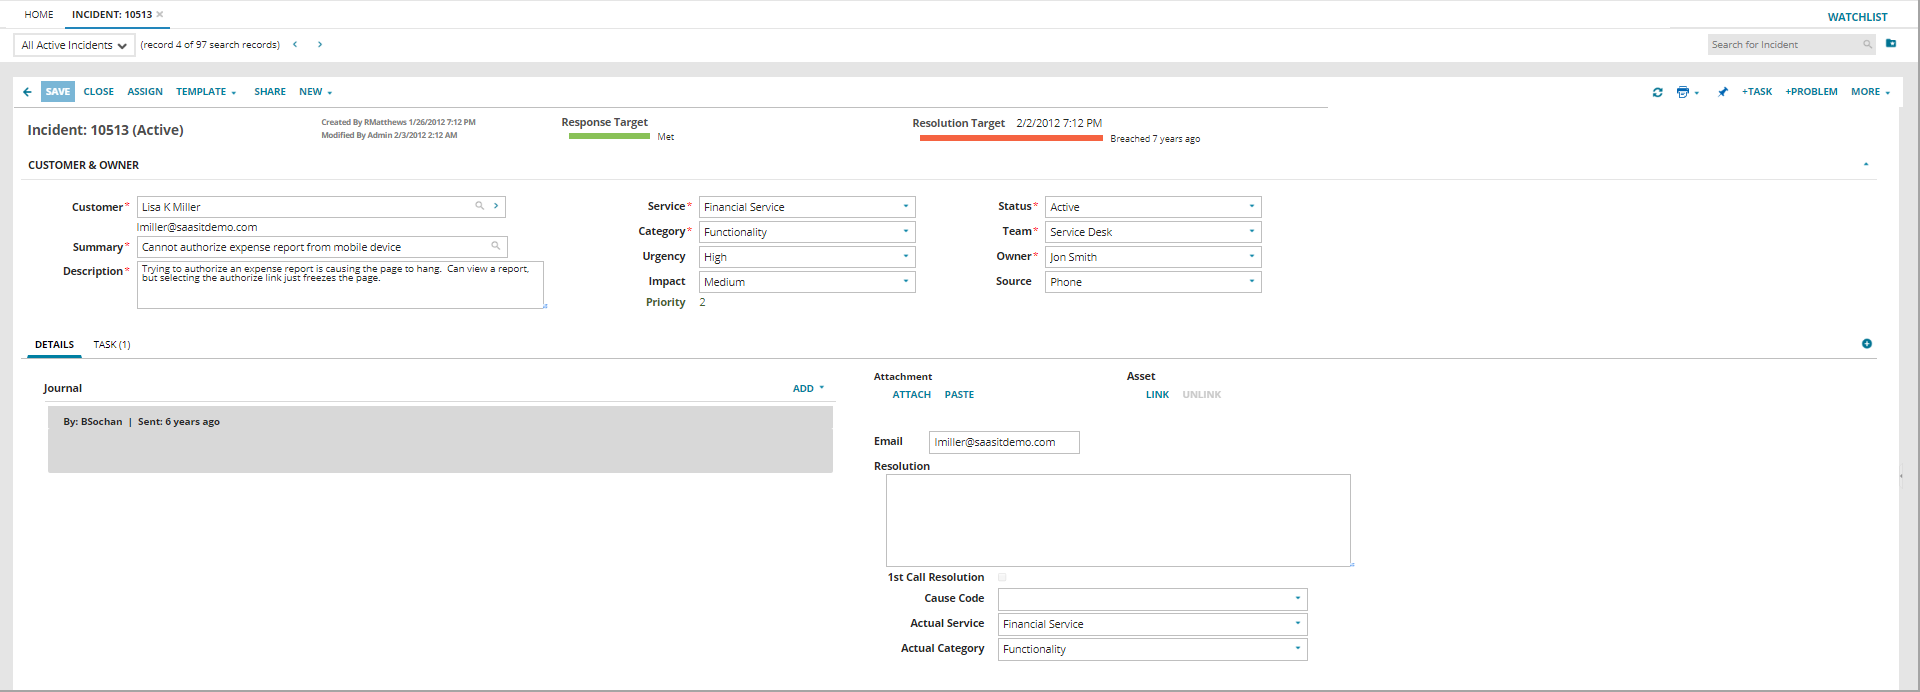
The system displays the following fields:
Do not enter the chevron character "<" in any of the field. The system considers it as the start of an HTML tag and removes any content that follows during rendering.
| Field | Description |
|---|---|
|
Customer |
Name of the person who submitted the incident. The system automatically adds email, phone number, and location. |
|
Summary |
Brief summary of the incident. Click the search icon |
|
Description |
The description of the incident with relevant details. You must include HTTP:// or HTTPS:// when entering a URL in this field. |
|
Service |
The affected service that is impacted. |
|
Category |
The category. |
|
Urgency |
Specifies the time appropriateness required. The default value is 3. |
|
Impact |
Specifies the impact to the organization, group, or individual. The default value is 3. Impact and urgency together define the priority value: High: Has a major impact on the organization. Medium: Has some effect on the organization but generally not considered a large effect. Low: Does not have much effect on the organization. |
|
Status |
The status of the incident. |
|
Team |
The team to work on the incident. |
|
Owner |
The login ID of the Service Desk Analyst who is assigned to work on this incident. |
|
Source |
Describes how the incident was submitted. |
| Declare as Master Incident |
Specifies if this is a master incident. Refer to Working with Master Incidents. |
| Update Related Incident | (Only shown if you check Declare as Master Incident.) Specifies if the system should update any incidents linked with this master incident with the information in this incident. |
| Resolution | Contains the resolution information. |
| Cause Code |
Contains the root cause of the incident. Choose the desired option from the drop-down list. |
| Actual Service |
The application automatically fills in the value for this field, although you can change it if you need to. |
| Actual Category |
The application automatically fills in the value for this field, although you can change it if you need to. |
| Attachment | Contains attachments. Refer to Working With Attachments and URLs. |
| Asset | Contains links to other business object (such as a configuration item) to this record. Refer to Linking Incidents. |
| Audit Info | Lists the date and time when the incident was created and the date and time when it was last modified. |
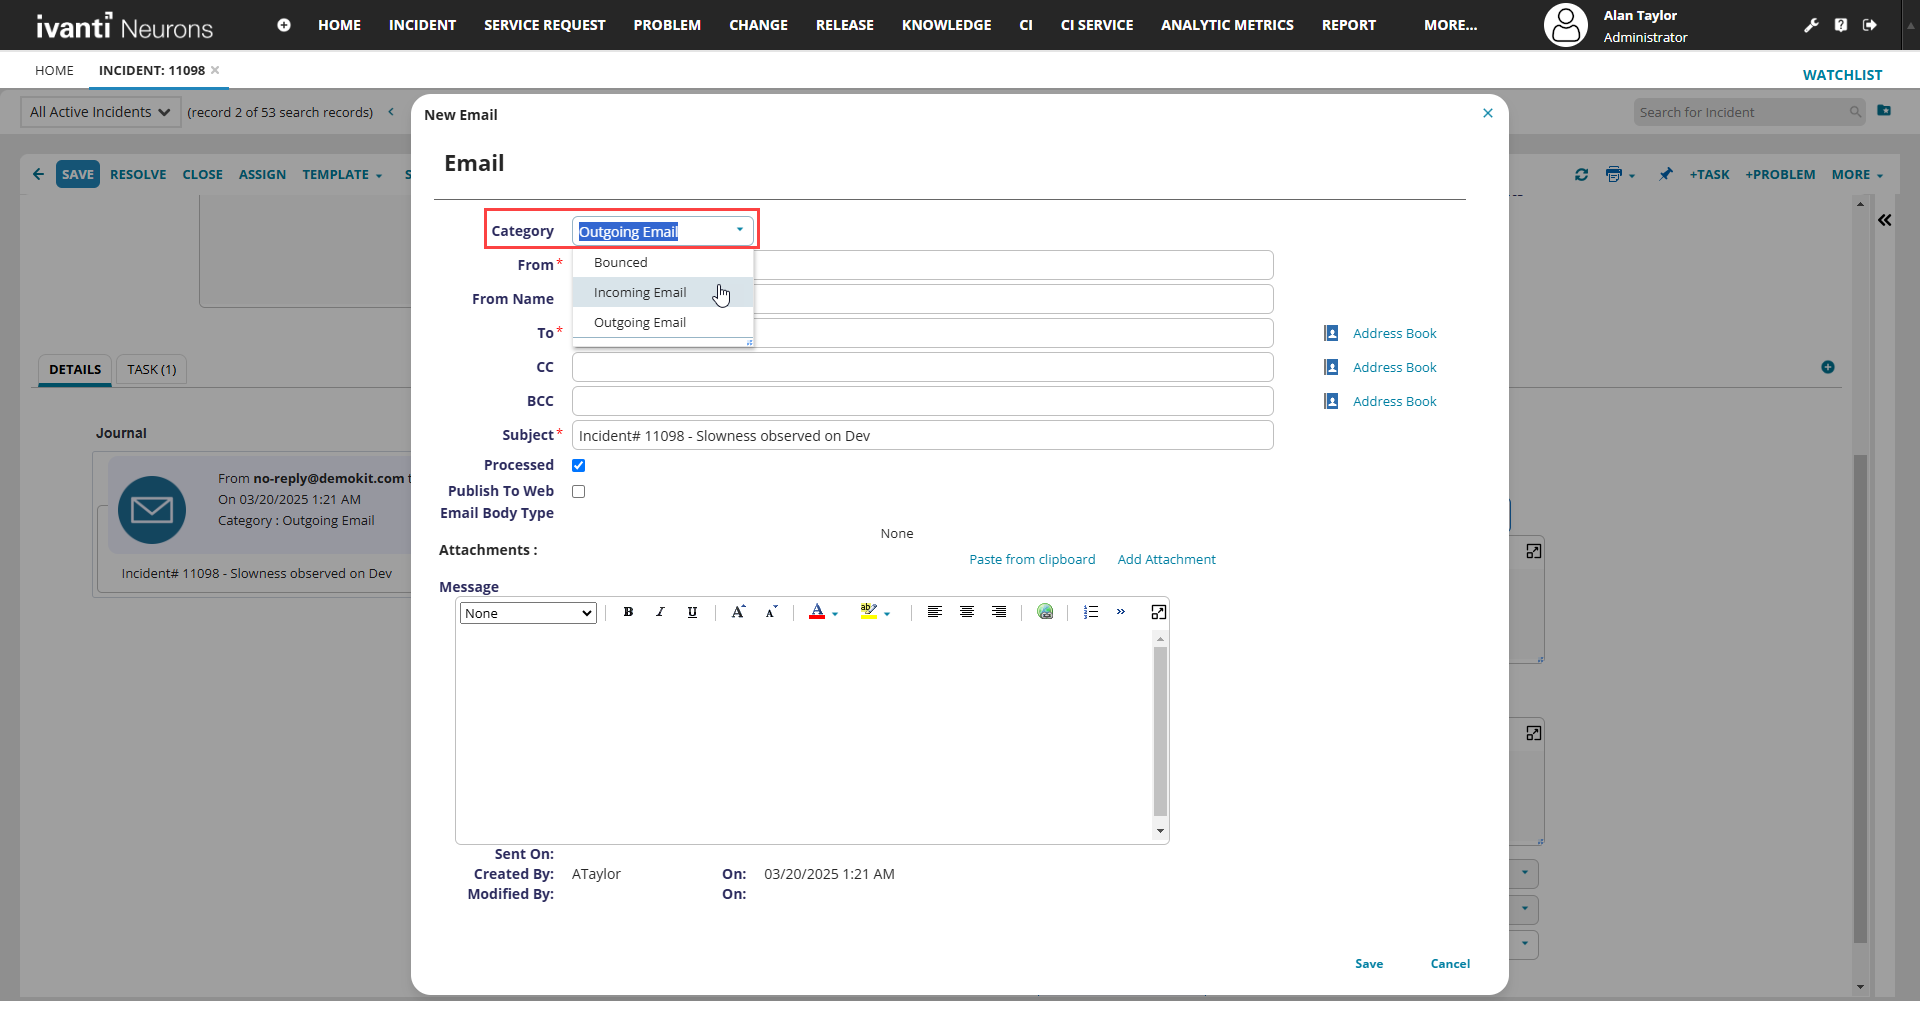
| Journal |
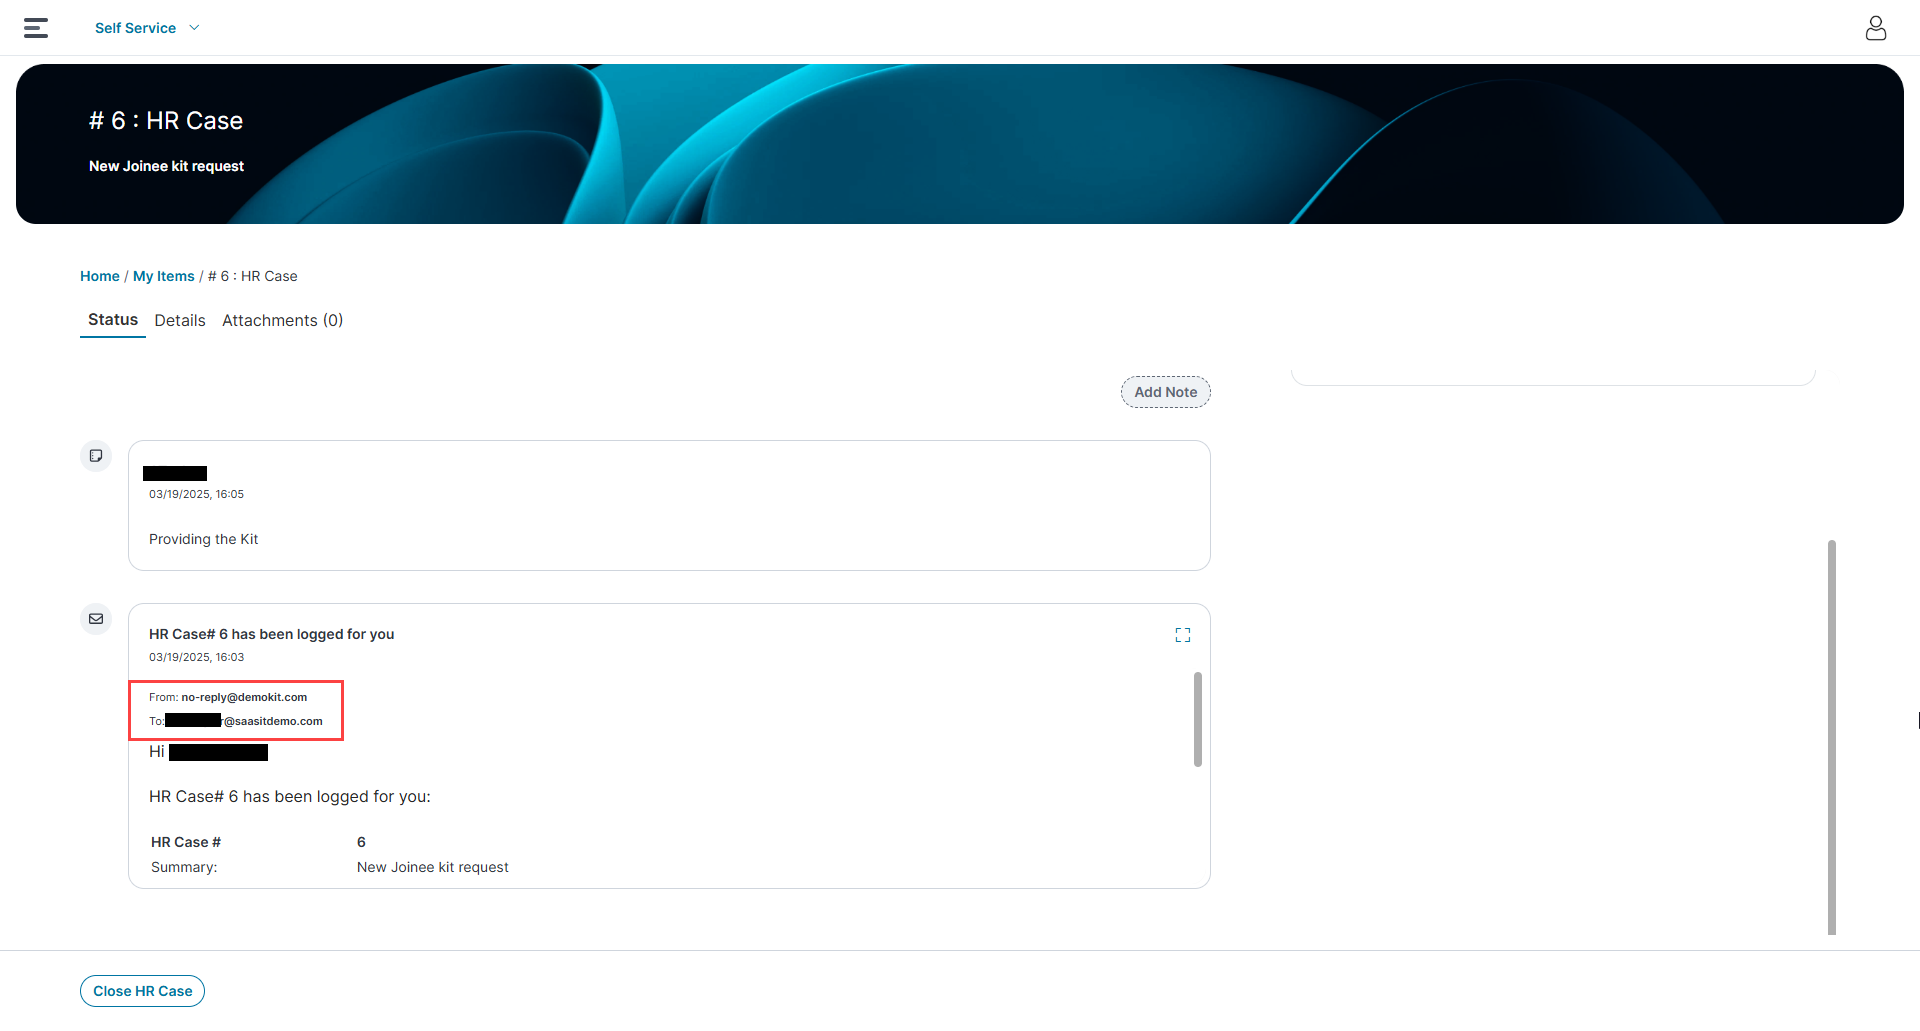
Contains comments or notes about this incident. Refer to Adding a Journal Entry to a Business Object. Within Journal you can also configure the incoming and outgoing emails for the particular incident. 1.Select Add > Email.
2.Select Outgoing Email or Incoming Email from the Category dropdown and define the email IDs as per your preference.
The email IDs mentioned here also shows up in the Self Service portal.
|
 to find related incidents, problems, and Knowledge Base articles. The application displays a list of related items under
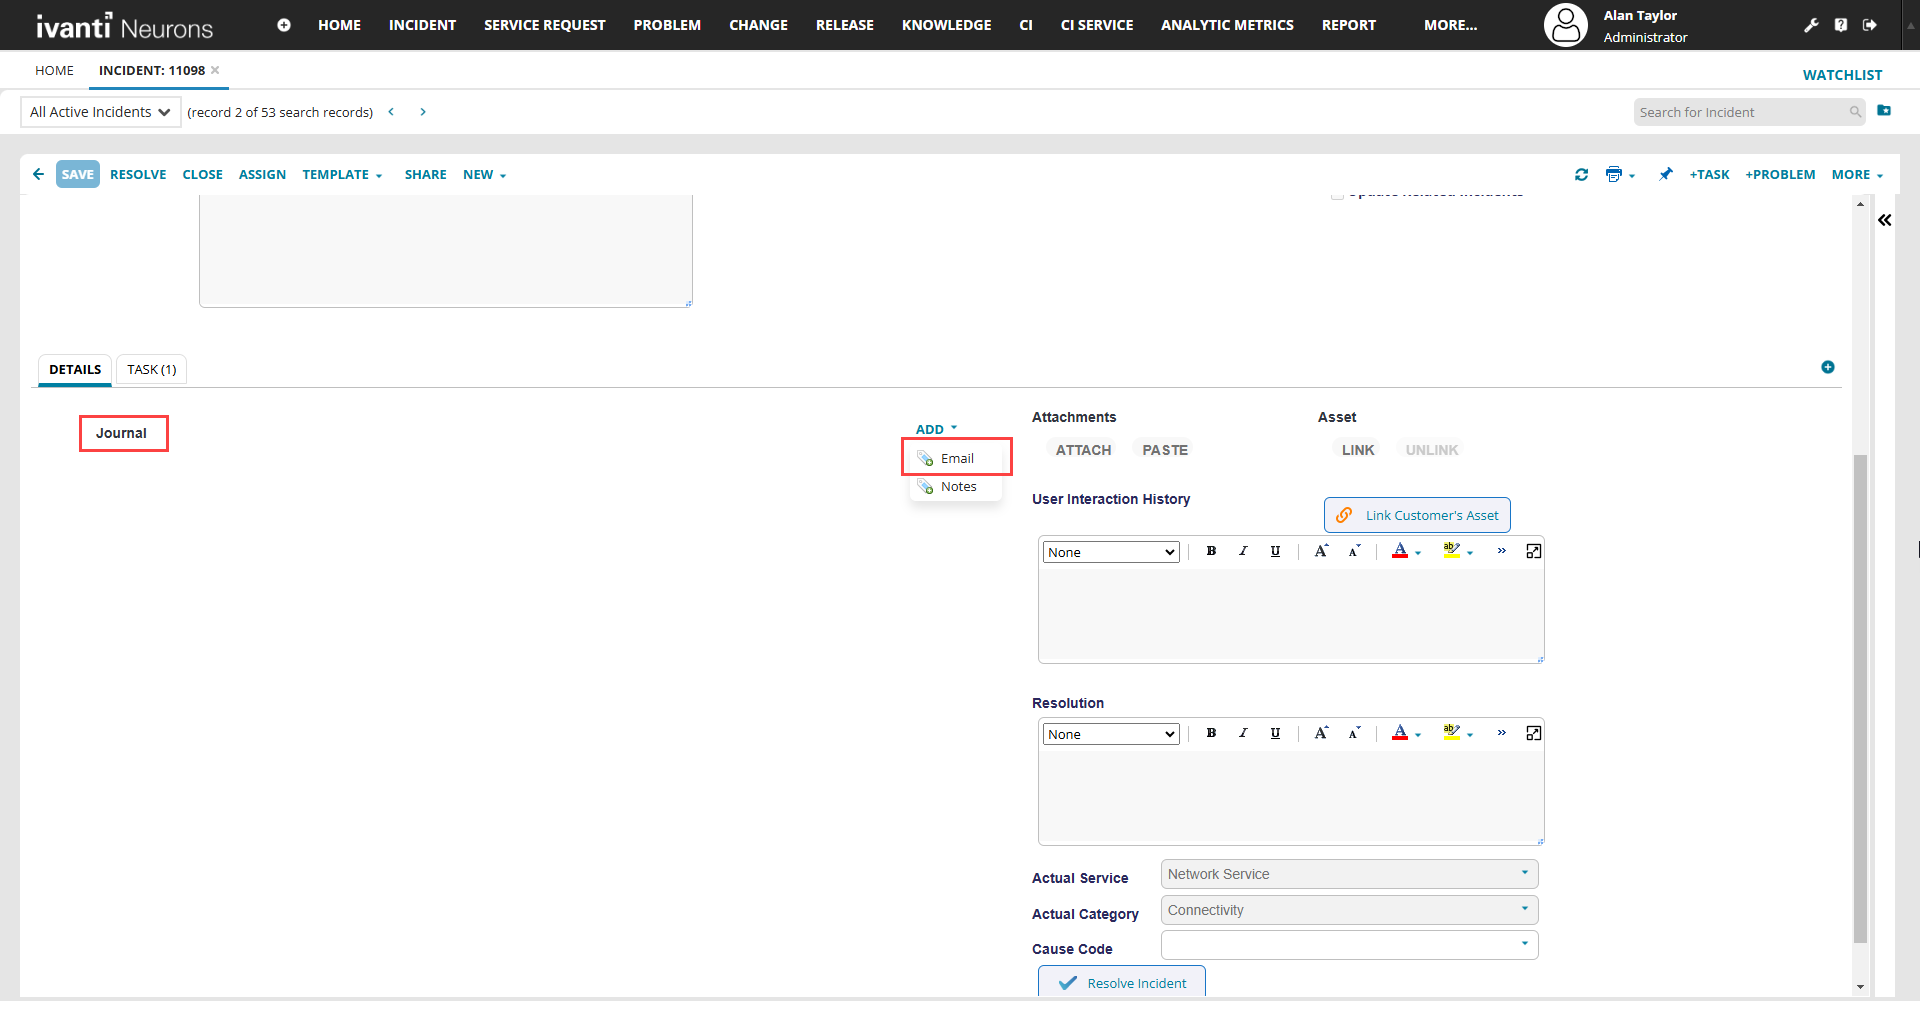
The system displays the following additional tabs. Refer to each tab for more information:
•Task
•About Creating a Configuration Item
You can modify incident values or update the incident to reflect status changes. The fields you can edit depend on your role and permissions.
1.Log into the Service Desk console.
2.Open the Incident workspace and open an incident to modify.
3.Change the information as required.
4.Click Save.