AppServer Advanced Configuration
You can configure the following settings on the Advanced Configuration AppServer tab for the voice server.
Inbound Lines Limit Option
You have the option to set a limit on the number of simultaneous inbound calls the voice server can accept. Incoming calls beyond the limit you specify receive a busy signal.
This functionality is useful if you want to reserve a number of lines for outbound calls. For example, if you have fifteen lines, you could reserve ten lines for inbound calls and five for outbound calls. If all fifteen lines are available for simultaneous inbound calls, there may be instances when outbound calls are not possible.
To set a limit on inbound calls:
1.On the Management Portal menu window, click System Configuration > Voice Server > Advanced Configuration. The Voice Server Advanced Configuration page opens.
2.Click the AppServer tab.
3.In the Number of Inbound Lines field in the AppServer table, specify the maximum number of simultaneous inbound calls you want the voice server to accept.
4.Click the Update and Commit Changes buttons to enact your changes.
Web Service Port and Concurrent Requests
•Web service TCP port - This port is for use by the Ivanti Voice Web Service. The default value is 2323. If you change the default value, you will need to restart the Voice Server (using the Management Console) to apply the change.
•Maximum number of concurrent Web Service requests - The maximum number of concurrent applications which can be initiated by the Ivanti Voice Web Service. The default is -1, which indicates unlimited requests.
The Click2Talk webservice is hosted on IIS as an asmx web service. The URL for accessing the webservice is https://<Voice Machine domain name/IP Address>/Voice/C2TWebService.asmx
You must install IIS and a site binding must be created in IIS for the Voice application with a valid SSL Certificate to access the webservice through HTTPS.
Follow the below steps to apply the new configuration:
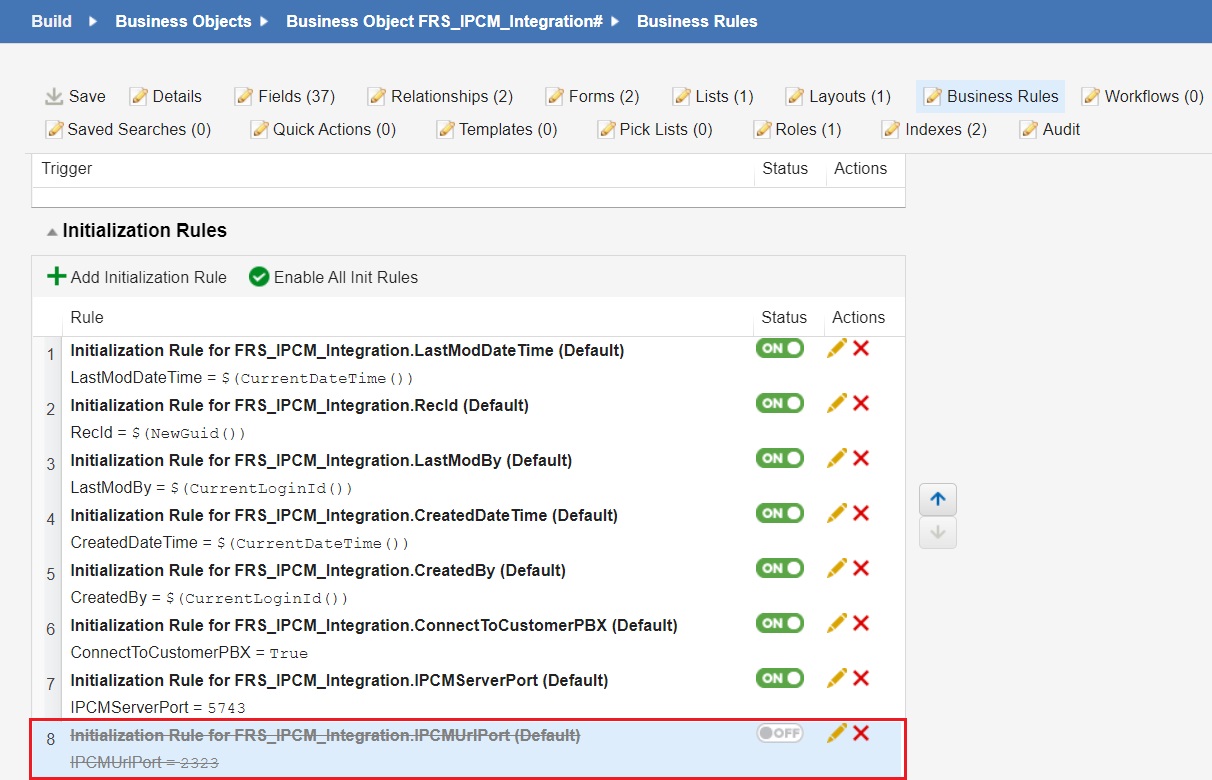
The following business rules must be disabled under FRS_IPCM_integration Business Object in Ivanti Service Manager SaaS Integration to configure the asmx Webservice URL.
Initialization Rules Changes
Change the status to OFF for FRS_IPCM_Integration.IPCMUrlPort(Default) IPCMUrlPort = 2323 as shown below.
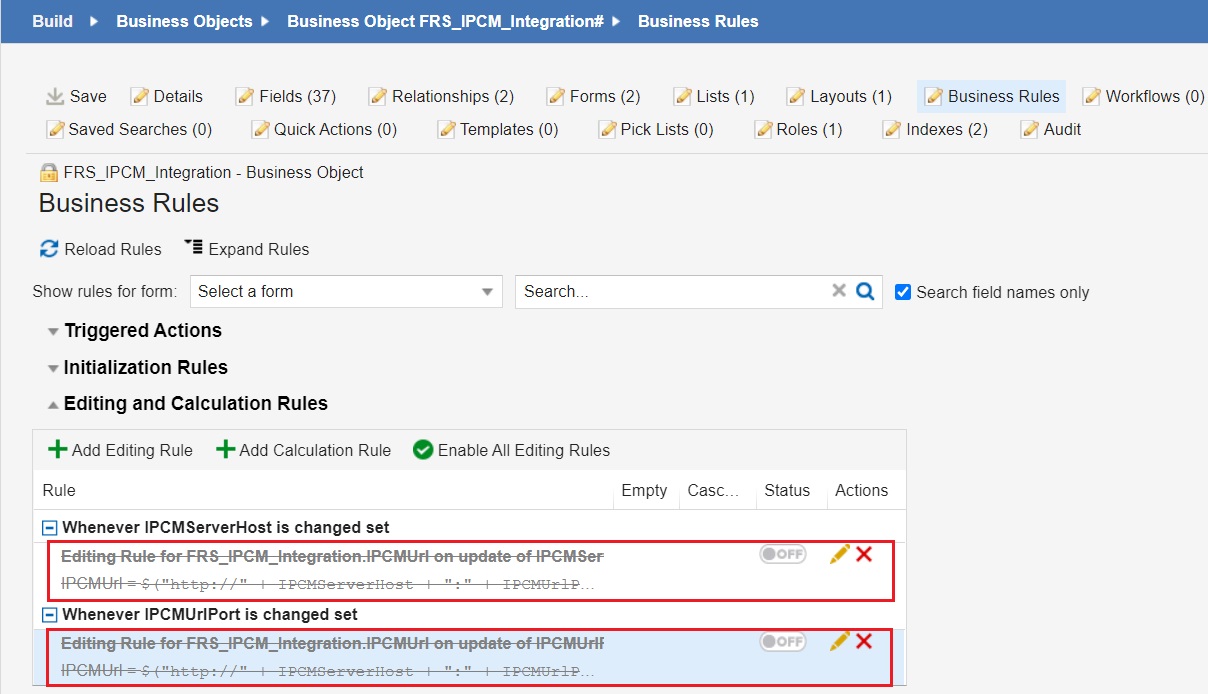
Editing and Calculation Rules Changes
Change the status to OFF for the following rules.
•Whenever IPCMServerHost is changed set IPCMUrl = @(“http://” + IPCMServerHost + “:” + IPCMUrlPort)
•Whenever IPCMUrlPort is changed set IPCMUrl = @(“http:/” + IPCMServerHost + “:” + IPCMUrlPort)
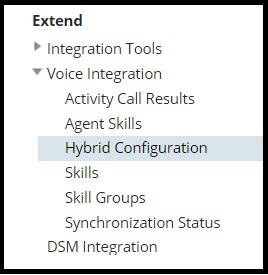
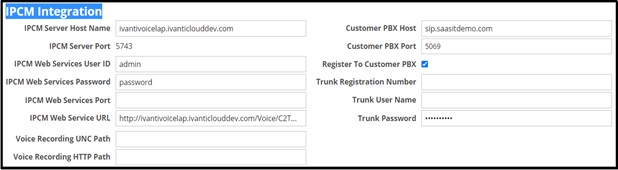
Change the IPCM Integration configuration in Hybrid Configuration of Voice Integration in AdminUI as shown below:
Configuration Examples:
Voice Machine Domain Name: ivantivoicelap.ivanticlouddev.com
IPCM Server Host Name : ivantivoicelap.ivanticlouddev.com
IPCM Web Services Port : Leave empty
IPCM Web Service URL : http://ivantivoicelap.ivanticlouddev.com/Voice/C2TWebService.asmx
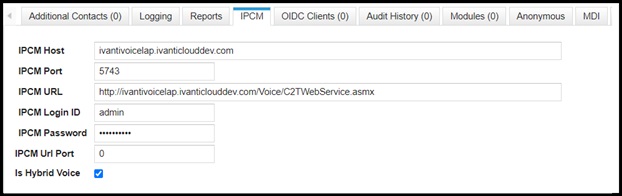
Modify the configuration in Tenant as shown below:
IPCM Host: ivantivoicelap.ivanticlouddev.com
IPCM URL : http://ivantivoicelap.ivanticlouddev.com/Voice/C2TWebService.asmx
Application File Locations
•AppBuilder Applications - The location of voice application files for applications created in Application Builder. The default is C:\Program Files\Ivanti, Inc.\IP Communications Management\Applications (refer to Voice Application Design for more information about voice applications and Application Builder).
Common Data Speaker (CDS) Settings
A Common Data Speaker (CDS) is language-specific voice functionality that uses special prompt vocabularies and executable grammar modules to play data such as numerals, dates, times, and money amounts. Ivanti Voice includes a default CDS for American English, as well as a Russian CDS and British English CDS.
The CDS functionality cannot play ordinals with more than ten digits, nor numbers with more than fifteen digits.
The default CDS settings are suitable for most Ivanti Voice deployments; however, you can specify the voice you want the Common Data Speaker to use.
To Specify the Common Data Speaker:
1.On the Management Portal menu window, click System Configuration > Voice Server > Advanced Configuration. The Voice Server Advanced Configuration page opens.
2.Click the AppServer tab.
3.In the CDSSpeaker drop-down list, select the default voice for the Common Data Speaker.
4.Click the Update and Commit Changes buttons to enact your changes.
Default Language Setting
Specify the default language you want the Common Data Speaker (CDS) and Text-to-Speech (TTS) engine to use when the voice application does not specify a language.
To Set the Default Language:
1.On the Management Portal menu window, click System Configuration > Voice Server > Advanced Configuration. The Voice Server Advanced Configuration page opens.
2.Click the AppServer tab.
3.In the Language drop-down list, select the default language you want the CDS and TTS engine to use.
4.Click the Update and Commit Changes buttons to enact your changes.
Text-to-Speech (TTS) Voice Specification
Install at least one TTS engine for each language in which you want Ivanti Voice to generate dynamic prompts (refer to Prompts). Ivanti Voice switches TTS engines automatically if a situation occurs in which one TTS engine does not provide the necessary functionality. For example, if you have a TTS engine that does not support Russian and another TTS engine that does, Ivanti Voice switches to the TTS engine that supports Russian if Ivanti Voice needs to generate a Russian prompt.
You can install TTS engines before and after installing Ivanti Voice. If you install more than one TTS engine for one language, set one as the default.
To Set One TTS Engine as a Default for that Language:
1.On the Management Portal menu window, click System Configuration > Voice Server > Advanced Configuration. The Voice Server Advanced Configuration page opens.
2.Click the AppServer tab.
3.In the TTSSpeaker drop-down list, select the voice for the TTS engine to use as the default.
- The options in the TTSSpeaker drop-down list depend on the TTS engines installed and listed in the Windows Speech Properties dialog box: on the Text to Speech tab, you can specify the desired Voice selection option. Then, in Ivanti Voice, select the Use System Voice Selection option in the TTSSpeaker drop-down list to utilize the Windows setting.
- If you install a TTS engine after installing Ivanti Voice, you must restart the voice server for the TTS engine to appear as an option in the TTSSpeaker drop-down list.
4.Click the Update and Commit Changes buttons to enact your changes.
5.Launch the Management Console and restart the voice server:
- Right-click the Voice Server icon and select Stop Application. The icon turns red, indicating the server has stopped.
- Right-click the Voice Server icon and select Start Application. The icon turns green, indicating the server is running.