Adding a Metric
When you add a metric to the list, you can also configure one or more of the following:
•Threshold - You can set a value that triggers a threshold indicator for this metric, which you can format when creating a view part.
•Target - You can set a value that indicates a goal or objective for this metric. When creating the view part, you can then apply a style (Target Style on the View Parts General tab) to highlight the target data.
To Add a Metric:
- Open the category in which you want to add a metric.
- In the drop-down field at the bottom of the list, select the desired statistic and click Add. If you enable the Virtual check box, that allows you to create a custom metric.
- Reopen the category to see the statistic has been added to the list. To configure the new metric, click the link in the Title column. Three tabs appear: Metric Properties, Metric Thresholds, and Metric Targets.
- On the Metric Properties tab:
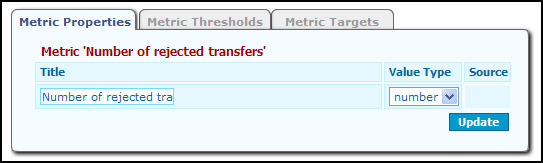
- Type a title for this metric. This title only appears in the Web Statistics configuration pages in the Management Portal.
- Select a Value Type: number, text, percent, time, image, or title.
The Source field is currently used only for delivered metrics and identifies where the data comes from: Attr (Attribute) indicates and object attribute from the Statistics and Metrics Engine and Eval (Evaluated) indicates data that is dynamically generated.
- Click the Update and Commit Changes buttons.
- On the Metric Thresholds tab:
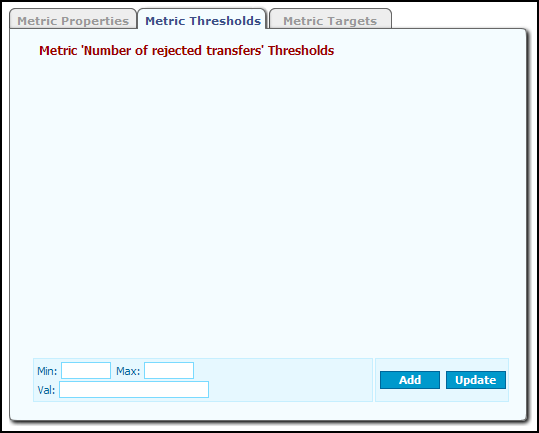
- Use any of the following fields to set the value that triggers the threshold indicator.
- Min - The threshold indicator activates when the statistic is less than this value.
- Max - The threshold indicator activates when the statistic is greater than this value.
- Value - The threshold indicator activates when the statistic is equals this value
- Click the Add button. The threshold is added to the table along with a Title field.
- Type a Threshold Title. This title displays only in the Web Statistics configuration pages of the Management Portal.
Click the red x icon to delete a threshold value.
- Repeat steps 5a through 5c to add more Thresholds as needed.
- Click the Update and Commit Changes buttons.
- On the Metric Targets tab:

- Use the following fields to configure the metric target value:
- Direction - Indicates the direction of progress toward the target (Up or Down).
- Value - Indicates the achievement value of the target.
- Title - This title displays only in the Web Statistics configuration pages of the Management Portal
- Click the Add button. The target displays in the table
- To configure different targets for specific users and/or groups, click the Target1 link. The Edit Target window opens.

- At the bottom of the window, select the Person or Group and type the target value for that person or group.
- Click the Add button. The target for that person or group is added to the table.
- Configure targets for other users or groups as needed.
- When finished, click the Close button.
- Repeat steps 6a through 6g to add more Targets as needed.
- Click the Update and Commit Changes buttons.
To Delete a Metric:
- Select the check box next to the metric and click Remove.
- Click the Commit Changes button to enact the change.
To Create a Custom Metric:
- Click the Virtual check box in the desired category, and click Add (a random ID number is assigned to the metric until you type a new title on the Metric Properties tab).
- You can then click the Title link to configure the metric.