Entra ID Authentication (OIDC)
Ivanti Neurons currently offer the option of selecting Entra ID as the external authentication provider for your tenant. This is a good choice if you want to centralize the end user log on experience, reduce the occurrence of password related calls to the help desk, and have granular controls over policies and audit trails.
To use Entra ID all members must accept the request for Ivanti to access their basic Azure profile data.
Auto provisioning for users and groups is now managed through SCIM Provisioning. To configure SCIM Provisioning, refer to SCIM Provisioning - Entra ID.
If you have already set up auto provisioning without SCIM, the existing setup will work as expected. You can continue to edit the default access control roles and disable auto provisioning.
Disabling auto-provisioning will not affect members already provisioned. Once disabled, Once disabled, you must set up auto-provisioning using SCIM Provisioning.
Configure & Enable External Authentication
 Step 1- Configure & Enable External Authentication (Ivanti Neurons Platform)
- In Ivanti Neurons Platform navigate to Admin > Authentication.
The Authentication page appears. - In the External Authentication (SSO) section, click Configure & Enable.
The Enable External Authentication (SSO) page appears. - From the Provider drop-down select Entra ID.
The Entra ID Configuration Settings appear.
Before you can continue with the Ivanti Neurons configuration you must first carry out some steps in Microsoft Azure Portal.
Step 2 - Entra ID Setup (Microsoft Azure Portal)
Before you can continue with the Ivanti Neurons configuration you must first carry out the following steps in Microsoft Azure Portal.
Step A - Create your Entra ID application
- Login to Entra ID Admin Center as Office 365 Administrator.
- In the sidebar menu click Entra ID > App registrations.
The App registrations dashboard appears. - Click New registration.
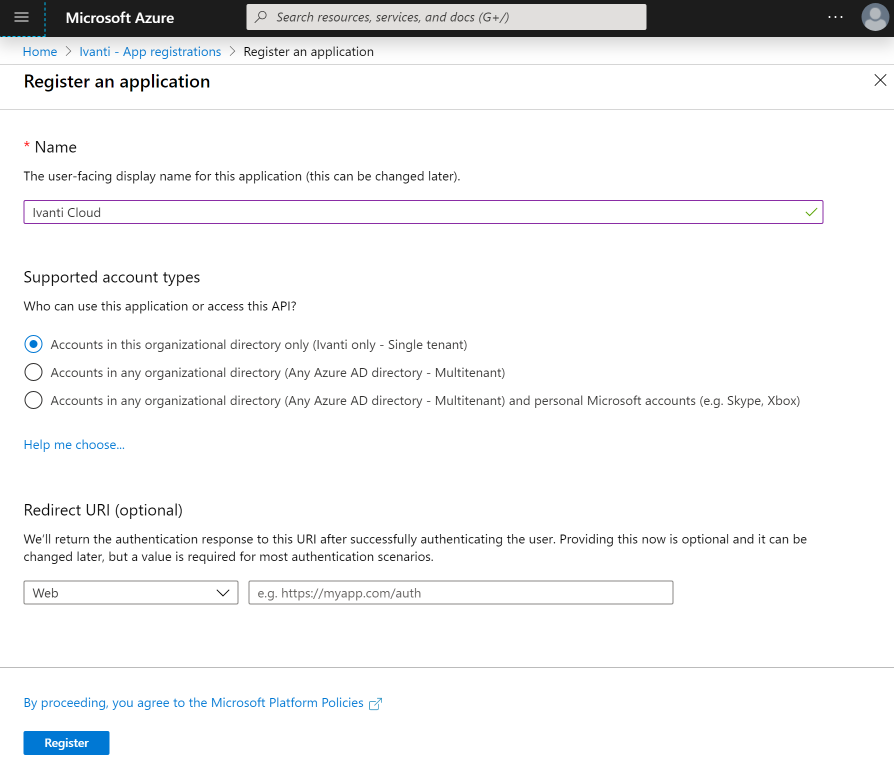
- Enter an appropriate name for the application, and accept the default supported account types: Accounts in this organizational directory only.
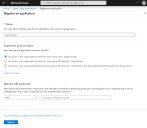
- Under Redirect URI section, select Web from the Select a platform drop-down. Enter the Redirect Uri, as displayed in the Neurons Platform Entra ID Configuration Settings.
- Click Register at the bottom of the dialog.
- Once the app registration is complete, a success message is displayed and redirected to the overview page of the registered application.
You need to record the application (client) ID and Directory (tenant) ID as it is required for the next stage of the setup in Ivanti Neurons.
Step B - Configure Authentication Settings
- On the created app, navigate to Manage > Authentication (preview).
- Navigate to Settings.
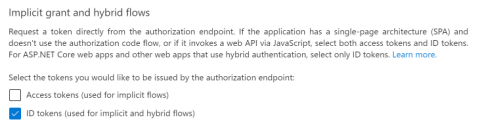
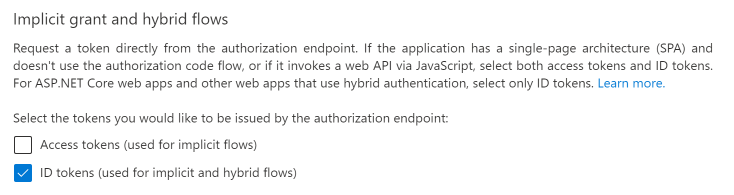
- In the Implicit grant and hybrid flows section, make sure the ID tokens check box is selected.
- Enter the Logout Url in the Front-channel logout URL field, as displayed in the Neurons Platform Entra ID Configuration Settings.
- Click Save.
Step C - Create a Secret
- On the created app, navigate to Manage > Certificates & secrets.
- Under the Client secrets tab, click New client secret.
- Add a description.
- Select the expiry duration in-line with your company standards.
- Click Add.
- A value is created, you must copy it somewhere safe because this is the only time it can be viewed.
Make sure you copy the Secret Value and not the Secret ID.
Entra ID setup is now complete and you can return to Ivanti Neurons Platform.
The Secret lifetime is finite, so your company should take measures to ensure this is replaced prior to expiry to avoid any outages to Ivanti Neurons. Learn how to Update Client Secret.
Step D - Token Configuration
Set up token configuration so you can use auto provisioning.
- On the created app, navigate to Manage > Token configuration.
- Select Add Optional Claim to open the side panel.
- For the Token type, select ID.
- From the Claims list, select email, family_name and given_name. This allows the email, last name, and first name, to be obtained for new Ivanti Neurons members, which is a requirement when using auto provisioning.
- Click Add.
A Microsoft Graph permissions pop up appears. - On the Microsoft Graph permissions pop up, select the checkbox and click Add.
Step E - Grant Permissions
If the user setting up SSO is not an Azure administrator, then the Azure administrator needs to log in to Azure and approve the Apps request for User-read/Signin permissions.
- Select Manage > API permissions for the EntraID application. You must be logged in as an Azure administrator.
-
If the checkbox was selected during Token Configuration, few permissions including User.Read would have already been added to Microsoft Graph as Delegated permissions.
- If User.Read is not listed as a delegated permission, you need to add the permission. To do this:
- Select Add a permission.
- Select Microsoft Graph > Delegated permissions.
- Select the User.Read permission.
- Select Grant Admin Consent for <entraid_tenant>.
Step 3 - Entra ID Configuration Settings (Ivanti Neurons Platform)
Once you have created the Entra ID application (client), directory (tenant), and secret, you can continue with the Ivanti Neurons Platform configuration.
-
Return to the Entra ID Configuration Settings page (Ivanti Neurons Platform > Authentication > External Authentication (SSO) > Configure and Enable.
- Enter the Directory (Tenant) ID from Entra ID app registration.
- Enter the Application (Client) ID from Entra ID app registration.
- Enter the Client secret value that was generated and saved.
- Enter the Client secret expiry date, this should match the expiry date specified when creating the client secret. See Update Client Secret for further details.
- Click Continue to display the Validate Connection Settings page.
Step 4 - Validate Connection Settings (Ivanti Neurons Platform)
You need to connect with your Entra ID credentials to validate your connection settings.
- On the Validate Connection Settings page, click Validate Settings to access your organization's sign-in page via a new tab, enter your Entra ID credentials and proceed to sign-in. If you are already signed in credentials are not required and the validation takes place automatically, so make sure you are signed in to the account you want to authenticate.
You will receive a confirmation screen if login is successful. - Return to this tab (Validate Connection Settings).
- Select the check box I confirm I have successfully validated my connection settings to confirm you have logged in successfully.
- Click Continue to move on to convert Ivanti Neurons Platform accounts.
The Enable Ivanti Neurons Platform accounts page appears.
The Azure username must exactly match your Ivanti Neurons username.
Validation Troubleshooting
- E2018 Authentication failed: User failed to authenticate with Entra ID. Check the username and password are correct and that the user has permissions on the Entra ID Application Registration.
- E2019 Missing optional claims: Validation step failed because the additional optional claims were not present in the token returned to Ivanti Neurons Platform from Entra ID.
- E2020 Unable to link to Neurons Platform user account: The Entra ID user login, does not match with the Ivanti Neurons Platform user. The Ivanti Neurons Platform user account email address must match the email address used to login into Entra ID.
Step 5 - Enable Ivanti Neurons Platform accounts (Ivanti Neurons Platform)
Entra ID is now configured, but it is not enabled.
To enable, you need to convert your Ivanti Neurons Platform accounts to use Entra ID instead.
- On the Enable Ivanti Neurons Platform accounts page, click Sign Out & Enable.
The Ivanti Neurons Sign In page appears. - Select to Sign In with Entra ID and enter your Entra ID credentials, the conversion will then be complete.
The same user must configure Entra ID authentication and Sign in and validate the credentials in Ivanti Neurons, to avoid an Access Denied error.
All members will receive an email to confirm the account has been converted and that they must access the tenant with Entra ID credentials going forward. If the member does not have Entra ID credentials, they will not be able to access Ivanti Neurons.
External Authentication (SSO) will now display with an Enabled status.
Update Client Secret
If the Entra ID client secret is due to expire, you need to set a new one to continue using this authentication method.
- In Ivanti Neurons Platform navigate to Setup > Authentication.
-
Click Actions and select Update client secret.
The Update Client Secret page appears. - Enter the new Client Secret from your Entra ID application.
-
Enter the date to receive a reminder of when the client secret is due to expire.
A reminder banner will display in the UI and an email reminder will be sent to users with the Admin role, 28 days before expiry. Further reminder emails will be sent 7 days before and a day before expiry.
If the client secret is allowed to expire and a new one is not set, access to the service will be interrupted and you will need to contact Ivanti Support to regain access. -
Click Continue.
The Validate Client Secret page appears. - Click Validate Client Secret, this opens your Entra ID sign in page.
Enter your username and password, this will be the same as the sign-in credentials for the Ivanti Neurons Platform. When you sign-in the new client secret is validated. If successful, return to this wizard and continue to update the client secret. If it is unsuccessful, go back and check if the new client secret you entered is accurate. For other failure reasons see Validation Troubleshooting - Once you have successfully validated the new client secret, select the confirmation check box I confirm I have successfully validated my new client secret and click Continue.
- Click Save Changes to complete the process. This updates the client secret and the expiry reminder with immediate effect, you are not required to do anything further.