Creating the HTTP Depot and Management Point (DMZ)
When you create a new depot, you can configure it so that it can use HTTP and/or SMB. Make sure to consider the distribution method, i.e. the position of a depot within the network.
The following rule applies: If you use HTTP for a depot, you can only read this depot with HTTP. Refer to Specifying Protocol Settings for Distribution for more information.
The different constellations described below are determining factors for setting up your DMZ environment:
- Installation of depot + Management Point on the same server
The DSMC cannot reach the server during installation (normal case)
First step: How to create a new HTTP depot and Management Point in the DSM infrastructure:
In the wizard, select the option Configure HTTP depot manually from media.
Then select the option Skip execution for the Management Point.
Second step: How to configure a new HTTP depot via .bat file:
- Installation of depot + Management Point on the same server
The DSMC can reach the server during installation
First step: Ensure that the server requirements are met and the firewall is set up.
Second step: How to create a new HTTP depot and Management Point in the DSM infrastructure:
- Installation of depot + Management Point on different servers
The DSMC cannot reach the server during installation
First step: How to create a new HTTP depot and Management Point in the DSM infrastructure:
In the wizard, select the option Configure HTTP depot manually from media.
Then select the option Skip execution for the Management Point.
Second step: How to configure a new HTTP depot via .bat file:
Third step: How to configure a new Management Point on another server via command line:
- Installation of depot + Management Point on different servers
The DSMC is running on the depot during installation (not recommended)
- Installation of depot + Management Point on different servers
The DSMC is running on the MP during installation (not recommended)
How to create a new HTTP depot and Management Point in the DSM infrastructure:
- Select the object in the Infrastructure view where you want to create the DMZ as new site.
- Unlock the ICDB and select Insert > DMZ.
The DMZ Wizard is started. You pass through the different wizard pages where you create a site, a depot and finally the required Management Point.
- Proceed as usual when creating the site.
Make sure that the user accounts you are specifying have the required permissions. - After you have created the site, another wizard starts automatically where you can create the depot in the DMZ site. Make sure that the required depot share already exists and the necessary access permissions have been assigned. See also: Protecting HTTP Depots
Proceed as usual but consider the following measures:- Supported transfer protocols:
Select the transfer protocol you are using for the distribution service and the DSM clients. Configure multiprotocol usage for the HTTP depot (SMB and HTTP).
Example: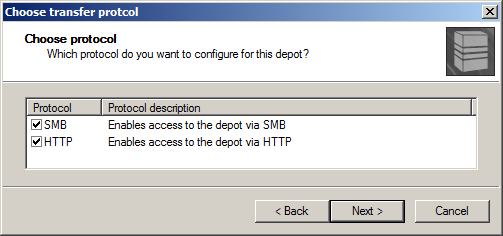
With Management Point installations in the DMZ, the depot must support the SMB protocol (mandatory).
- Primary transfer protocol:
If you are using multiprotocol, select the protocol that will be used initially to write the data to the depot. This protocol is also specified for the respective distribution service and the DSM clients that belong to the site. You can change these settings later in the site's configuration settings.
Example: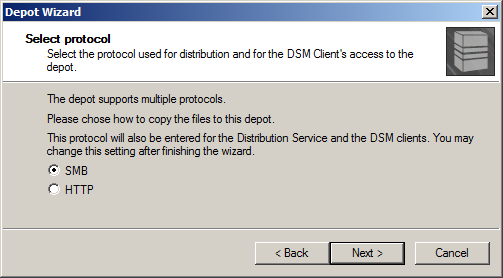
- Installing the web server:
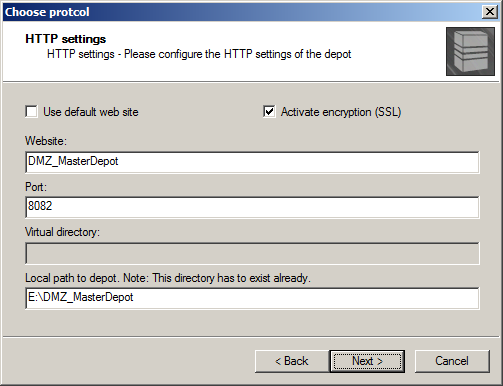
- Select the option Configure HTTP server if you are using an IIS web server. In this case, the next wizard page provides the following options for configuring the web server automatically:
- Use default web site, if you want to use the IIS for distribution. Then you can specify a Virtual directory.
- Activate encryption (SSL)
If you select this option, the IIS must be configured manually as an HTTPS server. Make sure that the matching certificate is provided on the server and configured in the IIS. Also, the certificate must be installed on the DSM clients you want to connect to the depot via HTTPS. - Website and Port provide the name of the web site and the port that are used to connect to the depot.
- Local path to depot is the local path to the server that hosts the HTTP depot. The directory you specify here should already exist on the server.
- Example:
- Select the option Use already configured HTTP server if you want to use a web server with another operating system (e.g. Apache Webserver). Note that you must configure this web server manually. Specify the respective URL (e.g. http://myserver:8086/mydepot). Next, the depot data is copied and after the copy process is finished, the web server configuration is finalized.
Example: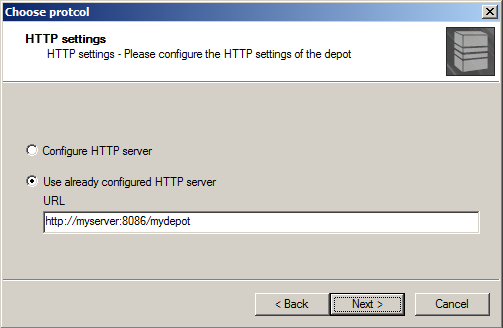
- Select the option Configure HTTP server if you are using an IIS web server. In this case, the next wizard page provides the following options for configuring the web server automatically:
- Firewall of the depot server:
Specify the firewall rules for the server where you are creating the depot. The system uses these rules automatically.
There are the following options:- Create extended Windows Firewall rule
Use this option to create a firewall rule for the specified name and the selected network profile. The network profiles match the ones from the Windows Firewall. - Enable rule
Check this option to enable to rule (if you forget to select this option the rule is created but not enabled).
If there is an active Windows Firewall on the server and the rule is not active, the firewall blocks the communication and the HTTP depot will not work. - Example:
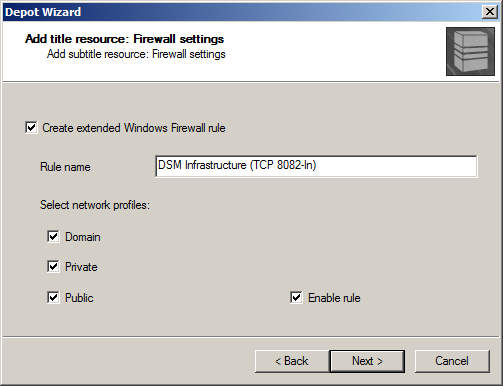
- Create extended Windows Firewall rule
- Depot configuration locally on the depot server (usually required for a depot in the DMZ):
Select the option Configure HTTP depot manually from media and enter the location for the configuration file in batch format.
If you select this option, the Setup Wizard and the configuration settings are stored on an external drive. This drive can be used to configure the HTTP depot directly on the server.
Execute the configuration file locally on the depot server as described below.
Example: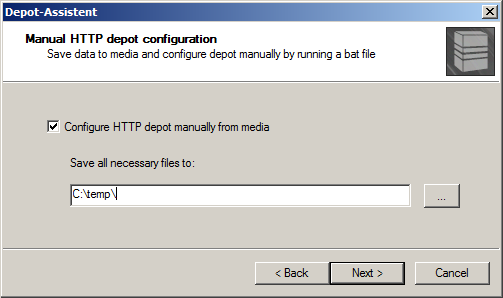
- Completing the Depot Wizard
In the last depot wizard dialog you can select whether the system copies the depot's program files of the depot or whether you copy them manually.
If you select to copy them manually (Don't copy files), delete the associated file Client.ID so that the system is able to assign a valid ID.
- Supported transfer protocols:
- Close the Depot Wizard.
Note: Make sure to specify the clients that will be using the depot via HTTP protocol. To do so, open the HTTP Protocol tab in the depot's Properties dialog.The system installs the depot on the server you specified, copies the required data to their share and configures the depot for distributions with the appropriate transfer protocols. The new site and the depot are displayed in the infrastructure tree.
When you configure the depot manually, the respective batch file is stored in the specified directory.
If this is not the case, the wizard configures the depot automatically. - The wizard to create a Management Point in the DMZ site is automatically started.
Proceed as usual but consider the following measures:- Select the Management Applications you want to install:
Select at least the Relay Proxy application for installation. With this choice, the Transport Layer and the Event Dispatcher are installed along with the Relay Proxy. Please also install a Distribution Service which controls the distribution within the DMZ and ensures efficient unpacking of ZIP files via HTTP protocol. - Check Installation Requirements
The system does not check the installation requirements at this point because you usually cannot access the appropriate server in the DMZ while you are creating a Management Point. The system postpones checking the requirements to step 2 (configuration of the Management Point). - Configure the Transport Layer
The Transport Layer allows the DSM infrastructure components to communicate across different Management Points and firewalls. Make sure that the Management Point in the DMZ communicates with the BLS over Transport Layer connections.
- Select the Management Applications you want to install:
- The Skip execution option is checked by default in the last wizard dialog because the system presumes that you must initiate the installation process manually on the server. You only need the command line displayed for this purpose if you want to install the Management Point on a different computer than the one where the HTTP depot is installed or in case the configuration of the HTTP depot fails regarding the Management Point.
In all other cases, the configuration of the HTTP depot already contains the installation of the Management Point (per batch)!The system creates the Management Point object in the DSM infrastructure.
The actual installation depends on the Skip execution option.
How to configure a new HTTP depot via .bat file:
- Start the batch file for configuration you stored locally on the DMZ depot server earlier (see above).
Example: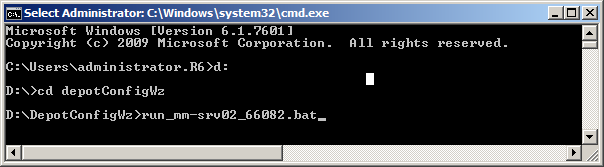
- Check and confirm the settings in the individual configuration wizard dialogs.
If you don’t want to execute the displayed configurations automatically, disable the respective section. - Enable the option Install Management Point on this server to start the installation of the Management Point automatically after finishing the Depot Configuration Wizard.
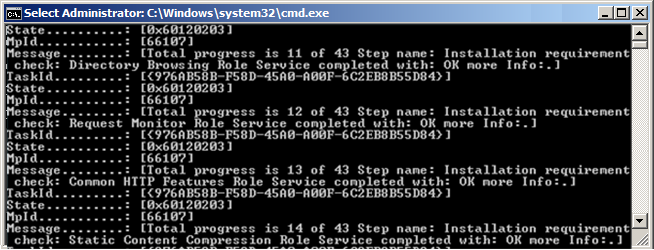
When you are finished with the configuration wizard, the system starts a background program, persistent for 4 hours, that checks the status of the depots and ICDB continuously (see also the following illustration). As soon as the system is done distributing the DSM program files and an ICDB is available with the respective Management Point object, the system starts the program for installing the Management Point.
Example: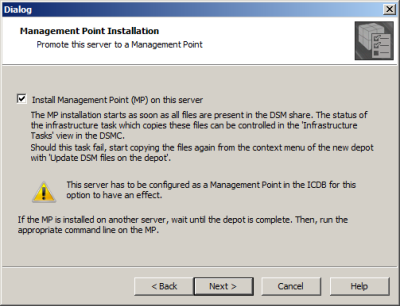
The configuration is applied locally on the server according to your specifications. Restart the BAT file if there are any issues. You can skip the steps you have already finished.
How to configure a new Management Point on another server via command line:
If the HTTP depot and the associated Management Point reside on the same computer, you can skip this step. In which case the Management Point is configured when the BAT file is executed.
- Run the stored command line for configuration (see above) locally on the Management Point Server.
Make sure that the depot's program files are complete when running the command.
Example: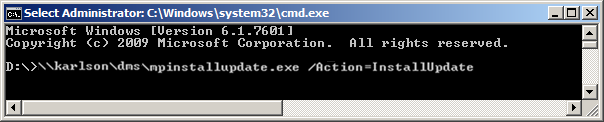
The configuration is applied locally on the server according to your specifications.Example: