Installing Ivanti WebDAV
WebDAV Server can be installed as a separate site or as an application within a site. The decision is up to the administrator.
You can get help from the command line: Type WebDavInstaller.exe /? For quick reference.
Install as separate web site
WebDav can be installed as a new site. This will create a root entry in IIS and install the binaries. Nothing in DSM configuration is changed. The same command that installs also updates.
Install example:
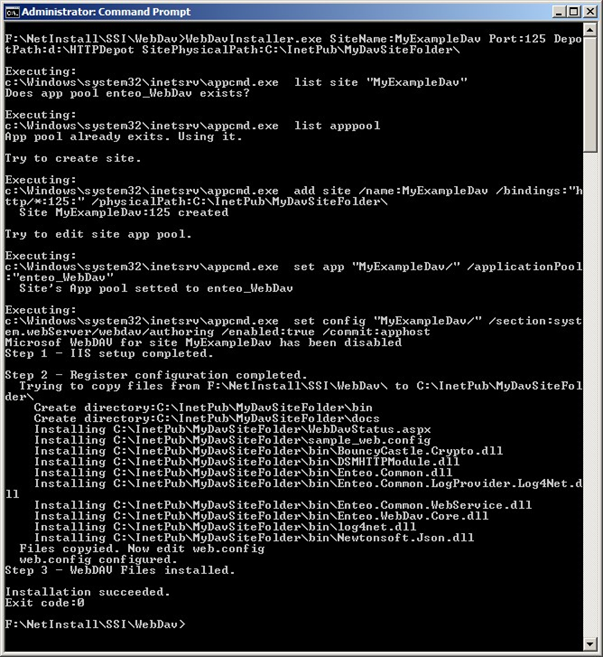
WebDavInstaller.exe SiteName:MyExampleDav Port:125 DepotPath:d:\HTTPDepot
Example of output window:
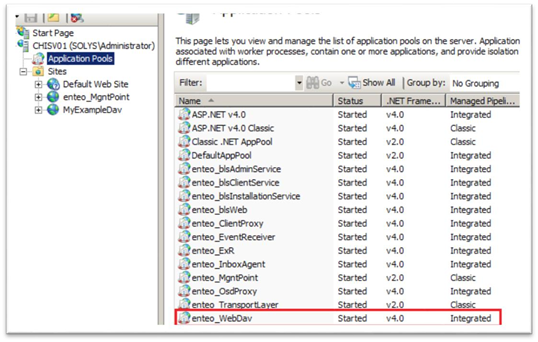
Created app pool:
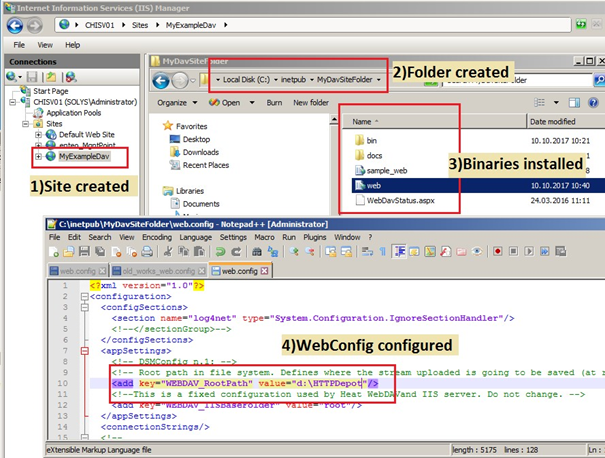
Site installed and configured:
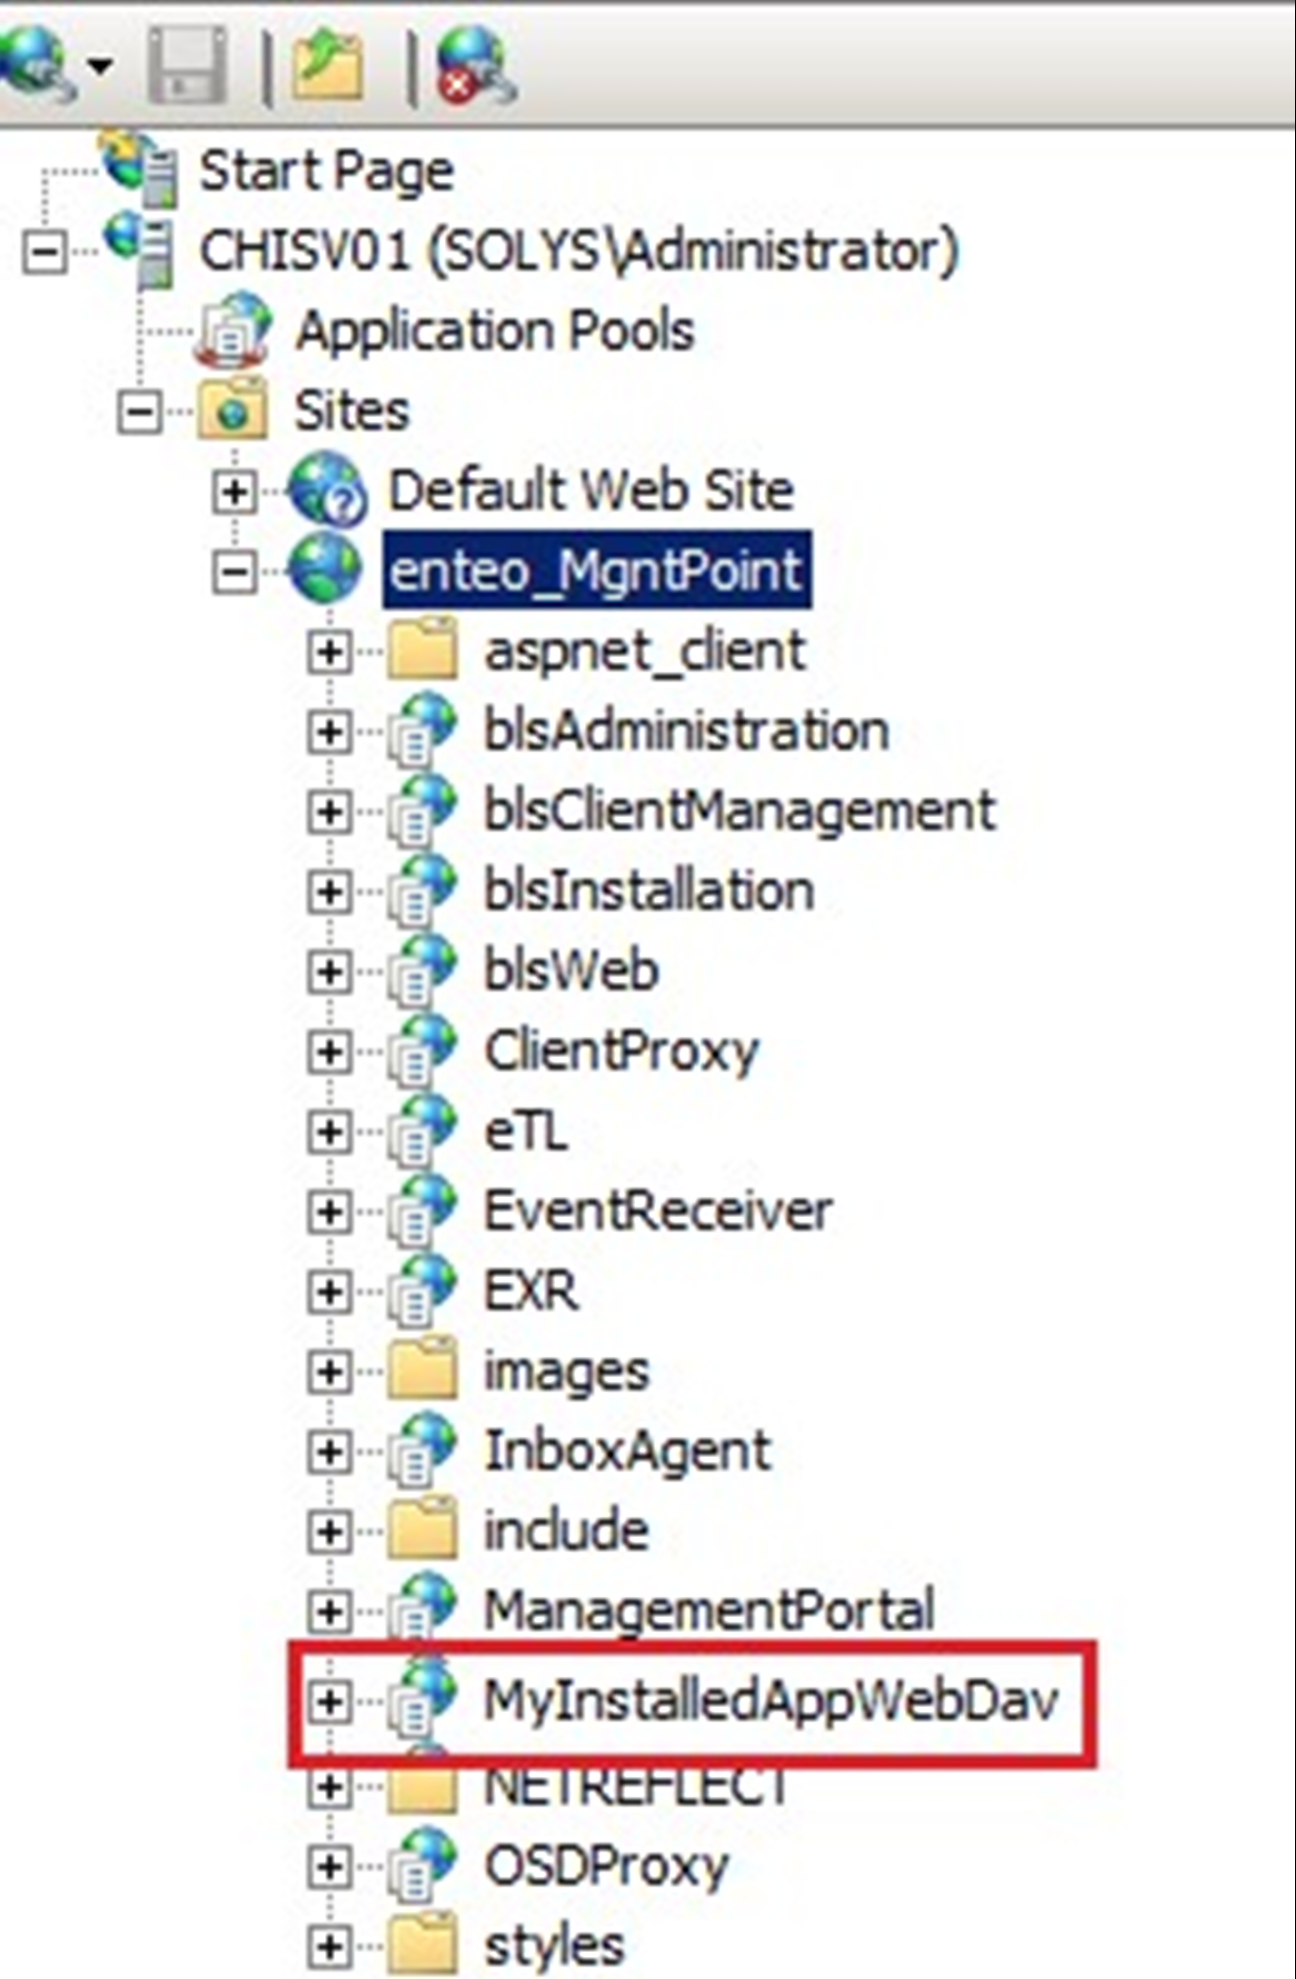
Install as application under an existing site
WebDav can also be installed under an existing site. This will create an entry under the main site in IIS and install the binaries. Nothing in DSM configuration is changed. The resulted installation is almost the same as “install as site” but now it is an application under another site.
Install example:
WebDavInstaller.exe SiteName:enteo_MgntPoint ApplicationName:MyInstalledAppWebDav DepotPath:d:\HTTPDepot
Complete parameter list
For a more granular installation, there are additional parameters that can be used.
The following are the parameter names, type, and details for installing as a separate new site:
•SiteName: Type Mandatory. Site name under IIS structure.
•Port: Type Mandatory. Port number used by Site. If the port is already in use, the site will be created in stopped mode.
•DepotPath: Type Mandatory. HTTP Depot path.
•IISCmndLineTool: Type Optional. Default is c:\Windows\system32\inetsrv\appcmd.exe
•SitePhysicalPath: Type Optional. Location where WebDav binaries are going to be placed. Default is c:\InetPub\[SiteName]\
•ApplicationPool: Type Optional. Application pool used by the Site. If does not exist, create. Default is enteo_Webdav
•DavBinariesPath: Type Optional. Location where WebDav binaries are. Default is installer’s exe folder.
The following are the parameter names, type, and details for installing as a new application under another site:
•ApplicationName: Type Mandatory. Application name under IIS structure.
•DepotPath: Type Mandatory. HTTP Depot path.
•SiteName: Type Mandatory. Site where the application is going to be installed. Default is enteo_MgntPoint
•IISCmndLineTool: Type Optional. Default is c:\Windows\system32\inetsrv\appcmd.exe
•SitePhysicalPath: Type Optional. Location where WebDav binaries are going to be placed. Default is c:\InetPub\[SiteName]\[AppName]
•ApplicationPool: Type Optional. Application pool used by the Site. If does not exist, create. Default is enteo_Webdav
•DavBinariesPath: Type Optional. Location where WebDav binaries are. Default is installer’s exe folder.
Checking WebDav
This installer automates several steps to deploy the application. However, if something fails, manual checking should be done. Installer’s commands can be executed again if it fails. This is because the installer can also update, using the same command parameters used to install. The output window shows the same info written in the log file.
WebDAV pos conditions
After installation, there are some checks to ensure it is correctly installed. After the install/update, the command-line console/log outputs “exit code” as last line. When exit code is “0,” this means no error.
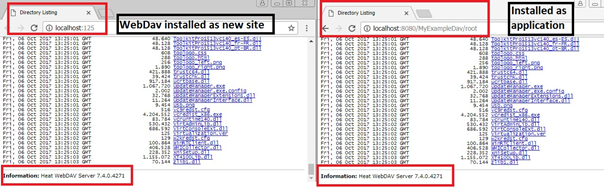
Testing navigation: From IIS interface, select WebDAV site or application and click “Browse”. If WebDAV is installed as an application, add “/root” to the url. The HTTP depot content should be displayed (if exists).