Setting up DSM PatchLink
When you activate DSM PatchLink for the first time, we recommend following the required steps in the order explained below.
These are the steps to take:
1.Install Patch Management
2.License Patch Management
3.Create group for assigning patches: You need to create at least one group that contains the computers the patches will be applied to.
4.Configure Patch Management Service: When configuring the Patch Management Service, the required system packages are assigned to the group you just created (the system packages enable checking for security vulnerabilities). Also, you can define the intervals for synchronization of the patch information and download of mass data. When you are finished with the configuration and the system has checked for security vulnerabilities the first time, the system downloads the patch catalog automatically.
5.Disable unwanted manufacturers and products: As a result, an individual patch category (Disabled Products) is created or extended. Also, there is a specific rule that excludes patches of this type from being applied.
6.Create Patch Categories: Patch categories combine the patches of one patch producer or product; you can define a common rollout rule for these patches.
7.Defining Patch Rollout Rules: Rollout rules are used for downloading and assigning specific patches automatically or for preventing the download or assignment of specific patches.
8.Optional - Using Patch Templates: You can use individual package templates as a basis for the patch packages having been created via rollout rules.
Organizing the Patch Library
Before configuring DSM PatchLink, select the computers where you want to run DSM PatchLink. We recommend creating a group for assigning patch packages of DSM PatchLink. This allows you to retain a better overview if issues arise in the Patch Management. For example, when changing from Classic Patch Management to DSM PatchLink or if you want to remove the Classic patch packages from your system later!
Using the Configuration Wizard
DSM PatchLink provides an improved configuration as compared to Classic Patch Management. The Patch Management Service is configured so that the patches are installed mostly automatically. Use the Configuration Wizard to configure the Patch Management Service.
1.Go to the Software Library.
2.In the context of the Patch Library, select the command DSM PatchLink > Configure Patch Management Service.
3.Define the distribution targets: Add the group for assigning patch packages as target; you already created this computer group before. The packages PatchLink Client Package... and PatchLink Execution Package... are assigned to this target and the associated policies are activated.
By selecting the option on the left of the distribution target you can activate or deactivate the individual policies! Deactivate the Automatically create the PM Execution package policies option if you want to assign the policies (including the client and catalog packages) manually later.
4.Define Patch Settings: Specify the Patch Management parameters to be set on Managed Users & Computers. When creating policies automatically: Define an execution schedule and installation order for the scan and the installation.
5.Set the installation order for the security scan and the patch installation on the clients. The default values are:
•Scan: 100
•Installation: 110.
6. Set the time for the security scan and the patch installation on the clients.The default values are:
•Scan: Weekly
•Installation: Every 24 hours.
Specify the synchronization and the download of the software producer's patches.
7.In the Time dialog, define the intervals for synchronization of the patch information and download of mass data. After defining the schedule, don't forget to ...activate the synchronization and download!
8.Finish the configuration. When you are finished with the configuration, DSM executes the distribution of the PatchLink Client Package... and the PatchLink Execution Package... on the clients and starts scanning for security vulnerabilities according to the definition. These security vulnerabilities are returned to the server and are displayed in the context of the computer on the Security Vulnerabilities tab.
DSM downloads the patches and creates the respective patch packages only after the existing security vulnerabilities have been returned. This process runs automatically in the background. To be able to install the patch packages on the clients, you have to create the respective categories and assign them with patch rollout rules.
In the context of a patch package, clients with respective vulnerabilities are displayed in the Affected computers tab (incl. the status of the patch installation). However, the Detail information tab displays the detailed information about the patch directly from the provider.
Using the Patch Catalog
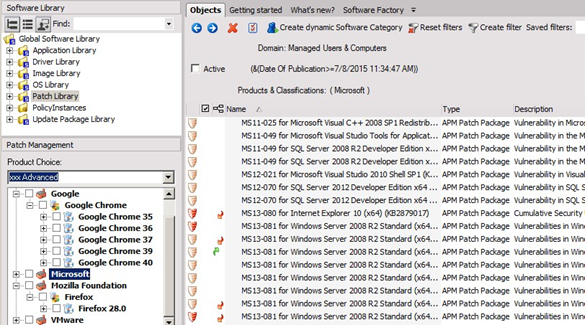
The clear overview in the DSMC helps you to easily manage the available patches. Open Patch Management in the Navigation window's Organization view. Here you can find the patch catalog and/or the directory of the available patches.
The patch catalog also provides the Microsoft products with the associated patches of the Classic Patch Management (as long as this is still available). These products and patches are displayed in the Patch Catalog in Microsoft (classic).
Display and filter
The Patch Catalog provides the following display and filter options:
•The producers and the products are displayed in bold letters if a security vulnerability has been detected. The associated patches are displayed on the right.
At first, the patches are displayed as available. Before being able to download and package a patch, you must add the patch to a patch category and create a patch rollout rule for the patch category.
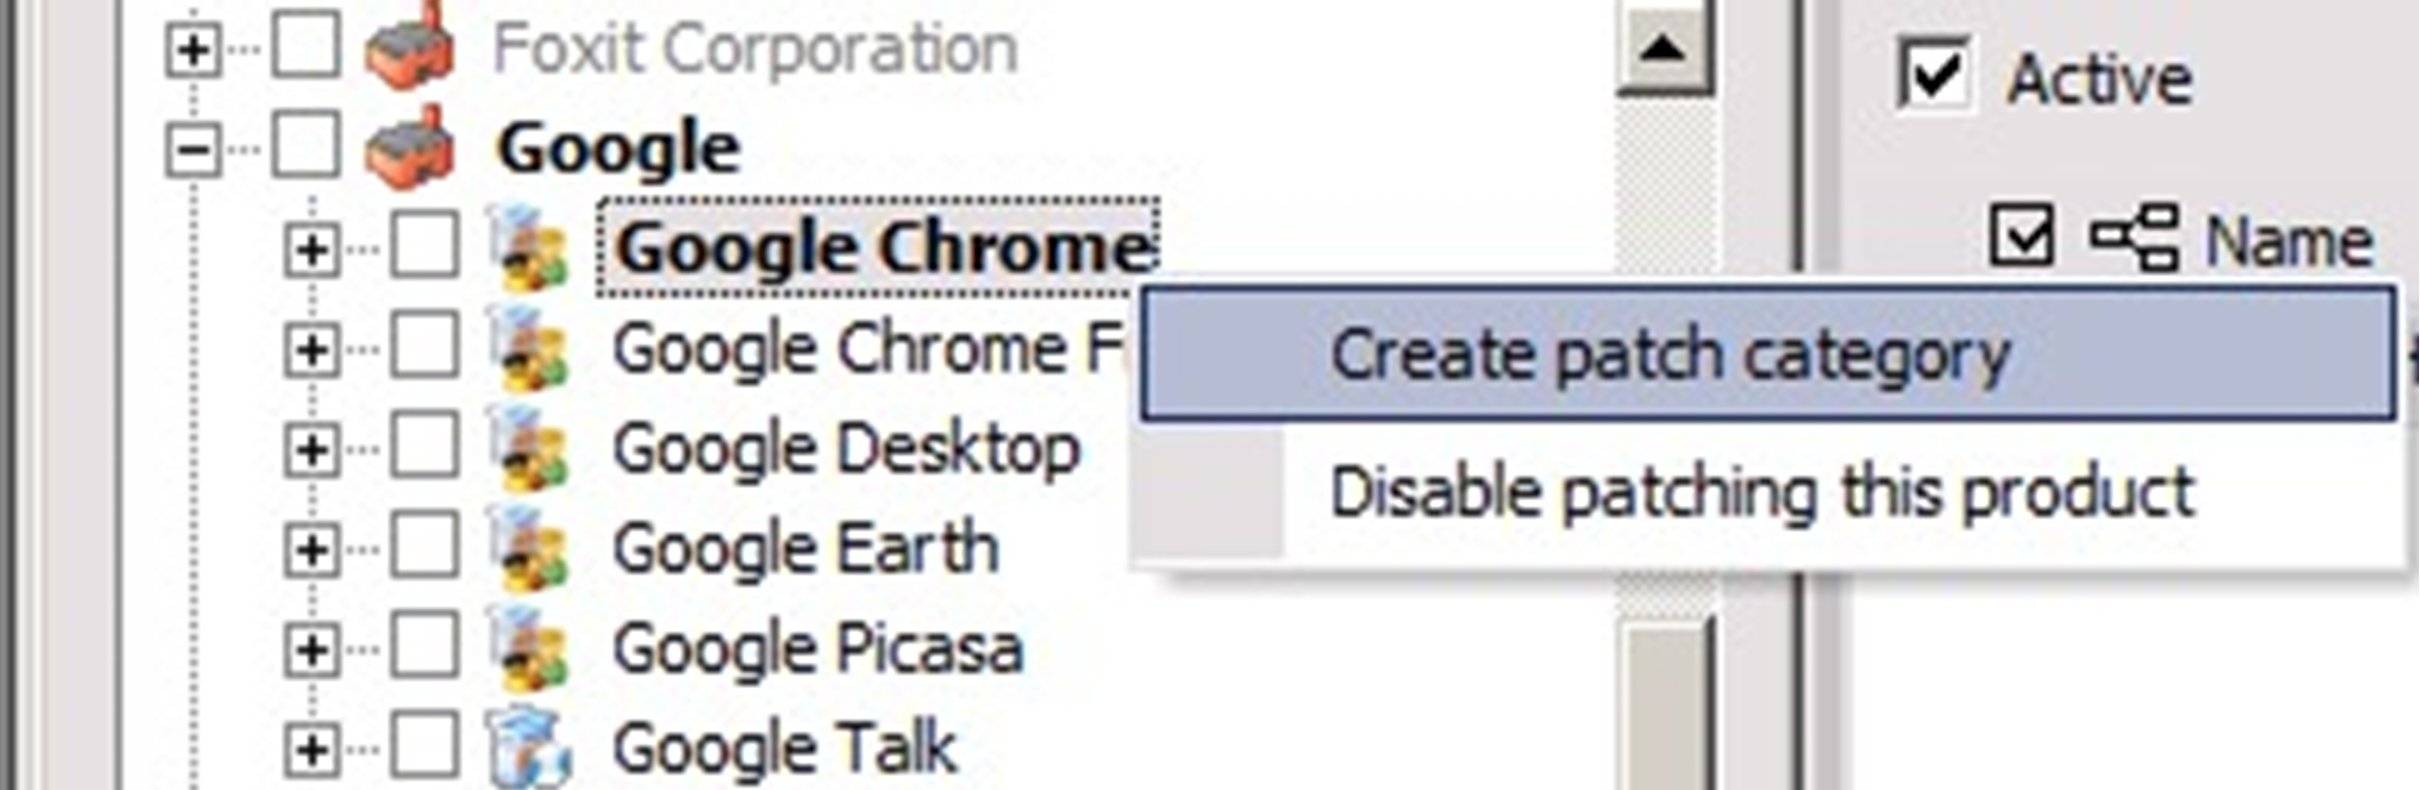
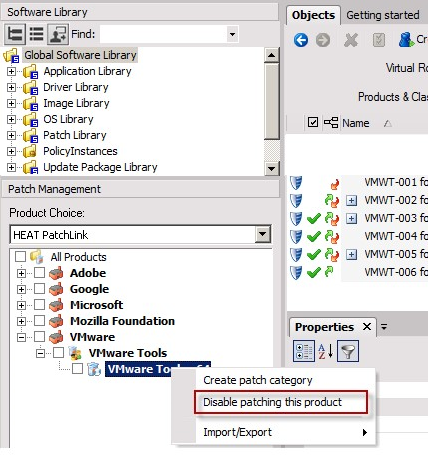
• Filter Disabled products: If you apply this filter, the deactivated producers and products are also displayed; they are grey and can be easily detected. Use the context menu commands Disable patching this product or Enable patching this product to deactivate or activate the producers or products.
With these commands you can create or customize a rule that prevents rollout:
•Filter Unused products: Use this filter to show all available producers and products. If this filter is not applied, you can only see the producers and products for which a security vulnerability has been detected (they appear in bold letters).
•Filter Classic PM: If this filter is applied, you can see the products and patches of the Classic Patch Management in Microsoft (classic).
•Filter DSM PatchLink: If this filter is applied, you can see the products and patches of DSM PatchLink.
•Filter Classification: This filter is displayed in an individual window below the patch catalog. When you select one classification or several classifications (e.g. Service Packs), the system only displays the respective patches.
Patch Categories
Patch categories, which combine patches for specific products, and patch rollout rules, which assign these patches according to specific rules, form the basis for the targeted assignment and installation of patches on managed computers.
Use the context menu command Create Patch Category to create patch categories. If you want to select more than one patch category, click the producer or product in the respective check box next to the name. In the basic scenario, the patch category you create contains all patches of a product or a producer.
Disabling Products for Patching
Individual products (or manufacturers) can be excluded from automatic download, assignment and installation in the Update Catalog (Patch Management tab in the Navigation window). Multiselect is possible to deactivate more than one product at once.
Disabled products are displayed greyed out and can be hidden in the tree view of the Update Catalog.
When disabling a product a rollout rule is created or extended with the deactivated product. The rule is named Disabled Products and uses the Action = None setting. Imported patches and their assignments will not be deleted.
However, clients still discover vulnerabilities for disabled products and report them to server, so that the patches can still be downloaded and assigned manually.
Creating Patch Categories
Basically, patch categories combine the patches of one patch producer or product. Patch categories are required if you want to configure the download, assignment and installation of patches flexibly with the help of rollout rules. Patch categories are created dynamically with an LDAP filter which also allows for detailed filtering of the patches within the category (beyond the producer and product).
The main purpose of creating patch categories is providing a 'group of patches' that can be specifically included or excluded for download and installation according to the new patch rollout rules.
Examples of patch categories:
| Patch Category | LDAP Filter |
|
Company=Google |
|
| MS SQL Server 2012 |
Company=Microsoft Products=(cn=SQL Server 2012*) (In this example, the system considers all products that contain 'SQL Server 2012'. Alternatively, you can select the required versions of SQL Server 2012 from a list of products.) |
| Microsoft - Critical patches |
Company=Microsoft Severity=critical |
| Microsoft - Patches for German products |
Company=Microsoft Possible languages=*de* |
1.Open the context menu for the required product or producer. To select several producers or products, check the required entry.
2.Select the Create patch category or Create Linux patch category task. The Patch Category Wizard pops up.
3.Enter a descriptive Name for the new patch category. The default patch category type is Dynamic because patch categories are always dynamic when they are based on a selection of producer, products or similar.
4.Edit the LDAP filter, if required, to limit your preselection of producers and products in the patch catalog. Use the LDAP filter, as usual. Additional properties of patch packages can be found mainly in the Patch Package Properties.
5.Click Finish to close the Wizard. Activate Create patch rollout rule to start the Rollout Rule Wizard directly after.
The system creates the new patch category and stores it in the Patch Library folder of the Software Library. Click the new patch category to view the patches it contains.
You can use the Group definition > Edit filter task to edit the LDAP filter of an existing patch category.
1.Open the Patch Library context menu and select the task DSM PatchLink > Create patch category or Create Linux patch category. The Patch Category Wizard pops up.
2.Enter a descriptive Name for the new patch category.
3.Select the type of patch category. Select Dynamic if you want the category to be based on a selection of producer, product or similar. Select Static if you want to assign the associated patches manually later.
4.Edit the LDAP filter for a dynamic category if you want to limit the producers and products, for example. Use the LDAP filter, as usual. Additional properties of patch packages can be found mainly in the Patch Package Properties.
5.Click Finish to close the Wizard. The new patch category is created and stored in the Patch Library folder of the Software Library. Click the new patch category to view the patches it contains.
You can use the Group definition > Edit filter task to edit the LDAP filter of an existing patch category.
Defining Patch Rollout Rules
DSM PatchLink employs patch rollout rules for downloading and assigning specific patches for security vulnerabilities (based on patch categories). The rules are also used to prevent the download or assignment of specific patches.
Examples of patch rollout rules:
| Patch Rollout Rule | Action/Target | Patch Category |
Extended |
| 3rd party (test) |
Action: Download and Assignment Policy Target: Test group |
Included: Adobe Flash 11, Adobe Reader 11, Citrix Xen Desktop 5, Chrome, Firefox Excluded: None |
|
| 3rd party (productive) |
Action: Download and Assignment Policy Target: List of OUs/Groups |
Included: Adobe Flash 11, Adobe Reader 11, Citrix Xen Desktop 5, Chrome, Firefox Excluded: None |
|
| Microsoft - critical patches |
Action: Download and Assignment Policy Target: List of OUs/Groups |
Included: All Microsoft products Excluded: None |
Severity: Critical, severe Postpone policy activation: 0 hours |
| Microsoft - non-critical patches |
Action: Download and Assignment Policy Target: List of OUs/Groups |
Included: All Microsoft products Excluded: None |
Severity: Unknown, low, medium Postpone policy activation: 72 hours |
1.Select the task DSM PatchLink > Create Patch Rollout Rule from the Patch Library. Alternatively, select the task DSM PatchLink > Manage Rules for Patch Management, open the Patch Rollout Rule tab and click Create Rule. This opens the Patch Rollout Rule Wizard.
2.Enter a Name for the new rule. Specify the option Activate policy to activate the rule right away.
3.In the next wizard dialog you can specify which Action you want to apply automatically for the respective patches (based on the rule):
•Download Only: The patches are only downloaded but not assigned (independent of a policy target).
•Download and Assign: The patches are downloaded, packaged and assigned to a target, which you can specify in the Policy target box.
•None: Patches are not downloaded (independent of a policy target).
Select Show extended options, to specify additional options.
4.In the next wizard dialog, select which patch categories (i.e. the patches) are applied to these rules (Included Patch Categories) and which are not applied (Excluded Patch Categories). If there are no categories included, the Rollout rule is applied to all available patches. Excluding patches always applies and overrules a possible inclusion of the same patches.
5.In the Extended Settings you can specify additional restrictions and properties of the rollout rule, as required:
•Classifications, Severities and Languages: If specified, only these settings are applied, if not, all settings are applied. The Tools classification has the following features:
•Clients only report security vulnerabilities to Tools if the computer configuration variable Scan including tools has been enabled.
•If you select Action = Download and Assign in the rollout rules, the Tools classification is never considered. The default value is Classification = all except Tools. Explanation: You can only exclude, download or manually assign tools; they cannot be assigned automatically!
•Activate Policy: Automatically activates the policies for the respective targets.
•Policy Activation Offset (h): The policy's activation is postponed and is activated in the specified time (hours). This option allows you to install some patches, for example critical ones, immediately, and to postpone the installation of other patches.
6.Click Continue to close the Wizard. Activate Create Patch Rollout Rule to open the dialog for managing the rollout rules immediatley afterwards. Here you can manage the evaluation of rollout rules (especially the Evaluation order and If rule applies) and change the properties of individual rollout rules, if required. The new patch rollout rule is created.
Managing Patch Rollout Rules
You can display and manage patch rollout rules centrally in the Patch Management Rules dialog. In this dialog you can change existing rules and also set the evaluation order for the rules; with this order you can easily control the download and assignment of patches.
How patch rollout rules work
Within the configured interval and on a regular basis, DSM PatchLink checks all patches the system finds security vulnerabilities for (see Using the Configuration Wizard). The system checks the (active) rollout rules for every patch in the specified evaluation order. If a patch meets all requirements specified in a rollout rule (Patch Management Rule Properties group), the system executes the specified actions (Patch Rollout Rule Properties group).
The actions are executed depending on the patch package's properties. For example, the patch property Automatic Patch Assignment determine whether a patch policy is created automatically only once, never or always if the policy is not available any more.
With Patch Template Rules you can use templates with different default settings for different patches (see Using Patch Templates).
The following Rule Properties determine how the patch rollout rules are evaluated:
| Property | Effect |
| Is active | Determines whether the rule is applied or ignored during evaluation. If it is ignored, the evaluation continues with the next rule. |
| Evaluation order if rule applies | The Evaluation order is a number that determines which rules are checked for patches in ascending order that refer to a security vulnerability.
If an (active) rule applies, the object will either be inserted or ignored, depending on the rule.
The evaluation order of the individual rules for patches is determined by clicking or interactively moving the respective object. You cannot enter a number for the evaluation order or have the wizard enter one. If rule applies determines whether the evaluation is continued when the rule applies or not. |
1.In the Patch Library, select the task DSM PatchLink > Manage Patch Management Rules. The dialog for managing patch rollout rules pops up on the Patch Rollout Rules tab.
2.Check the order of the rules and their properties. Change the order by moving the items with the mouse. Select a rule and change the properties (displayed in the lower part of the dialog).
The order of the rules is especially important when a rule applies and the evaluation is not continued (If rule applies = No further evaluation). This way you can create a set of rules where each rule checks whether a patch meets the contained conditions. When the system determines that a patch can be applied, the evaluation for this patch is finished. In this case, we recommend that the last rule (in the order) is a rule that 'catches' all of the remaining patches and that determines how these patches are processed further.
3.Use the Create Rule and Delete Rule buttons to add new rules or to delete the rules you no longer need.
4.Click Finish to close the dialog. The changed patch rollout rules are stored.
Using Patch Templates
When the patches are automatically packaged and assigned, the patch package is created based on a patch template. The Generic PatchLink Patch Template is supplied by default. Additional patch templates may be created based on patch templates and patch packages.
The patch package template mainly contains the package script and various package properties. These may be customized accordingly and used differently for various patch packages. There are rules for assigning the patch templates to the patches, similar to the patch roll-out rules; you can easily assign them in the dialog for managing the patch rules.
1.Select the task DSM PatchLink > Create Template in the Patch Library for an existing patch package or patch template.
2.Enter a unique name for the template. The template is created and stored in the Patch Library in the Templates.
Edit the package as usual; customize the eScript and the properties for using the patch template.
1.Select the task DSM PatchLink > Create Patch Template Rule from the Patch Library. Alternatively, select the task DSM PatchLink > Manage Rules for Patch Management, open the Patch Template Rule tab and click Create Rule. The Patch Template Rule Wizard pops up.
2.Enter a Name for the new rule. Specify Is active to activate the rule.
3.In the next wizard dialog, select the Patch Template that will be used with this rule.
4.In the next wizard dialog, select the Patch Categories (i.e. the patches) this template is applied to (Included Patch Categories) or is not applied to (Excluded Patch Categories). Excluding patches always applies and overrules a possible inclusion of the same patches.
5.In the next wizard dialog, select the Languages this template applies to.
6.Click Finish to close the Wizard. The system creates the new patch template rule.
Managing Patch Template Rules
Patch template rules are displayed and managed centrally in the Patch Management Rules dialog. In this dialog you can change existing rules or specify an evaluation order for the rules that are used to assign templates to patches individually.
The following general Rule Properties control how the patch template rules are evaluated:
| Property | Effect |
| Is active | Determines whether the rule is applied or ignored during evaluation. If it is ignored, the evaluation continues with the next rule. |
| Evaluation order if rule applies | The Evaluation order is a number that determines which rules are checked for patches in ascending order that refer to a security vulnerability.
If an (active) rule applies, the object will either be inserted or ignored, depending on the rule.
The evaluation order of the individual rules for patches is determined by clicking or interactively moving the respective object. You cannot enter a number for the evaluation order or have the wizard enter one. If rule applies determines whether the evaluation is continued when the rule applies or not. |
1.In the Patch Library, select the task DSM PatchLink > Manage Patch Management Rules. The dialog for managing patch rollout rules pops up. Open the Patch Template Rule tab.
2.Check the order of the rules and their properties. Change the order by moving the items with the mouse. Select a rule and change the properties (displayed in the lower part of the dialog).
The order of the rules is especially important when a rule applies and the evaluation is not continued (If rule applies = No further evaluation). This way you can create a set of rules where each rule checks whether a patch meets the contained conditions. When the system determines that a patch can be applied, the evaluation for this patch is finished. In this case, we recommend that the last rule (in the order) is a rule that 'catches' all of the remaining patches and that determines how these patches are processed further.
3.Use the Create Rule and Delete Rule buttons to add new rules or to delete the rules you no longer need.
4.Click Finish to close the dialog. The changed patch template rules are stored.
Customizing Patch Packages
Using eScript commands in DSM PatchLink
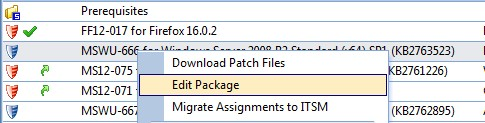
Patch packages generally allow for an execution of additional eScript commands before and after the installation of the patch. For this purpose, patch packages can be edited in the Packaging Workbench the same way as standard eScript packages.
However, we recommend using patch templates rather than changing individual patch packages. Patch templates can be created based on the supplied Generic PatchLink Patch Template or based on existing patch packages; they are assigned to the patches with a patch template rule. Generally, patch templates are stored in the Patch Library in the Templates folder.
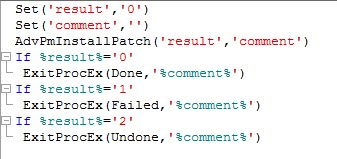
The Script.inc file of the Generic PatchLink Patch Template contains the commands for patch installation and error handling only.
Customizing
You can customize all patch templates, for example if you want to stop 3rd party product agents or services or disable automatic updates.
With patch packages, you can also execute user-related commands: As soon as the system is done installing the computer-related portion of a patch package, it starts installing the user-related portion for any logged-on user, independent of the patch installation schedule.
Note that the Installation of user-related portions setting must be specified for the respective package and/or patch template.
You can run your own batch files before and after the installation. The PreDeploy.bat file runs before the installation and the PostDeploy.bat after the installation. Ensure that these files reside in the root of the patch package, next to the patch.bat file.
Updating Patch Data
You can update the packages for DSM PatchLink at any time outside of the timeframe you specified for automatic synchronization.
This command loads the patch catalog to the Patch Library after having configured the Patch Management Service the first time. After their installation, you can find the packages PatchLink Update Catalog ... in the Patch Library, depending on the different operating systems.
1.Go to the Software Library.
2.In the context of the Patch Library, choose DSM PatchLink > Synchronize patch data now. The Wizard starts.
3.Click Continue to exit the wizard.
The Patch Management Service wizard immediately starts the synchronization with the provider's website. As a result, the patch catalog is updated, the patch packages for the relevant operating systems and languages are imported and the policies for the catalog packages are updated.
The patch package’s mass data is only downloaded when security vulnerabilities are detected and corresponding rollout rules exist for the download.
Using Asynchronous Patch Installation
As a standard, DSM PatchLink installs patches synchronously. Normally without problems. However, in rare cases a patch installation may not complete as expected and "hang" instead.
In such a case, the asynchronous patch installation can be used which is automatically terminated by the system if a timeout occurs.
1.In the Organization Tree, select the container or group for which the asynchronous patch installation is to be used.
2.Open the Configuration tab.
3.In the section Patch Management activate the variable Terminate patch installation after the timeout period expired and specify the maximum time in minutes after which the system automatically terminates the installation via the variable Timeout period for single patch installation [min].
Disabling DSM PatchLink
If you want to disable DSM PatchLink temporarily or remove it permanently, you can use a corresponding Wizard.
1.In the context of the Patch Library select DSM PatchLink > Disable DSM PatchLink. This starts the DSM PatchLink Deactivation Wizard.
2.If you only want to deactivate the system packages of DSM PatchLink (e.g. for tests), select the option Deactivate policies of the Execution Packages, Catalogs and Update Agents. The rollout of DSM PatchLink patches is stopped.
If you want to enable DSM PatchLink again later, you only need to activate the policies of the respective system packages manually. It is not sufficient to go through the configuration wizard again!
3.If you decide to delete DSM PatchLink packages from the patch library, select the option Delete Update Agents, Catalogs and Patches. The configuration of the Patch Management Service is reset. In addition, existing patch categories, patch rules, and patch packages are deleted. The same applies to products, product families and manufacturers of DSM PatchLink in the patch library.
Testing DSM PatchLink and Deleting Old Patch Packages
Before switching from Classic Patch Management to DSM PatchLink, you can test DSM PatchLink for some time. DSM allows you to run both applications parallel as long as you have valid licenses. During the test phase we recommend deactivating the PM Execution Packages from the Classic Patch Management. This makes it easier to revert to Classic Patch Management, if you decide to do so, and to re-activate the policies manually. If you decide to use DSM PatchLink, we recommend deleting the packages used only in the Classic Patch Management from the Patch Library.
1.In the context of the Patch Library select Classic Patch Management > Disable Classic Patch Management. This starts the Classic Patch Management Deactivation Wizard.
2.If you only want to deactivate the system packages of the Classic Patch Management (e.g. for tests), select the option Deactivate policies of the Execution Packages, Catalogs and Update Agents. The rollout of Classic Patch Management patches is stopped.
3.If you decide to use DSM PatchLink and to delete the Classic Patch Management packages from the patch library, select the option Delete Update Agents, Catalogs and Patches. The configuration of the Patch Management Service is reset.
In addition, existing patch categories and patch packages are deleted. The same applies to products, product families and manufacturers of Classic Patch Management in the patch library.
Specifying the Settings for Patch Packages
This list describes the process of specifying the settings for patch packages:
•Install patch also on server: Defines whether the patch is also to be installed on computers with a server operating system.
•Allow Installation of NetInstall Packages after a Reboot Request by a Patch Installation: Determines whether packages are installed before restart when a patch package requires a restart.
•Define Reboot Behavior: Defines what happens if the installation requires a reboot.
•Define patch installation sequence: Defines when patch packages are executed by the Installer.
•Activate staging of packages: Defines if the download (staging) of installation data onto the client computers is also executed for patch packages.
•Omit replaced patches from the scan result: Defines if patches which have already been replaced (superseded) by other patches are omitted from the scan results. This setting applies to DSM Advanced Patch Management only.