Patch data
As of ITAM Cloud 2023.4, you can import patch data for your hardware assets from the Ivanti Neurons Platform. The displayed data includes the advisory and patch names, as well as the deployment status and date.
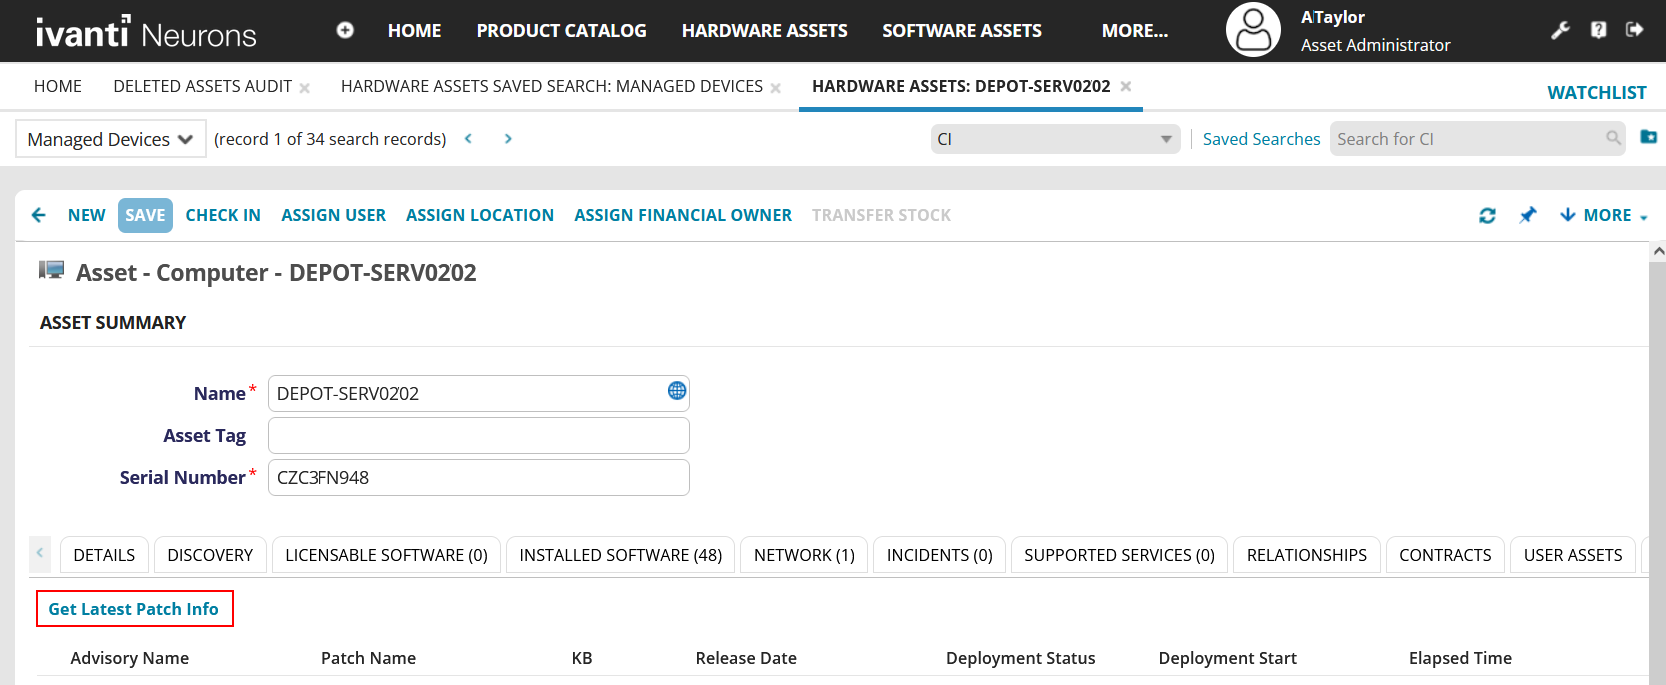
You can view this data as part of an asset's record under the Hardware Assets workspace > Patch Info tab. This is the same data found in the Neurons user console under the views for:
•Patch Management > Deployment History
•Devices > Patches
Getting started
To set up the ability to import patch data for assets, ensure that:
•The ITAM 202304 package installed. Download this package from the Ivanti Marketplace. If you need to update from more than four releases back, contact Ivanti's Professional Services Organization (PSO) prior to downloading the package.
•The Ivanti Neurons connector is correctly configured for your data source. For details, see Ivanti Neurons Connector in the ITSM help.
•The Neurons device sync API global constant in ITAM is enabled, which allows the connector to import the patch data into ITAM.
1.Log in to ITAM as Asset Administrator.
2.Click the ![]() icon in the menu bar at the top of any workspace. The Configuration Console displays in a new browser tab.
icon in the menu bar at the top of any workspace. The Configuration Console displays in a new browser tab.
3.In the left navigation pane, expand Build > Global Constants.
4.From the global constants list, locate EnableNeuronsSyncByAPI and set it to True.
5.Click Save.
Next, if you're an existing ITAM user who is upgrading to 2023.4, you need to complete an extra procedure to update the Hardware Assets workspace to include patch data. (New users can skip this procedure.)
1.Log in to ITAM as Asset Administrator.
2.Click the ![]() icon in the menu bar at the top of any workspace. The Configuration Console displays in a new browser tab.
icon in the menu bar at the top of any workspace. The Configuration Console displays in a new browser tab.
3.In the left navigation pane, expand Build > Business Objects.
4.In the Find box, type "CI," then click it in the drop-down list.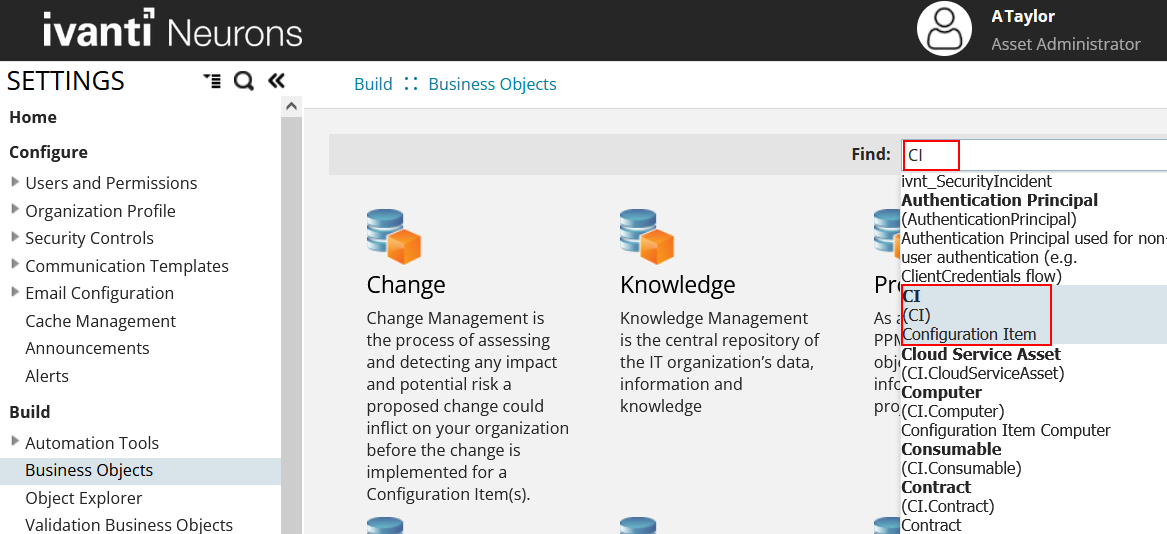
5.Click Layouts at the top of the page. From the Layouts list, click AMC.CI.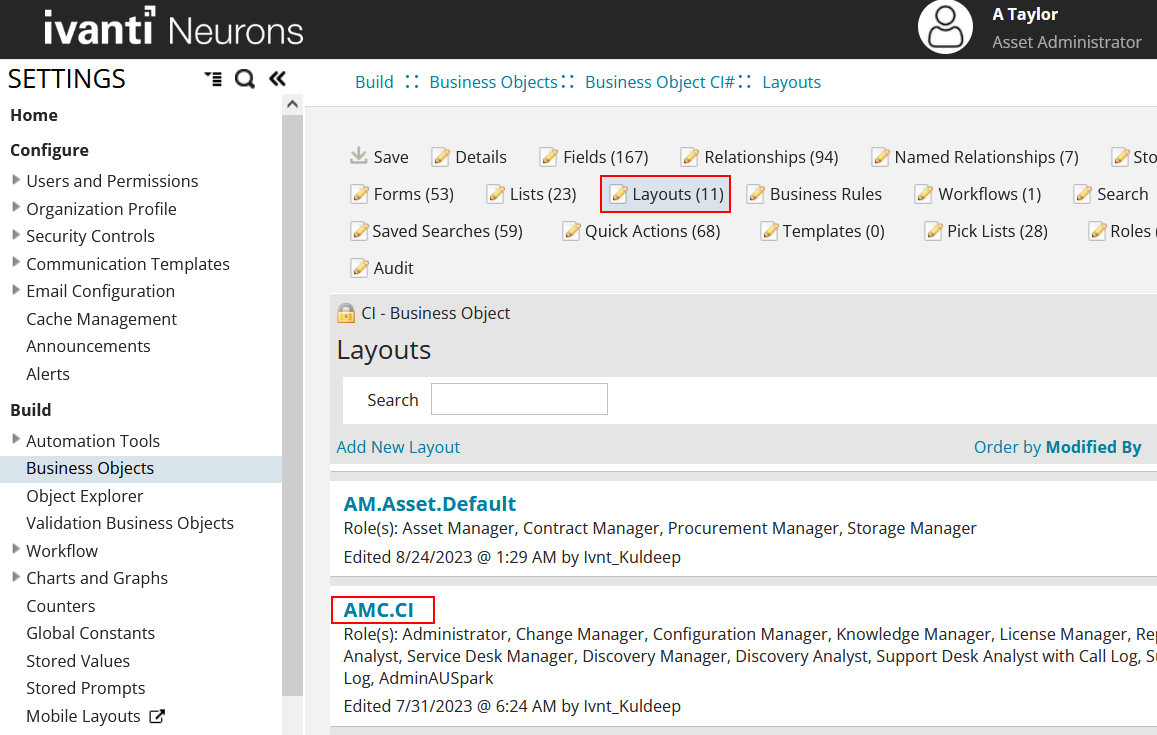
6.From the Views in this Layout list, click Computer.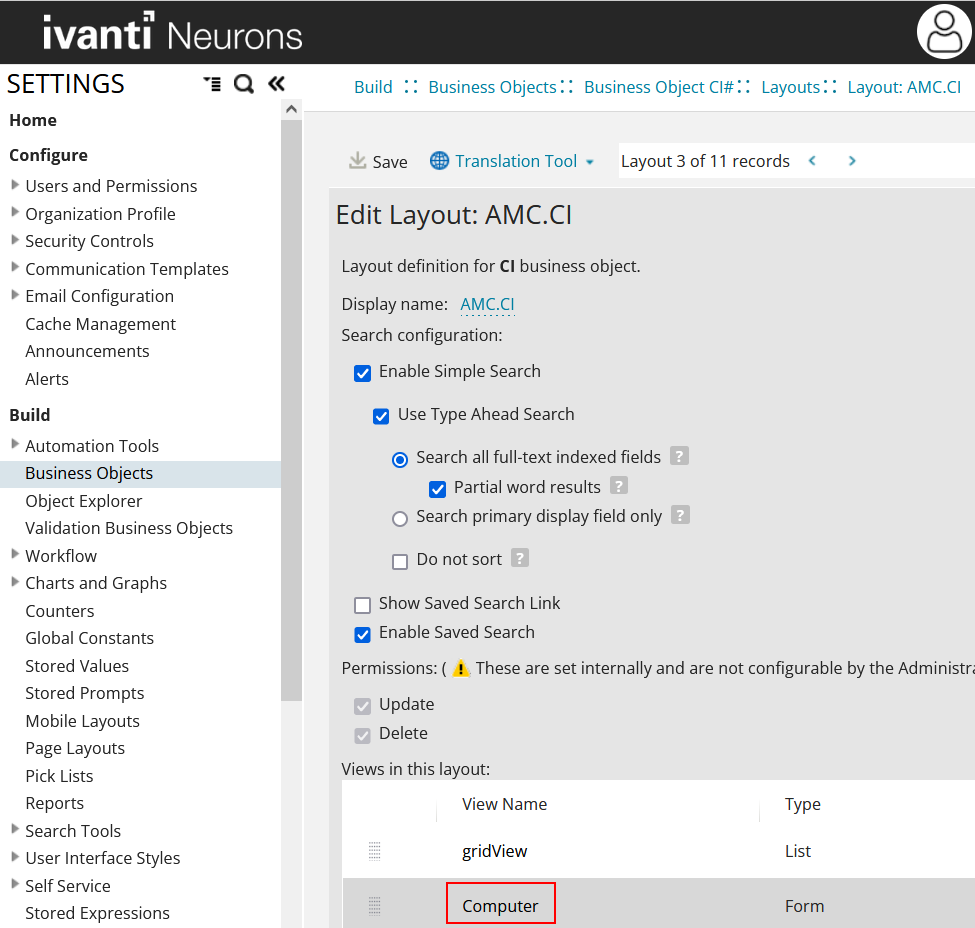
7.Scroll down to the bottom of the page and click Add Child Panel.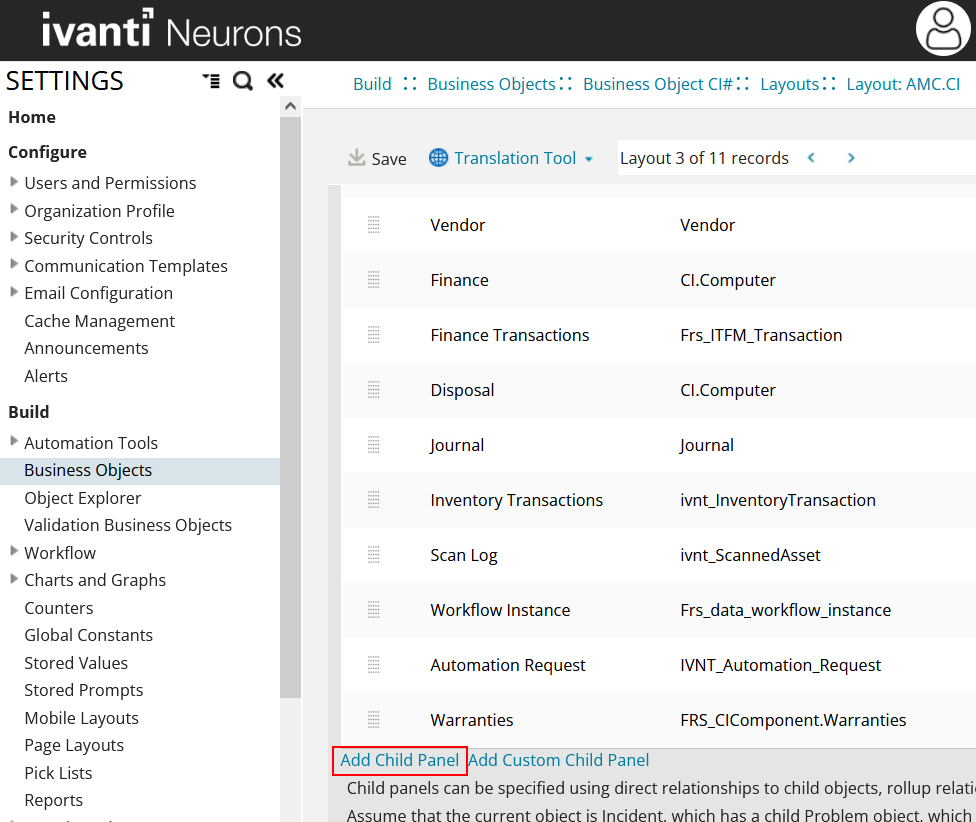
8.On the Edit Layout page: under the Display Name column, click <Not Set> and enter the tab name "Patch Info" or something similar.
9.On the Edit Layout page: under the Object column, click <Not Set>. The FormView Child Panel Relationship Editor opens.
10.Next to Direct Relationship, click not set and select ivnt_PatchInformation (via ivnt_PatchInformationAssocCI) from the drop-down list.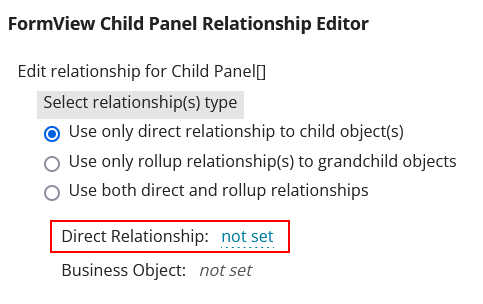
11.Click Save. Ivnt_PatchInformationAssocCI will automatically display in the Relationship(s) column (third column on the page).
12.Scroll to the right and click Edit in the row you just created.
13.In the Toolbar Editor, remove unwanted buttons and only add the quick action Custom:Get_latest_Patch.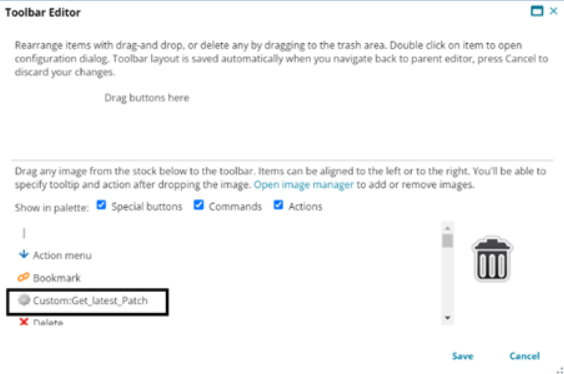
14.Click the edit icon, then set the following options:
•Display: Select Text Only.
•Text: Select Custom and type Get Latest Patch Info.
•Tooltip: Type Get Latest Patch Info.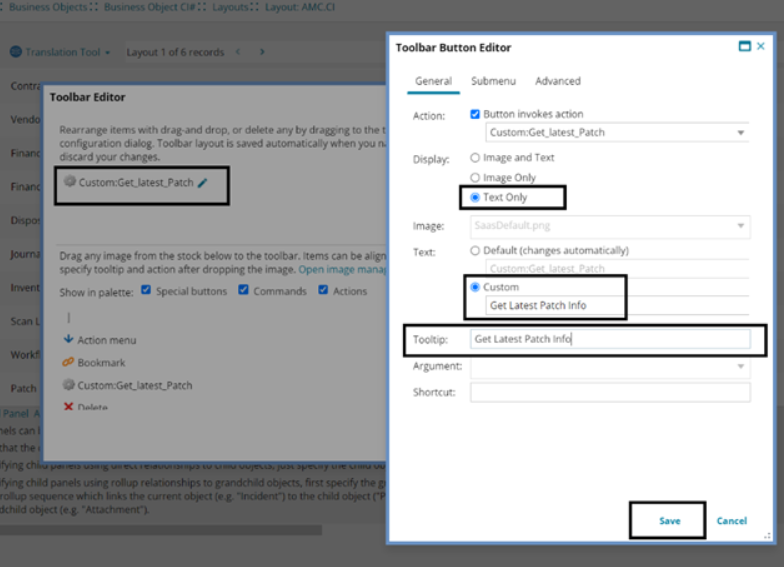
15.Click Save.
16.On the Edit Layout page: under the List column, select PatchDetailsList from the drop-down list.
17.On the Edit Layout page: under the Initially Visible column, click <Not Set>. The Expression Editor opens. Type True, then click Save.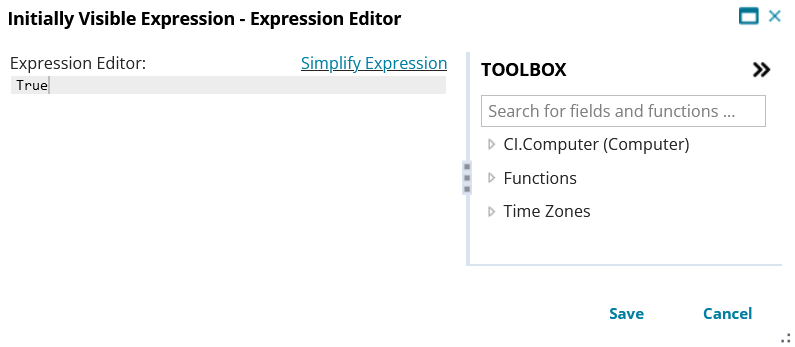
18.Click Save to save all of your updates.
Finally, you need to complete the following three procedures.
1.Log in to ITAM as Asset Administrator.
2.Click the ![]() icon in the menu bar at the top of any workspace. The Configuration Console displays in a new browser tab.
icon in the menu bar at the top of any workspace. The Configuration Console displays in a new browser tab.
3.In the left navigation pane, expand Build > Global Constants.
4.From the global constants list, locate EnablePatchIntegration and set it to True.
5.Click Save.
1.Log in to Neurons as Administrator.
2.Navigate to Admin > App Registrations.
3.Click New Registration.
4.From the New App Registration drop-down, select Custom App, then click Continue.
5.Enter a meaningful Description, then click Register.
6.Complete the registration by copying all of the settings to the clipboard. You will need these in the next procedure.
7.Click Finish and close. The custom app will display in the App registrations list.
1.In the ITAM user console, open the Client Registration workspace.
2.Click New Client Registration. Type a meaningful Name, such as "ITAM Patch," clear the Is On Premise check box (since this feature is only available for ITAM Cloud), and enter the Client Registration URL (i.e., the Neurons Auth URL), Client ID, and Client Secret using the copied settings from the previous procedure. You can leave the VerificationUrl field empty.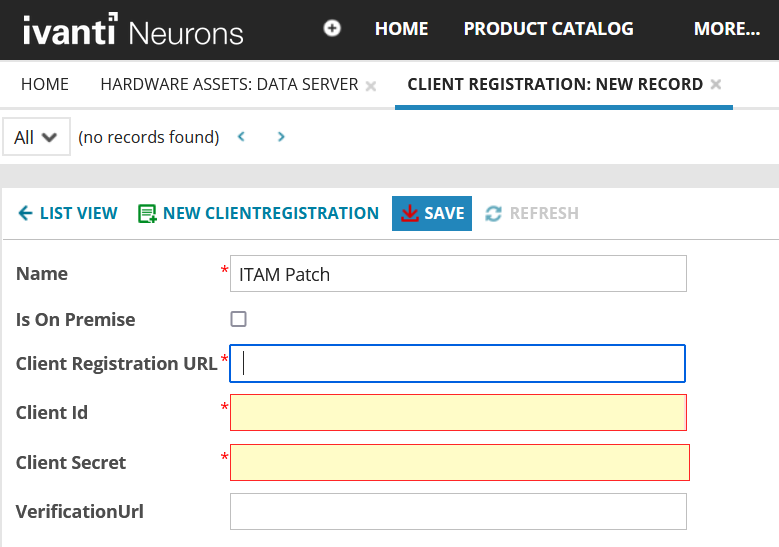
3.Click Save.
Viewing patch data for assets in ITAM
Once the procedures above are completed, you should be able to view patch data for assets from the ITAM user console.
To view patch data for an asset
1.In the ITAM user console, open the Hardware Assets workspace.
2.From the list view, double-click an asset to open its record.
3.Click the Patch Info tab. (You may have to scroll to the end of the tab list to see this tab.) All deployed patches for this asset are displayed in the list.
To view the most recently deployed patches, you may need to click Get Latest Patch Info.
