Creating Tickets in ServiceNow
Summary: How to create ServiceNow tickets in Ivanti Neurons.
Ivanti Neurons offers integration with ServiceNow for users that also utilize this ticketing platform to manage their vulnerabilities and remediation. The Ivanti Neurons platform and ServiceNow Service Request Ticketing System integration is bi-directional, allowing network, application, and database remediation support and development teams to maintain visibility throughout the remediation process without the additional burden of leaving their preferred system. The integration allows users to perform the following high-level tasks:
-
Create tickets for one or more findings.
-
Create tickets from the Findings pages for all three asset types.
-
Create tickets from the Asset pages for all three asset types.
-
Create tickets from the Tags page.
-
View all synced information in the ServiceNow system.
-
Assign tickets to appropriate stakeholders inside of ServiceNow based on a selection.
-
Additionally, users are provided with “many-to-many” capabilities:
-
A ServiceNow Service Request ticket is created from a tag, and that tag can have any number of items associated with it.
-
A ServiceNow Service Request ticket can be created from each tag, allowing the user to have findings involved in more than one ticket (which is common). For example:
-
User creates a ticket for fixing three critical assets that will include all findings on those assets.
-
User then creates a ticket for fixing a finding across 10k assets.
-
If the finding across the 10k assets is included in the first bullet, that is okay because the Ivanti Neurons platform supports a multi-relationship, so that users can have these items tracked in different ways across the platform.
-
-
Starting out in ServiceNow, make sure you have your Template set up (the below example is from an “Incident” setup. The template will be used later to map fields. Make sure this is created in the account that you will be using to monitor tickets, log into ServiceNow with, etc.

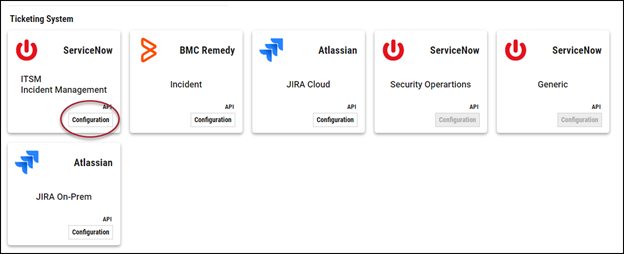
In Ivanti Neurons, navigate to the Automation > Integrations page and select the ServiceNow instance that you need. In this case, in the ServiceNow Incident box, click Configuration to get started.
Once in the connectors screen, fill out the information for your new connector from ServiceNow.
-
Connector Name: Name of ServiceNow connector.
-
Username: Your login username for ServiceNow that has access to these tickets.
-
Password: Password for that ServiceNow account.
-
Location: URL of your ServiceNow Account.
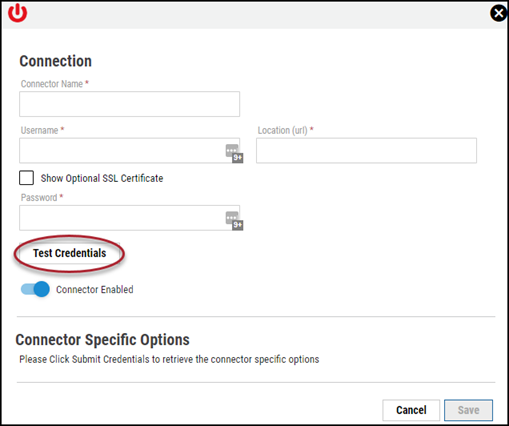
Once you complete the required fields, click Test Credentials. It may take a moment, but if the login details are correct and work, you will get a new menu below to complete and customize.
When creating a connector, disable any password manager that autofills a username and password, as it may interfere with the process. You may re-enable your password manager once connector setup is complete.
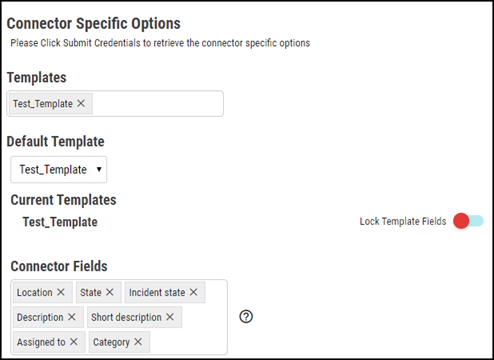
On the menu that pops up, click the Template in the drop-down menu (It should read and the template that you created in ServiceNow) Also, make sure that the Connector Fields section is completed. All of those fields will be what is read and transferred over between Ivanti Neurons and ServiceNow in the initial ticket creation.
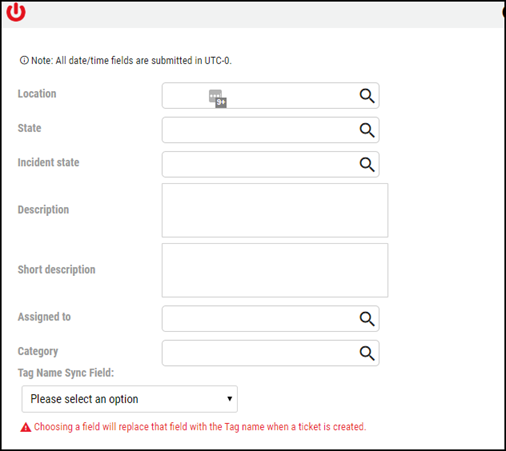
The above shows the fields you could customize for this template. For instance, you could enter Texas as the Location or use a Short Description like Server vulnerability. Later, when creating tickets based on this template, these fields automatically populate. If you have nothing to add, you can leave these blank.
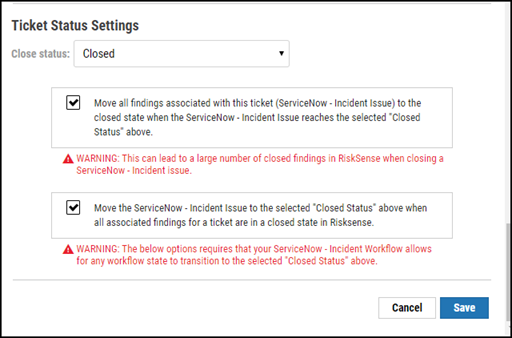
Finally, towards the bottom are the Ticket Status Settings. Checking these boxes will sync statuses between Ivanti Neurons and ServiceNow. Be aware that not everything can sync back to Ivanti Neurons. Essentially, Ivanti Neurons creates the original ticket for ServiceNow with vulnerability information from Ivanti Neurons. Ivanti Neurons does not have many of the fields it is creating for ServiceNow (like State, Location, Short Description, etc.) so changes to those in ServiceNow will not sync to Ivanti Neurons.
-
The first checkbox closes any finding in Ivanti Neurons associated to the ServiceNow ticket when that ticket is closed. Be aware that these findings will re-open in Ivanti Neurons if the scanner detects the finding again. ServiceNow will not reopen the ticket.
-
The second checkbox allows ServiceNow to close when the finding is in a closed state in Ivanti Neurons. Be aware that these findings will reopen in Ivanti Neurons if the scanner detects the finding again. ServiceNow will not reopen the ticket.
Once you click Save, your ServiceNow Integration will be ready to use.
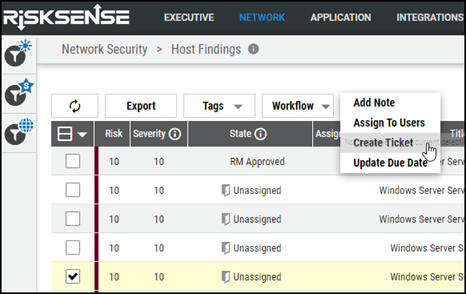
Select a finding (or multiple findings) in Ivanti Neurons using the check boxes. After selecting findings, click More and then click Create Ticket.
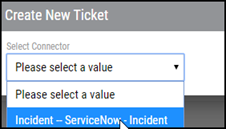
Select the ServiceNow Integration to use to create the ticket.
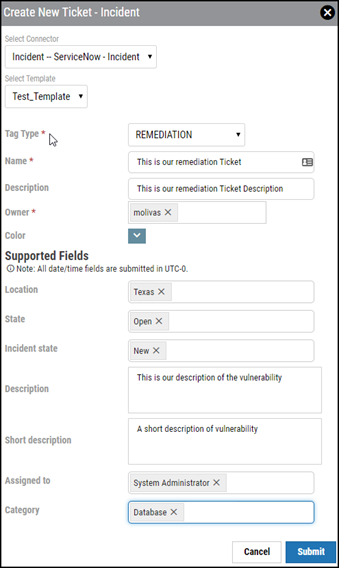
The fields set up in the original integration appear. Complete the fields you want to use to create a ServiceNow ticket and click Submit.

In ServiceNow, the new ticket should appear from RiskSense with the synced fields that you completed.
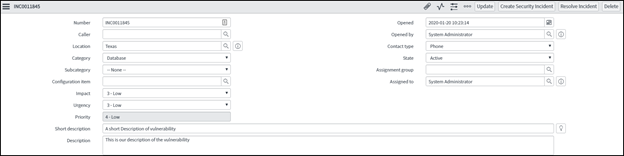
The ServiceNow ticket will also show the synced fields.

Back in Ivanti Neurons, you will now see a ticket/tag noted in both the asset and the finding.
If applying a ticket to a host, all findings within that host will have the ticket applied to them.
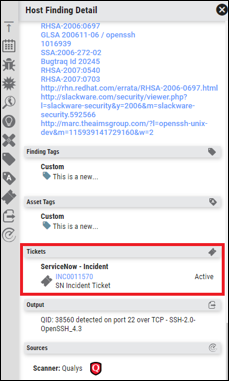
Looking at the Host Finding Detail within a finding, the ticket is also shown with a ticket number/link that leads back to ServiceNow.
Ways of locating the new ticket within Ivanti Neurons include using filters and searching for:
-
“Tag” (or the Ticket Name)
-
“Ticket ID”
-
“Has Ticket”
-
“Ticket Status”
The new ticket is also available on the Tags page. These tickets are set as tags in the system and can be found within the Tags page as a Custom tag type.