Playbooks V2: Detailed Walkthrough
Summary: An in-depth guide to the Automation Playbooks feature, including a walkthrough of creating a Playbook from scratch, as well as how to modify settings on existing Playbooks.
For an introduction to Playbooks and their use in the RiskSense Platform, visit our Overview article. This guide presents a detailed walkthrough of the Playbook structure and components and how to create your first Playbook and associated Rules.
Anatomy of a Playbook
In this section, the structure of Playbooks will be introduced, and you will be shown how all the various components are displayed and categorized.
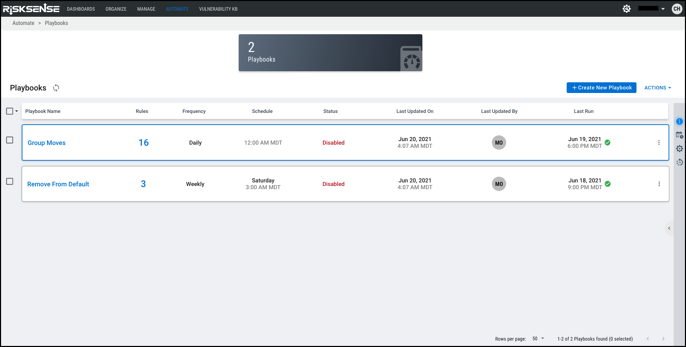
Every Playbook contains the following properties visible on the main list view:
-
Playbook Name: The user-provided name for the Playbook
-
Rules: The number of actions contained within the Playbook
-
Frequency: How often the actions are to be executed
-
Schedule: The designated day and time on which the actions take place
-
Status: Whether the Playbook will run on a schedule (Enabled) or not (Disabled)
-
Last Updated On: The timestamp on which the most recent changes to the Playbook were made
-
Last Updated By: The user who made the most recent change to the Playbook
-
Last Run: The most recent timestamp on which the actions in the Playbook were executed.
In the Playbooks view pictured above, an expandable Detail Pane provides further information on each Playbook, including detailed information on its creation, next scheduled run, enumerated actions taken during the last run, number of assets findings modified, and a history of past Playbook executions. Clicking anywhere on the card outside the name will invoke this detail pane.
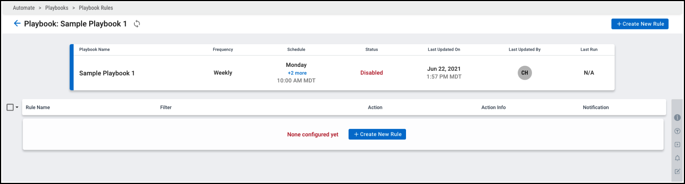
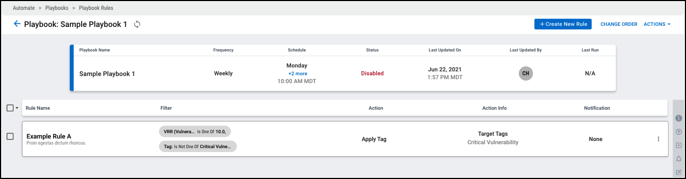
Clicking on the name of a Playbook within the card will bring you to the Playbook Rules View, where all the individual actions contained within the Playbook are shown.
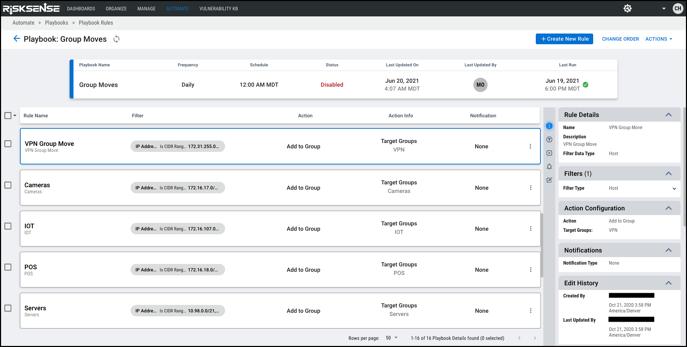
Every Rule contains the following properties visible on the main list view:
-
Rule Name - The user-designated name of the Rule
-
Filter - The active filter(s) this Rule will use to identify the inputs for the action
-
Action - The operation to be carried out
-
Action Info - The targets of the operation
-
Notification - Any designated alerts that are to be sent when the Rule has executed
The Playbook Rules view also features an expandable Detail Pane to show further information on each Rule, including an accompanying description and edit history.
Creating a Playbook
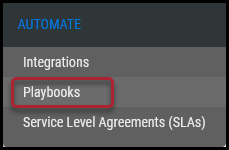
This section will walk through how to create a new Playbook and accompanying Rules from start to finish. To begin, first, navigate to Automate > Playbooks.
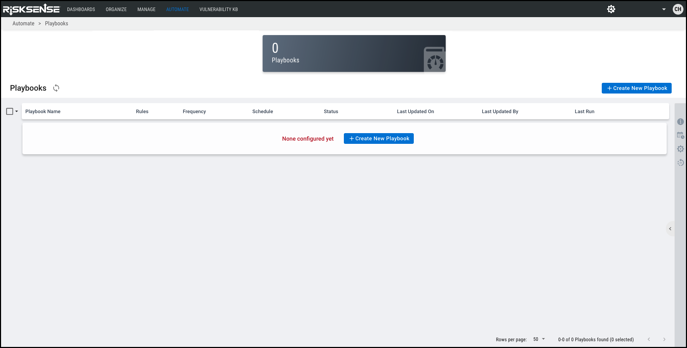
If your organization has existing Playbooks, they will be shown here. If this is your first time setting up a Playbook, you will be presented with a prompt to create a new Playbook.
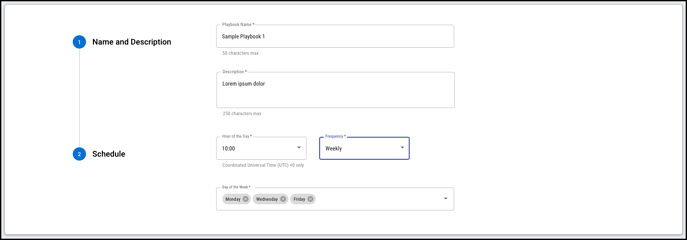
You will then be taken to the Create New Playbook wizard, where you can enter the information for your new Playbook. You will need to provide the following information to set up your automation:
-
A Name and Description for your playbook, describing what its purpose is. The name will appear in the list view, so it is best to choose something short and specific.
-
The Schedule on which the automation will execute. This consists of first choosing an Hour of the Day, followed by your preferred Frequency: daily, weekly, or monthly. Choosing weekly allows you to specify which days of the week you want the automation to run on, and choosing monthly allows you to specify which dates within each month.
-
The Playbook scheduler will automatically adjust a monthly schedule for shorter months. For example, a playbook that normally runs on the 31st of the month will run on the 30th of April or the 28th of February.
-
Note that the Hour of the Day is specified in Coordinated Universal Time (UTC) and will adjust to show your local time zone after the Playbook has been created.
-
Now that you have specified the required information click the Save button to generate your Playbook. You will then be taken back to the Playbooks view, and your newly created automation will be visible.
Setting Up a Rule
Now that we have a container for our automation, it’s time to provide explicit actions that we want our Playbook to carry out. You will notice that in the Playbooks view, our newly created Playbook is currently Disabled. This means that it’s not turned on yet and that we can make changes to it and create Rules while it’s disabled. Once we’ve finished setting it up, we can Enable the Playbook to execute on schedule as normal. We’ll complete this step at the end.
The Rules within a Playbook are executed sequentially in order. For now, we will only be creating a single rule. As you start to build your own Playbooks, note that the order of the Rules will be taken into account and can be modified later.
Navigate to Automate > Playbooks > Playbook Rules by clicking on the name of our Sample Playbook 1 created previously. Currently, this Playbook contains no Rules, so we’ll click the prompt to create a new one and invoke the Create New Rule wizard.
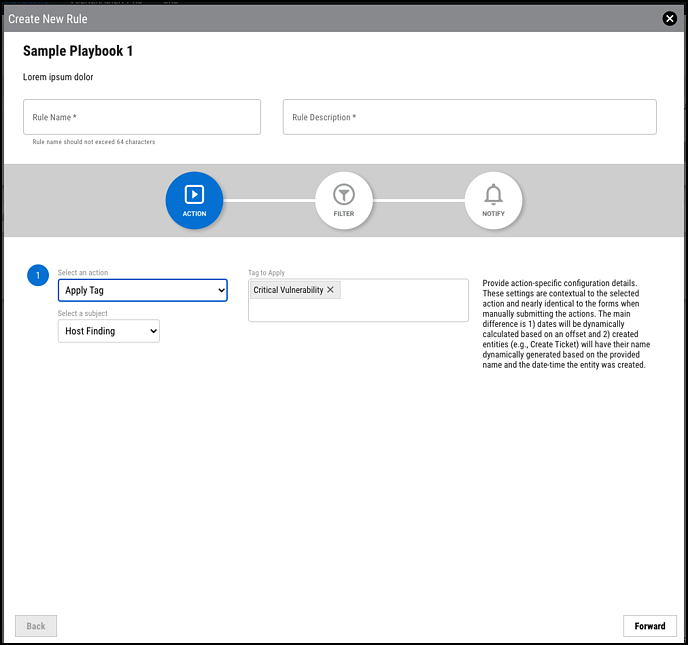
There are three key steps in setting up a new Rule:
|
|
Select an Action |
The Action step defines the operation that the Rule will perform. |
|---|---|---|
|
|
Choose a Filter |
The Filter step defines which assets or findings the Rule will target. Rules store a copy of the chosen filter, so modifying a saved filter won’t impact any existing Playbooks. |
|
|
Set a Notification Type |
The Notify step defines whether users are to be notified upon the Rule completing its operation. |


Each of these steps is explained in depth below.
Select an Action
In the first step, we will choose an action that we would like our Rule to execute. Along with the action itself, we will need to choose a subject to work with, usually either an asset or finding type. Then, the target of the action will be specified, depending on which action is chosen. For example, the “Apply Tag” action’s targets include a list of existing tags in your organization. In contrast, the “Add to Group” action’s targets include a list of groups across your networks.
The following table lists all actions that can be automated using the Playbooks system.
|
Action |
Description |
Subject Data Types |
|---|---|---|
|
Update Severity without Workflow |
Temporarily or permanently change the Severity of a finding. Playbooks will set the expiration date of the new severity rating relative to the run date. If the expiration date offset is omitted, the finding retains the new severity indefinitely. Note that the request-approval workflow is skipped, and the Automation system will move findings to the Severity Update Approved state. Note: This action affects Severity only, not VRR or CVSS scores. Visit this article for more information. |
Host Findings |
|
Apply Tag |
Add a tag to a finding or an asset.* |
Hosts |
|
Unapply Tag |
Remove a tag from a finding or asset.* |
Hosts |
|
Assign Findings |
Assign findings to one or more users. |
Host Findings |
|
Unassign Findings |
Specify one or more users to unassign from findings. |
Host Findings |
|
Set Due Date by Offset |
Add or update a due date on a finding. The due date is set relative to the playbook run date. The offset determines how many days the due date should be set to in the future. |
Host Findings |
|
Add to Group |
Assign an asset to one or more groups. |
Hosts |
|
Remove from Group |
Remove an asset from one or more groups. After this action is executed, any assets with zero group assignments will automatically be added to the Default Group, since every asset must belong to at least one group. |
Hosts |
|
Remove Due Date |
Remove a due date from a finding. |
Host Findings |
|
Update Business Criticality |
Change the Business Criticality of an asset, on a scale from 1 (least critical) to 5 (most critical). |
Hosts |
|
Delete Assets |
Deletes Assets from a Rule. |
Hosts |
For this walkthrough, let us choose the “Apply Tag” action. We will choose Host Findings for our subject and a sample existing tag from our organization to apply.
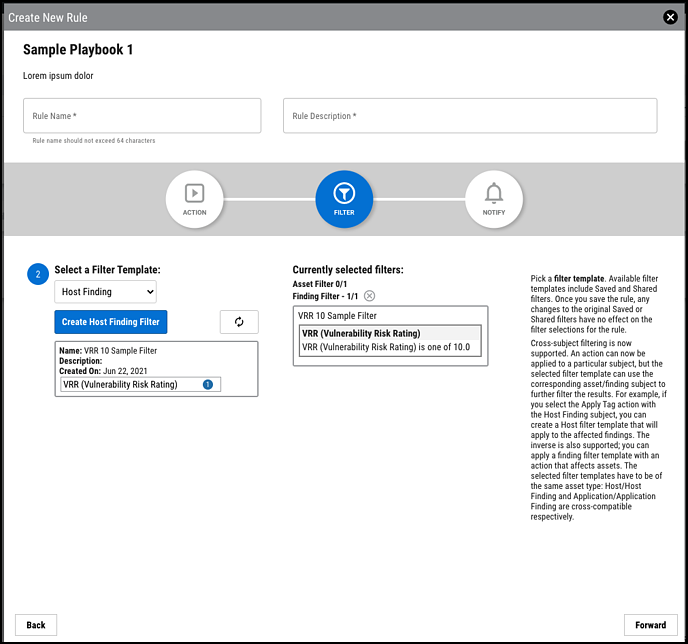
Choose a Filter
Once we have specified all the required information for the action to take, we now want to determine which Host Findings we want our automation to apply the tags on. To do this, we will need to provide our Rule with a filter to identify the desired findings or assets.
The Playbooks system utilizes saved filters within the RiskSense platform. If you do not yet have any saved filters, a link is provided which opens a new tab to the relevant list view, where you can create a new filter.
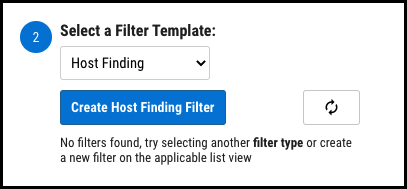
Suppose we would like our automation filter to apply this sample tag to all Host Findings with a VRR of 10. First, we will navigate to the Host Findings view via the “Create Host Finding Filter” button and create the appropriate filter.
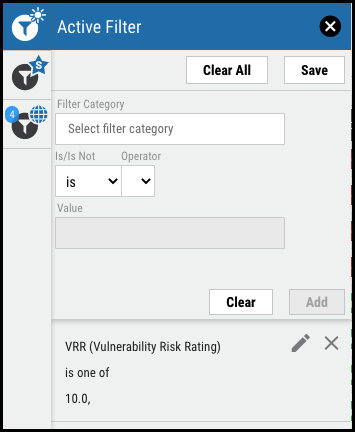
Now we’ll save this filter under the name “VRR 10 Sample Filter” and return to the Create Rule tab. Clicking the refresh button within the wizard now displays the newly created saved filter, and we can select it for use in the Rule.
Note that filters for both assets and findings of a single type may be selected to narrow down the Rule's scope. For instance, a filter for Hosts may be used in conjunction with one for Host Findings.
Set Notification Type and Provide a Name
Now that the details of our Rule have all been specified, we can choose to have the automation system notify a specified set of users via email when the Rule executes. The subject and body of the email can be customized, and the option to include an operational summary of the Rule’s execution details, including actions completed and runtime, is provided as well. No sensitive information is transmitted in this summary.
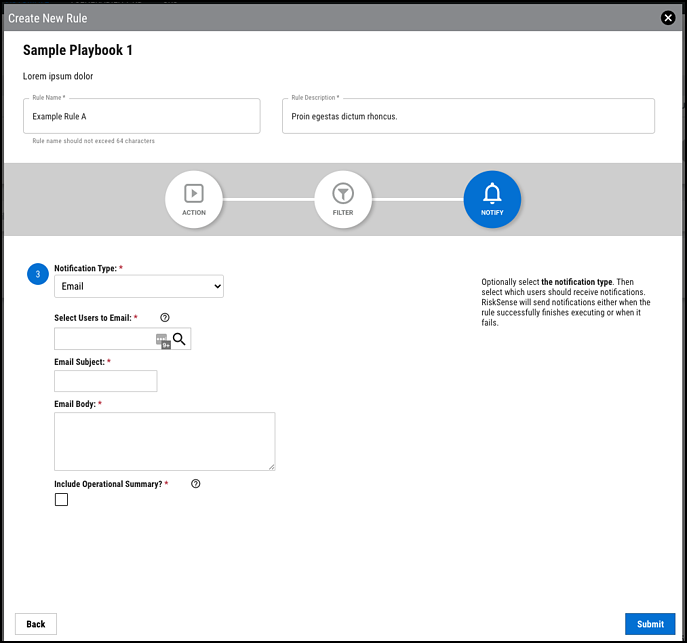
At any point during the Rule creation process, the name and description of the Rule can be specified at the top of the wizard. Once all the required information has been populated, click the blue Submit button to save our created Rule. We now have a fully functional Playbook ready to execute!
Managing Playbook Settings
In this section, we will discuss how to modify the settings and structure of your Playbooks.
Enabling or Disabling Playbooks
To modify the settings of a Playbook, it must first be in the Disabled state. By default, a newly created Playbook will always be disabled. This means that its configurations have been set, but it will not yet execute any actions. To have the automation begin running according to the designated schedule, we will need to Enable the Playbook.
To enable a single Playbook, click on the three-dot options menu on the right edge of the Playbook card, and select “Enable.”
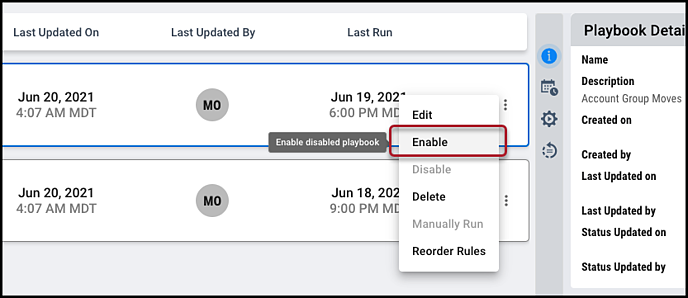
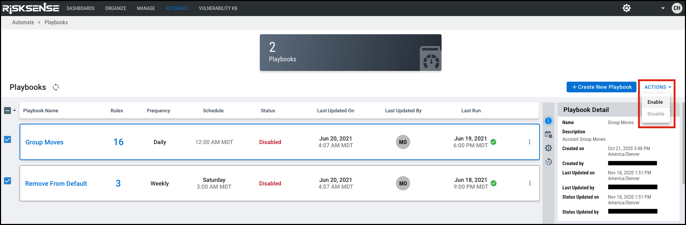
To enable multiple Playbooks at once, select the checkboxes next to each one in the list view and select the “Enable” option from the Actions drop-down menu in the top right.
Playbook Status
The Status of a Playbook shows one of four states: Enabled, Disabled, Running, or Deferred. As discussed above, an Enabled Playbook is configured to run at its scheduled time, and a Disabled Playbook will not run and can be configured.
A Playbook in the Running state is currently executing its operations, and its state and properties cannot be modified until the run is complete.
A Deferred Playbook is queued for operations and will begin executing as soon as its turn in the queue arrives. Playbooks in this state can also not be modified.

Reordering Rules
As discussed above, the Rules of a Playbook will execute in the exact order seen in the Playbook Rules list view sequentially. If you wish to modify this order, first ensure that the Playbook is Disabled. Click on the name of the Playbook whose Rules you wish to reorder, and then select the “Change Order” option in the top-right of the view.

The Change Rules Order wizard will then be presented. In this window, Rules may be rearranged by dragging and dropping them within the list. Arrow buttons to the right of each card can also be used to change the order. Once your rules are in the desired order, click the Save button to apply the configuration to your Playbook.

Deleting a Playbook or Rule
To delete an individual Rule from a disabled Playbook, click on the three-dot options menu to the right of that Rule’s card in the Playbook Rules view, and select “Delete.” A confirmation dialogue will appear; click “Submit” to successfully delete the Rule from the Playbook.
To delete a disabled Playbook, click on the three-dot options menu on that Playbook’s card in the Playbooks view, and select “Delete.” A confirmation dialogue will appear; click “Submit” to successfully delete the Playbook.
Manually Running a Playbook
A Playbook can be executed outside of its normal scheduled time by Manually Running it from the Playbooks view. Note that the Playbook must be enabled to do so, and it cannot be currently queued or running.
To initiate a Manual Run of a Playbook, click on the three-dot options menu on that Playbook’s card in the Playbooks view, and select “Manually Run.” A confirmation dialogue will appear; click “Submit” to start the manual playbook execution.
Transfer Ownership of a Playbook
You can transfer the ownership of a playbook to any eligible owner.
Prerequisite - The Playbook must be in Disabled state.
Procedure
-
Go to Automate -> Playbooks.
-
Click the vertical ellipsis next to the desired playbook.
-
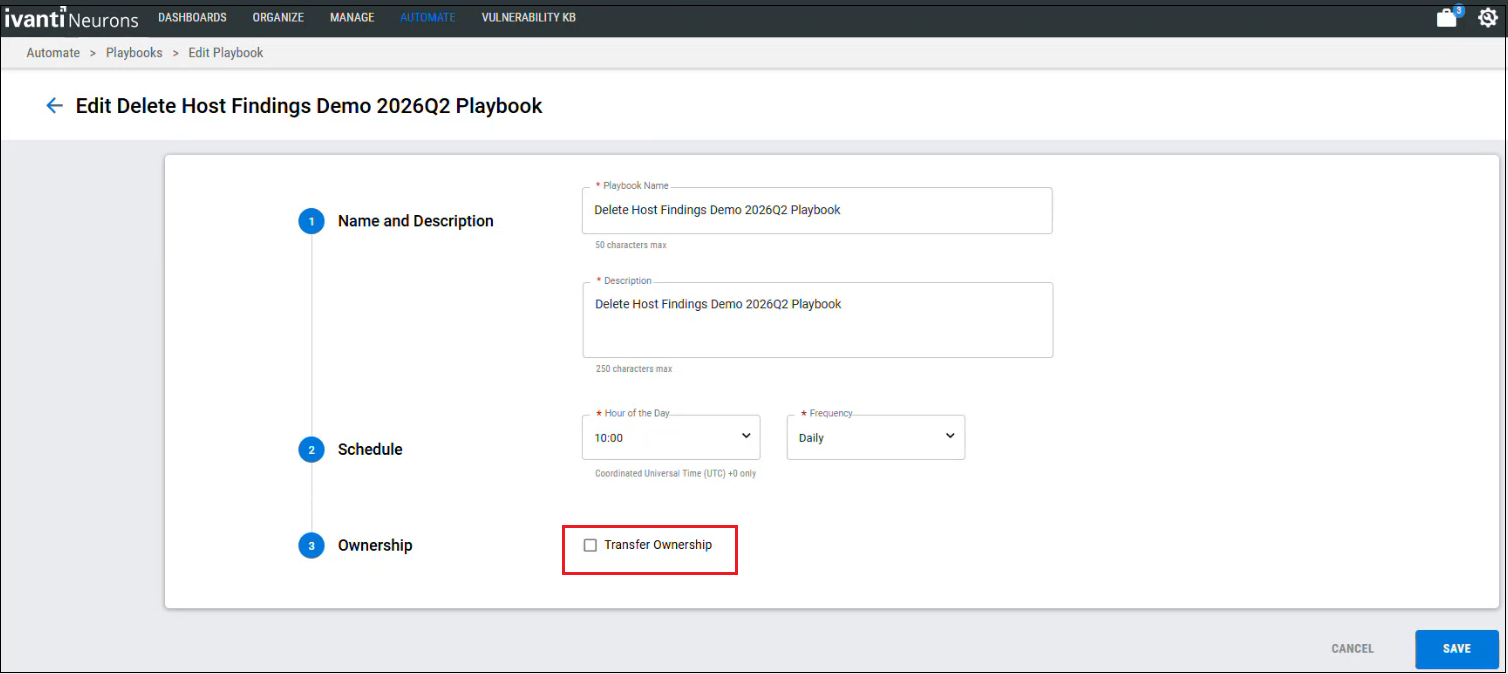
Click Edit.
The specific playbook details appear on the screen.
-
Under Ownership, select Transfer Ownership.
The list of eligible owners will be displayed.
-
Select the required owner to which the ownership must be transferred.
-
Click Save.
A confirmation window appears on the screen - Ownership changes will be applied to the playbook and all underlying rules that currently have the same previous owner. Please confirm that you want to proceed with this transfer.
-
Click OK to confirm the ownership transfer.
Notes and Best Practices
A Note on Locked Tags
In the RiskSense platform, a Tag Owner or Manager can choose to Lock a Tag, preventing it from being applied or modified from its currently set assets and/or findings. Alternatively, the RiskSense system can create a Locked Connector Tag when an API connector is run. RiskSense manages these locked connector tags, and they are also prevented from being applied to or removed from assets and/or findings. Locked Tags cannot be utilized in Playbooks. To utilize the Apply/Unapply Tag automation action, a new tag will need to be created.
System-Applied Filters
Occasionally when creating a new Rule for a Playbook, you may notice that additional filters are attached to the Rule following its creation. These filters are added by the system automatically, and they function as an optimization safeguard to ensure that all Rules are operating as efficiently as possible. No action is required for this to occur; the system will create these additional filters as needed.
Best Practices
When building a new Playbook:
-
Make Rule filters as specific as possible. By defining precise filters for your Rules, you ensure that Playbooks perform only the desired operations on assets and findings.
-
Use filters to eliminate unnecessary operations. For example, a rule that adds assets into a target group should include a filter that excludes any of the chosen assets which are already in that group.
-
Use Rule execution order to your advantage. The sequential operations within a Playbook allow users to chain together sophisticated sets of actions by feeding the output of one operation into the next one.