Walkthrough: Tag Creation and Application
Summary: Step-by-step process for creating an Asset Tag and propagating that tag to both Hosts and Host Findings.
Here is an example of creating and applying tags to Ivanti Neurons assets and findings.
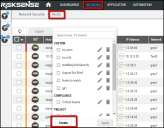
Navigate to the Network > Hosts page, click the Tags button, and click the Create button in the Tags drop-down menu.
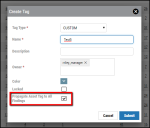
In the Create Tag window, select any of the Tag Types, provide a descriptive name for the tag, ensure that the Propagate Asset Tag to All Findings checkbox is enabled, and click Submit.
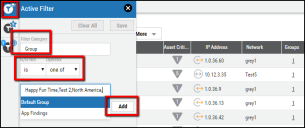
Now that the tag has been created, it can be applied to hosts and their vulnerabilities. Within the main Hosts list view, open the Active Filter dialog and apply a filter like “Group / is / One Of / x,x,x,x”, where x is the names of one or more Ivanti Neurons Groups.
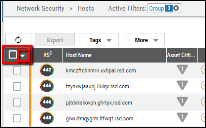
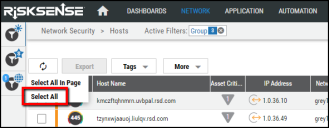
Once the filter is applied, select the down-arrow icon just underneath the page refresh button and use the Select All option from the drop-down list. Please note that clicking the box next to the down-arrow performs a Select All in Page, rather than a Select All. Use the latter option when applying tags to more than 50 items at once. Confirm the selected asset count in the top-right section of the page.
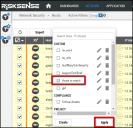
Now that the hosts are selected, click the Tags button, search for the tag created earlier, check the box next to the tag, and select Apply.
While the platform applies the tag, users will see a briefcase-looking icon in the top-right corner of the Ivanti Neurons interface, indicating the active job of applying tags to hosts. Once that icon disappears, the tags refresh the page.
The tag should now be applied and can be validated by selecting the Active Filters again, clearing all current filters, and adding a filter of “Tag / is / exactly / x” where x is the name of the tag created earlier in this walkthrough.
