Cherwell Service Management Connector Guide
Summary: How to set up and use the Cherwell Service Management connector in Ivanti Neurons RBVM/ASPM/VULN KB.
Cherwell Service Management Connector Overview
Use the Cherwell Connector to create an integration with Cherwell Service Management for ticket creation from the Ivanti Neurons RBVM/ASPM/VULN KB platform. When the connector is configured, Neurons RBVM/ASPM/VULN KB users can create tickets in Cherwell. This integration supports three forms of tickets--Incident, Change Request, and Problem. The Cherwell user credentials used in the connector configuration should have create, read, and write permissions to create tickets and subsequently query the ticket status from the Cherwell ticket. When creating a ticket, the connector allows a user to create a ticket on single or multiple vulnerabilities for applications or hosts.
Connector Setup
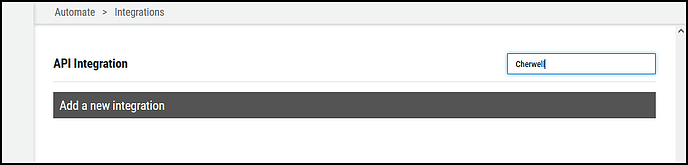
To set up the Cherwell connector, navigate to the Automate > Integrations page.

Using the search bar in the upper-right corner of the Integrations page, type Cherwell to find the connector.
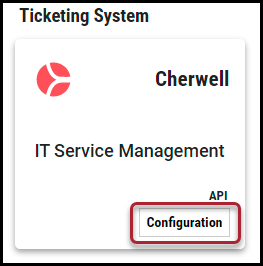
Locate the Cherwell IT Service Management card on the page and click Configuration.
In the dialog box, complete the required fields under Connection:
-
Connector Name: The name of the connector instance.
-
Location URL: The URL of the Cherwell instance.
-
Username: The username of the user that has access to the Cherwell instance.
-
Password: Password of the user that has access to the Cherwell instance.
-
Client ID: Client ID/API key retrieved from the Cherwell instance.
Once the fields are filled out, click Test Credentials to ensure the credentials entered are valid.
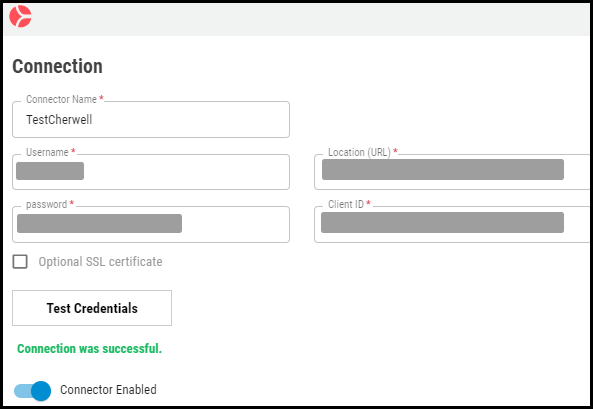
When the Test Connection succeeds, the Connector Specific Options appear.
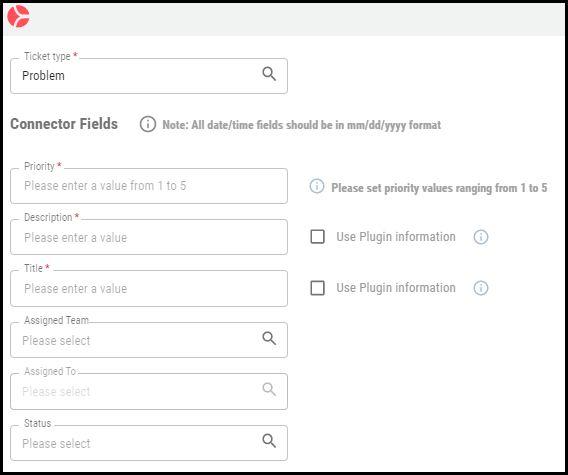
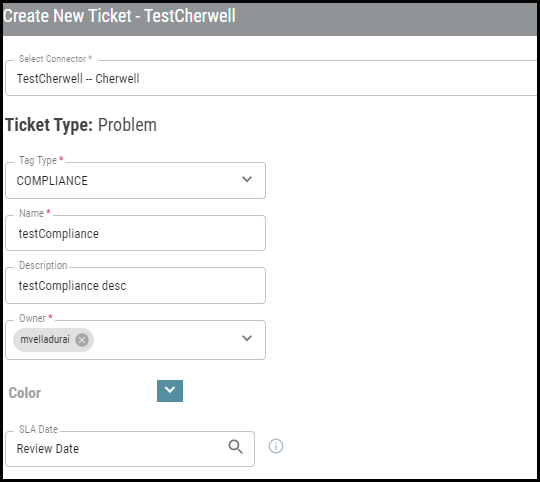
Select the Ticket Type dropdown. It has three ticketing options--Incident, Problem, and Change Request. Based on this selection, additional form options will appear.
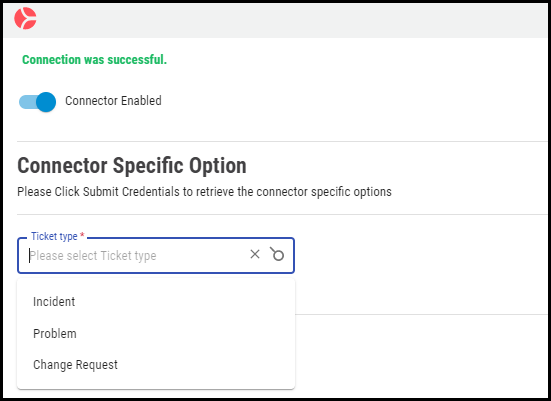
For this example, select Problem as the chosen ticket type. Depending on the configuration, available fields will appear in this section, as shown below.
Form options: When a magnifying glass appears, it will allow searching for data to fill. Required fields are denoted with “*”. Date fields will open a date picker window.
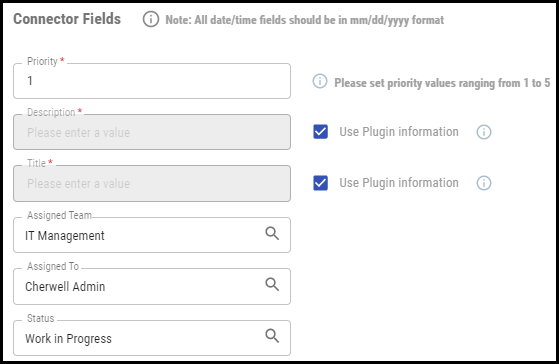
If the user selects the Use Plugin Information checkbox near the Title and Description fields, then RiskSense will send plugin-related information as part of the corresponding fields in Cherwell. The plugin information includes the scanner, plugin ID, title, description, VRR, and vulnerabilities associated with the plugin. If the ticket is associated with a single finding, the ticket also includes asset information. Users can choose to provide a custom Title and Description for the ticket or to populate these fields with plugin information automatically.
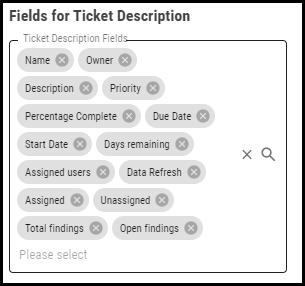
Select the fields that will appear in the ticket description. These are the fields that appear on the Tags page.
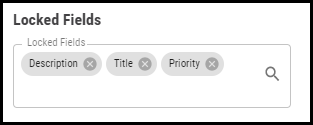
Optionally, there is the ability to select a set of fields that will be locked when a ticket is created. This is action is completed by selecting the Locked Fields dialog. When clicking the field, the available fields appear.
Users can select default values for Neurons RBVM/ASPM/VULN KB fields.
-
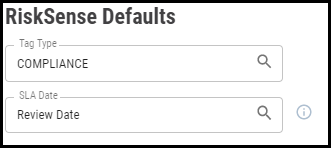
Tag Type: The user can choose the default tag type. While creating a ticket in the Create Ticket popup, the tag type field will be pre-populated with the chosen value. If the user wishes to override them it is also possible, both in the connector form or in the Create Ticket popup.
-
SLA Date: This dropdown gives the list of Cherwell fields that the user would like to map the SLA date from RiskSense. If the ticket is associated with more than one finding, the earliest due date applied among those findings would be listed as the SLA Date on the ticket.
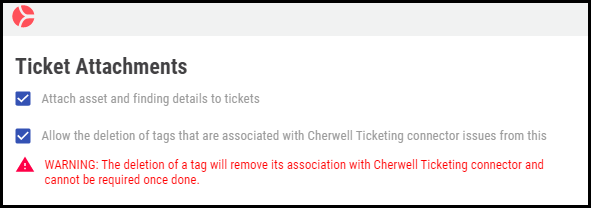
In the next section, the ability to attach asset details and findings as Ticket Attachments and allow the deletion of tags associated with the connector option is available.
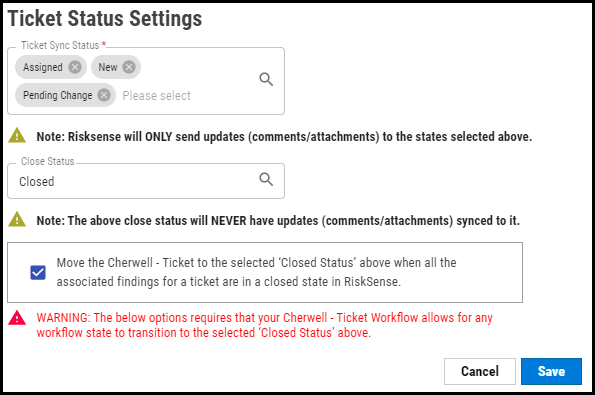
In the Ticket Status Settings:
-
Ticket Sync Status: This dropdown has a list of statuses from Cherwell. Neurons RBVM/ASPM/VULN KB will send updates (comments/attachments) only for the selected statuses.
-
Close Status: If the user wishes to move a Cherwell ticket to a selected status when all the associated findings for a ticket are in a Closed state in Neurons RBVM/ASPM/VULN KB, then the user needs to select the status and mark the checkbox. Neurons RBVM/ASPM/VULN KB will not send updates to this status.
Note: The status selected for Ticket Sync Status and Close Status should not be the same.
Click Save to enable the connector.
Creating a Cherwell Ticket
After configuring the Cherwell connector, you can view information about it from the following list views.
-
Hosts
-
Host Findings
-
Applications
-
Application Findings
-
Tags
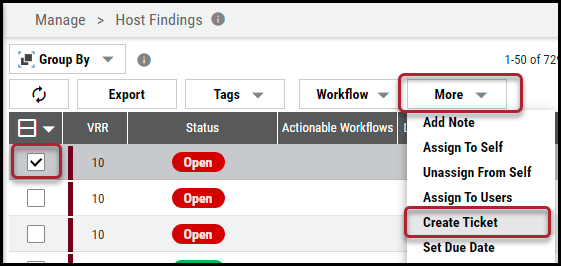
To create a ticket, the user must have the ability to create a ticket on any selected application or host vulnerabilities. First, select at least one finding. Next, click the More button and choose the Create Ticket option.
In the Create Ticket window, choose the Cherwell ticketing connector. After selecting the connector, the Create New Ticket window appears. In the Connector form, if the user has chosen the default value for Tag Type and the SLA date, then the selected values will be prepopulated here. If the user would like to override the chosen tag type, they can select from the dropdown. The SLA date field can also be overridden.
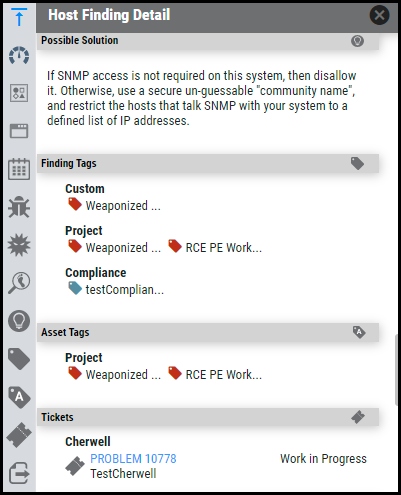
Once the ticket is created, it will take some time to reflect in the system. Click on the ticket icon in the findings detailed pane, and the user will see the ticketing system with the ticket number, which is a link to the ticket in Cherwell along with the current state of the ticket in the ticketing system.
If Use Plugin information is chosen, the ticket will look like the one below when a finding is associated with a ticket. Users can choose multiple findings, as well.
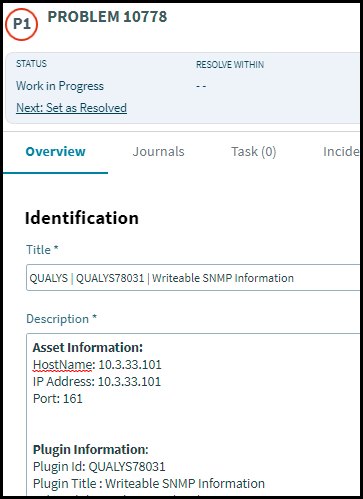
The following screenshot shows what the Description looks like in the Cherwell ticket.

If there is more than one finding, then each associated plugin’s information will be added to the ticket until the maximum character limit is reached.
Use the Has Ticket filter in a list view to see all vulnerabilities with a ticket assigned.
