This is not the latest version of Identity Director documentation.View available documentation.
Build the organizational structure
- People: These are all persons in your Identity Director environment.
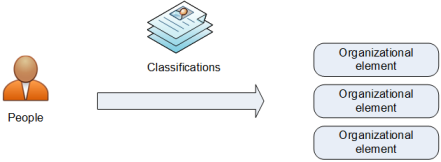
- Organization: This is the logical structure of organizational elements, subdivided in for example locations, roles and departments. By classifying people in organizational elements, you can determine which users are authorized to sign in to the Web Portal and the Clients and for which services they qualify.

The organizational structure allows:
- Administrators to configure services and specify who qualifies for them.
- Identity Director to deliver and return services to qualified users.
- Users to sign in to the Web Portal and the Clients.
Now you can add organizational context, to manage the structure of your organization.
In the Management Portal at Organization, you can manage the structure of your organization.
In this section, we will add a new organizational element manually. You can also build the organizational structure by synchronizing data from external sources. This is discussed in Scenario 1: Synchronize external data to build the organizational structure.
Configuration
- At Organization, 5 default organizational elements exist: Departments, Groups, Locations, Organizational Units and Roles.
- Click the tile of the organizational element Departments. This opens the Departments page.
- Click Add in the taskbar. This opens the New Organization page. You can use this page to configure the organizational element.
- On the Properties tab, specify Marketing in the Name field.
- Leave the other settings as they are and click Save.
Now you can add records for the people in your organization.
In the Management Portal at People, you can manage all people who are part of your environment. You can add new persons, change the properties of existing ones, view for which services a person qualifies, etc.
In this section, we will add two new persons.
Configuration
- At People, click Add in the taskbar. This opens the New person page. You can use this page to configure information about a person.
- On the Properties tab, specify Amanda Cavendish in the Name field.
- In the image area, click Change image and upload an image or specify its URL. This allows you to visualize the person to the end user in the Web Portal.
- Supported file types are JPG, PNG and GIF (Recommended: 10 KB, 96 x 96 pixels, larger dimensions are resized to 96 x 96). This also applies to URL images.
- In the Identifier area, configure the identification methods and their values that identify people in the Identity Director environment. A people identifier is a method to identify people in your environment. This can be the Windows user account or an e-mail address, but also an employee ID or phone number; as long as you can assign a unique value to it. User authentication in the Web Portalis also based on people identifiers. In this case, add the user account that you configured earlier for Amanda Cavendish to the identifier Windows user account (e.g. demo\CavendishA).
- Leave the other settings as they are and click Save.
- Repeat the previous steps to add John Smith to your environment.
- People now shows two persons: Amanda Cavendish and John Smith. If you want to view or change the settings of a person, click the tile of this person.
Finally, you classify the people in your organization.
In the Management Portal at People and Organization, you can classify people in the organization. Classifications reflect the relationship between people and the organization. You can classify people in multiple organizational elements (for example, you can classify them in the department Finance and the role Payroll Specialist). You can use the classifications of a person as qualification criteria for services: if you change these classifications, this may lead to a change in this person's service qualifications, which may result the automatic service delivery or return of services.
In this section, we will classify Amanda Cavendish in the organizational element Marketing, which is part of the organizational element Departments.
Configuration
- At Organization, click the tile of the organizational element Departments. This opens the Departments page.
- Click the edit button
 in the tile of the organizational element Marketing. This opens the Marketing page.
 - Click the People tab. You can use this tab to classify people in the organizational element Marketing.
- Click Add. This opens the Select panel.
- Select Amanda Cavendish and click OK.
- Click Save.
- Repeat the previous steps to classify John Smith in the organizational element Administration.
- At People, click the tile of Amanda Cavendish or John Smith to view in which organizational elements you classified them (Organization tab).
You can also classify people at People:
- At People, click the tile of Amanda Cavendish.
- Click the Organization tab. This tab gives an overview of all organizational elements in which Amanda Cavendish is classified. In this case, the organizational element Marketing.
- You can classify people in multiple organizational elements. For example, you can classify Amanda Cavendish in the organizational elements Marketing and Roles.
- Click OR to create different sets of criteria. This is useful if people have multiple roles or frequently work from a different location, and certain services only apply to a specific role or location. When you add organizational elements to a person's classifications, you can change their order with the arrows.