Filtering Patch View
Information displayed in the top pane can easily be filtered to narrow the focus to only those patches of interest. One way to do this is by using the Smart Filter.

The Smart Filter initially contains several default filters. Default filters are identified by a leading asterisk. Default filters cannot be modified or deleted.
Another option is to apply filters to individual columns. For more information, see Customizing the Column Headers.
Custom Filters
You can create your own custom filters. This is a powerful tool that enables you to specify exactly which patches you want displayed in Patch View. Each custom filter is comprised of one or more rules. You can define as many rules in a filter as needed.
To create a new filter:
- Click New Smart Filter.
The Smart Filter dialog is displayed. - Specify which rules in the filter must be matched.
- All: Only those patches that match all the rules in the filter will be displayed.
- Any: Patches that match at least one rule in the filter will be displayed.
- Define one or more rules.
To define a rule, select an option in each of the first two logic boxes and then type the criteria in the third box. To add another rule simply click Add Rule. - Type a name for the filter.
- When you are finished defining your custom filter, click Save/Rename.

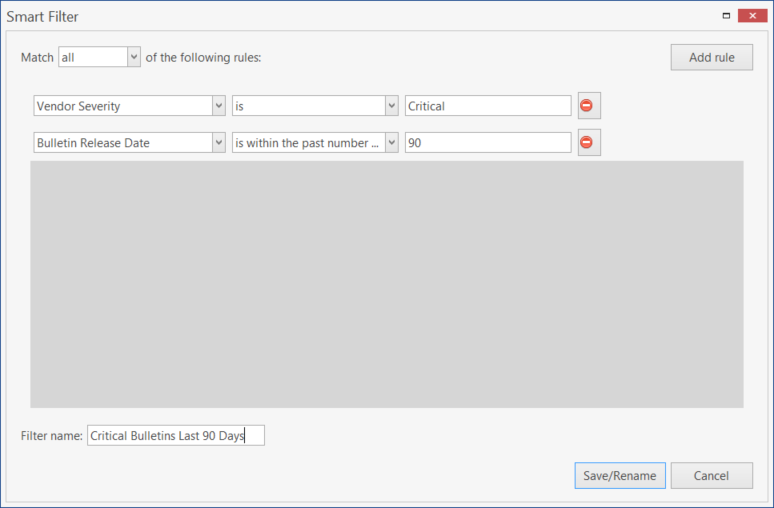
Example
Assume you want to see a list of all critical bulletins that were released within the past 90 days. You simply create a filter similar to the following: