Specifying Which Custom XML Files to Use
Security Controls enables you to create many different custom XML files. However, you may not want to use all your custom XML files all the time. For this reason Security Controls also enables you to specify which of your custom XML files (if any) that you want to use in your scans and deployments.
For information on creating custom XML files, see Creating A New Custom XML File.
To specify the custom XML files that will be used in your scans and deployments:
- From the Security Controls menu select Manage > Custom Patches.
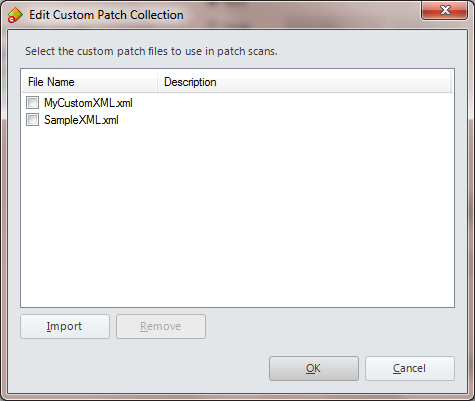
The Edit Custom Patch Collection dialog is displayed. It contains a list of custom XML files you have previously imported into the dialog. - (Optional) If you have created additional custom XML files that are not currently in the list, you can add them to the list by clicking Import.
Navigate to the custom XML file you want to add and then click Open. The new XML file is added to the list. Repeat this step for each new custom XML file you want to add to the list. - Enable the check boxes for the custom XML files you wish to include in your patch scans and deployments.
The XML files included in all future scans and deployments will be the standard XML patch file plus any of the custom XML files enabled here. The available XML files are called your collection; the custom XML files currently enabled for use is called your active collection. - Click OK.
Security Controls will perform a validation process to ensure that all the selected custom XML files and the primary XML patch file can be successfully combined. Although you should have already validated each individual custom XML file, Security Controls must make sure that the files collectively are okay. For example, if you inadvertently used the same name for two different custom products in two different custom XML files, the validation process will catch this.
IMPORTANT! Any custom XML file that has been changed since it was initially imported must be removed and then re-imported. If you just re-import a changed file without first removing it, the program will continue to use the old version of the file.
If an error occurs during the validation process the custom XML files will not be used. You must correct the problem and try again.
Removing a Custom XML File
To remove a custom XML file that has been previously combined with the primary XML file:
- On the Edit Custom Patch Collection dialog, clear the check box of the custom XML file you no longer want to use.
- Click OK.
Only those custom XML files still enabled will be included in the validation process and used with the primary XML file.