Creating a New Custom XML File
To create a customized XML file you use the Custom Patch File Editor.
- Access the Custom Patch File Editor by selecting Tools > Custom Patch Editor.
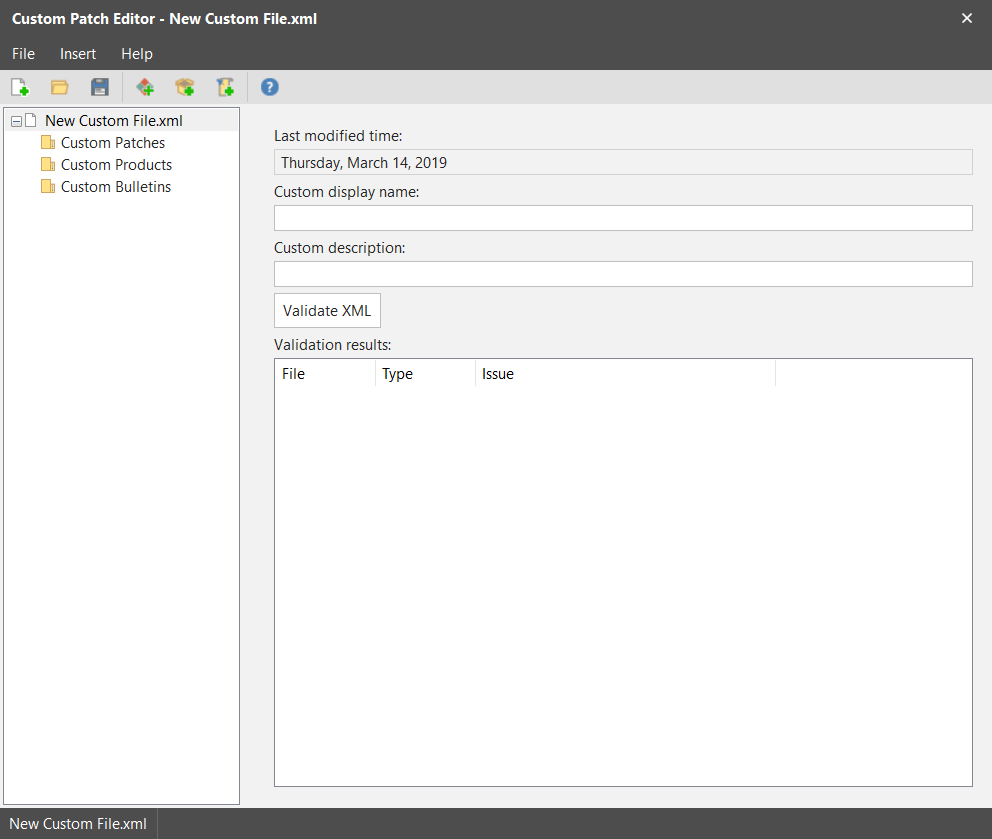
The Custom Patch File Editor dialog is displayed. - Create a new custom XML file by selecting File > New or by clicking the Create a new custom XML file link in the right-hand pane.
The New Custom File dialog is displayed. - Save the new custom XML file by selecting File > Save As and then specifying the name and location of the file.
You can give the file any unique name you want. The file can be saved anywhere you want, but a logical location is the program's DataFiles folder. - Use the fields in the right-hand pane to define the file characteristics.
- Define the bulletins, products, and patches you want included in this custom XML file.
- Create the new custom product.
- Create a new bulletin, or tie the patch to an existing bulletin.
- Create the new patch.
- Create a new bulletin, or tie the patch to an existing bulletin.
- Create the new patch.
The DataFiles folder is located here:
This is the directory used to store all the other XML files used by the program.
|
Field |
Description |
|---|---|
|
Last Modified Time |
This read-only field indicates the last time the custom XML file was changed. |
|
Custom XML Display Name |
Type a unique name for the file. |
|
Custom XML Description |
Type a description that explains the purpose of the file. |
|
Validate XML |
To verify that the XML file is properly formed and valid, click this button. You should validate the XML file anytime you make modifications to the XML file. Be sure to save the file before performing the validation to ensure that you are validating the most current file. |
|
Validation Results |
Displays the results of the most recent validation check. |
|
If creating a patch for a new product: |
Then create the items in this order: |
|
If creating a patch for an existing product: |
Then create the items in this order: |
For details, see the following topics:
