Editing Custom Group Properties
Summary: How to update custom group properties.
Groups can have up to five custom properties. This article describes how to update custom group property values and how to rename the properties within Client Settings.
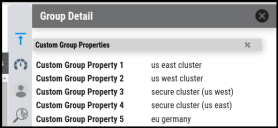
When you add custom properties to a group, you can filter on specific property values and view custom group properties in the Group Detail pane.
Editing Custom Group Properties
To edit custom group properties, you must have the IAM privilege Group Control.
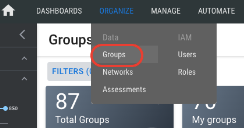
From the Navigation menu, go to Organize > Groups.
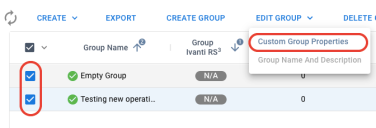
Select the group or groups to edit and select Edit Group > Custom Group Properties. Note that if you select the Default Group, this option will be disabled.
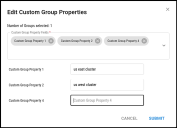
Select which properties you want to edit. For each property that you add, you will see a new text box.
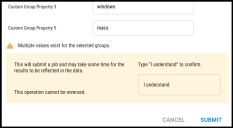
When you have entered the new values, click Submit. If you are updating the custom group properties of more than one group at a time, you must confirm by typing I understand first.
To view the new custom properties for a group, open the Group Detail and scroll to the Custom Group Properties section.
Viewing Custom Group Properties
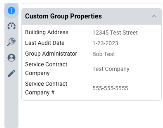
To view the new custom properties for a group, click on a row to open up the Group Summary. Then scroll to the Custom Group Properties section. (Note that in this screenshot, the client has changed their default property names.)
Changing Default Property Names
To edit the names of custom group properties, you must have the IAM privilege Client Settings Control.
You can change the default names of each custom group property within Client Settings.
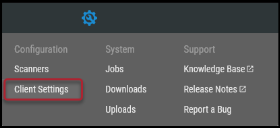
Go to Configuration ( ) > Client Settings.
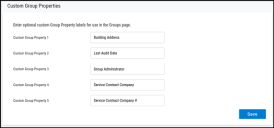
In Client Settings, go to the Custom Group Properties section to change the names of custom group properties across the client.
After you save the new names, the names will appear in the Group Detail for each group. The default names for custom group properties (“Custom Group Property 1”, “Custom Group Property 2”, etc.) will continue to appear in other parts of the platform and the exports.
