Qualys VM/VMDR Connector Guide
Summary: How to set up and use the Qualys Vulnerability Management (VM)/Vulnerability Management, Detection, and Response (VMDR) connector in Ivanti Neurons RBVM/ASPM/VULN KB.
Overview
Qualys Vulnerability Management (VM)/Vulnerability Management, Detection, and Response (VMDR) provides asset discovery and vulnerability assessment for on-premises and cloud environments.
The Ivanti Neurons RBVM/ASPM/VULN KB platform provides an API-based connector that integrates with Qualys VM/VMDR, enabling customers to bring in their findings. It allows customers to gain visibility into their overall risk due to vulnerabilities in their endpoint and a more straightforward, more efficient way to manage those vulnerabilities.
User Prerequisites/Qualys Setup
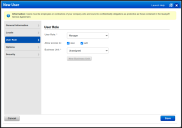
A Qualys user can be assigned to one or more roles, which consolidate permissions that represent the rights to access features and functions. API Access can be given to a user when assigning or editing their role.
Locate Users in the navigation bar and either create or edit an existing user. In the pop-up window, select a User Role. Then, select or deselect the API checkbox. Click Save.
Qualys VM/VMDR Connector API Calls
The following API calls are performed during a connector run to pull security vulnerabilities from Qualys VM/VMDR into Neurons RBVM/ASPM/VULN KB.
|
API Type |
Endpoint |
|---|---|
|
Authentication |
/api/2.0/fo/session/?action=login |
|
Fetch List of Hosts |
/api/2.0/fo/asset/host/ |
|
Fetch List of Vulnerabilities Associated with Each Host |
/api/2.0/fo/asset/host/vm/detection |
|
Fetch List of AssetGroups |
/api/2.0/fo/asset/group/ |
Connector Setup
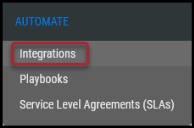
To set up the Qualys VM/VMDR connector, navigate to the Automate > Integrations page.
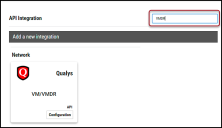
Using the search bar in the upper-right corner of the Integrations page, type VMDR to find the connector.
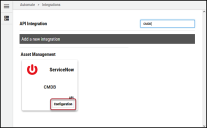
Locate the Qualys VM/VMDR card on the page and click Configuration.
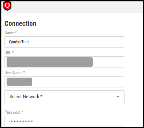
In the new window under Connection, complete the required fields, as described below.
-
Name: The connector’s name.
-
URL: The specific Qualys VM/VMDR instance URL.
-
User Name/Password: The Qualys username and password.
-
Select Network: Neurons RBVM/ASPM/VULN KB network name (ingested data associated with this network).
-
SSL: Optional instance SSL certificate in base64 format.
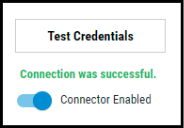
Click Test Credentials to verify the credentials are correct and have access to make API calls to the Qualys VM/VMDR instance.
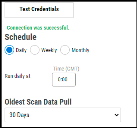
Under Schedule, you can configure the desired schedule for the connector to retrieve results from the Qualys instance and optionally select the Oldest Scan Data Pull configuration. The Oldest Scan Data Pull dropdown provides users the flexibility to pull the assets from the last 30, 60, 90, 180 days and 1 year.
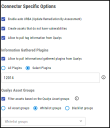
Under Connector Specific Options, select the required options from the list.
-
Users can optionally turn on Enable auto URBA (Update Remediation by Assessment).
-
On marking the Create Assets that do not have vulnerabilities options, Neurons RBVM/ASPM/VULN KB will create hosts with zero findings.
-
By enabling Allow to pull tag information from Qualys, RiskSense will pull associated tags with hosts.
-
Information Gathered Plugins: Clicking the All Plugins radio button allows users to pull all informational plugins related to the hosts. To pull specific plugins, click the Select Plugins radio button. Input the list of informational plugins you would like to process as comma-separated values without spaces. For example--11773, 12014, 12015
-
Qualys Asset Groups: Clicking the All Asset groups radio button allows users to pull hosts from all the associated groups. Users can choose to whitelist groups as well as blacklist. By whitelisting one or more groups, a user is able to configure only hosts belonging to these groups will be pulled in. On other hand, by blacklisting groups, users have the ability to restrict certain hosts from these blacklisted groups. Whitelisting and blacklisting of groups can be done only by the Qualys Users who have the Manager Role.
Click Save to create the connector.
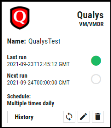
A new card for the Qualys connector appears at the top of the Integrations page.
This connector runs once the initial setup is complete. Click the History button to check the connector’s status. Clicking the Sync button pulls connector files from Qualys on demand. Clicking the Edit button allows you to modify the connector. Clicking the Delete button deletes the connector.
