SonarQube Connector Guide
Summary: How to set up and use the SonarQube connector in Ivanti Neurons.
Overview
SonarQube is an on-premises solution for code quality and security service. SonarQube operates as a static code analyzer that discovers security and quality issues in source code by interacting directly with the repositories.
Ivanti Neurons provides an API-based connector that integrates with SonarQube, enabling customers to bring their SAST findings. This connector allows customers to gain visibility into their overall risk due to vulnerabilities in their source code to allow a more straightforward, efficient way to manage those vulnerabilities.
User Prerequisites/SonarQube Setup
SonarQube is an on-premises solution. Ivanti Neurons requires a user account with the following access to communicate with and pull data from SonarQube.
-
A user with, at minimum, read access to scan results and their associated issues. The user must also be allowed access to SonarQube API endpoints.
-
As SonarQube is an on-premises solution, for it to communicate with Ivanti Neurons, we must set up a RiskSense On-Site Application (ROSA) OVA. More information on ROSA is available here.
SonarQube Connector API Calls
The following API calls are performed during a connector run to pull security vulnerabilities from SonarQube into Ivanti Neurons.
|
API Type |
Endpoint |
|---|---|
|
Authentication |
|
|
Fetch List of Projects Keys |
|
|
Fetch Analysis date for each project |
|
|
Fetch the list of Directories for each project |
|
|
Fetch the list of Issues for each directory |
|
|
Fetch the list of Rules for the organization |
Fetching the SonarQube User Token
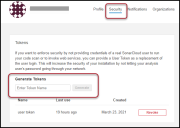
First, log in to your SonarQube instance with the designated user account. Navigate to My Account > Security. Enter the token name and click the Generate button.
Copy the user token, as it is only displayed once. Use this token for API authentication.
Configuring the SonarQube Connector in Ivanti Neurons
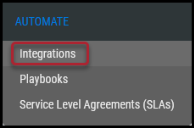
Navigate to the Automate > Integrations page.
Using the search bar in the upper-right corner of the Integrations page, type SonarQube to find the connector.
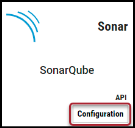
Locate the SonarQube card on the page and click Configuration.
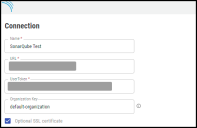
In the new window under Connection, complete the required fields, as described below.
-
Name: The connector's name.
-
URL: The URL to access SonarQube Instance
-
UserToken: UserToken retrieved from SonarQube instance, as described here.
-
Organization key: The default value for this field is default-organization. If the user doesn't provide any value, Ivanti Neurons will look for default-organization as a key.
-
SSL: Optional instance SSL certificate in base64 format
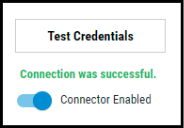
Click the Test Credentials button to ensure the credentials are correct and have the necessary access to make SonarQube API calls.
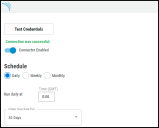
Under Schedule, you can configure the desired schedule for the connector to retrieve results from the SonarQube instance and optionally select the Oldest Scan Data Pull configuration.
The Oldest Scan Data Pull drop-down provides users the flexibility to pull the oldest reports from the last 30, 60, 90, 180 days, and 1 year.
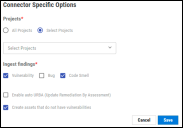
Under Connector Specific Options, select the required options from the list.
Users have the option to ingest the selected SonarQube findings. Ivanti Neurons can ingest more than one finding type.
-
Projects: Clicking the All Projects radio button allows the user to pull all projects under the organization. To pull specific projects, click the Select Projects radio button. Once selected, Ivanti Neurons makes a dynamic call to SonarQube to fetch all associated projects. Users can choose more than one project, as well.
-
Ingest Findings: The user can ingest selected findings from SonarQube. More than one type of finding can also be ingested at once.
Users can optionally turn on Enable auto URBA (Update Remediation by Assessment).
On marking the Create Assets that do not have vulnerabilities options, Ivanti Neurons will create applications with zero findings. This option will be selected by default, and the user can opt to turn it off.
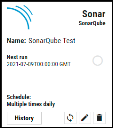
Click the Save button to save the connector's configuration and create the connector. Once saved, the connector is now visible on the Integrations page under Currently Configured Integrations.
Clicking the History button displays the connector details for each pull. The Sync button allows users to perform on-demand sync. The Edit button allows the user to edit the connector configuration. The Delete button allows the user to delete the connector.
Once files have been processed on the Uploads page, view the ingested data by navigating to the Applications and Application Findings pages.
Mapping SonarQube fields in Ivanti Neurons
This table showcases the high-level mapping of SonarQube fields in Ivanti Neurons.
|
Ivanti Neurons Fields |
SonarQube Fields |
|---|---|
|
Scanner Severity |
rules -> severity |
|
Normalized Severity |
The SonarQube Severity scale: Blocker, Critical, Major, Minor, and Info. Ivanti Neurons converts this Severity scale into a scale from 0-10 using specific logic. Contact Ivanti Neurons Support for more information. |
|
Scanner Plugin |
rules -> key |
|
Application Name |
ProjectName |
|
Plugin Source Status |
issues -> status |
Ivanti Neurons Tags
The following fields from SonarQube are converted into Ivanti Neurons tags. Use these tags for searching, automating playbooks, and visualizing in Ivanti Neurons Dashboards.
-
Organization - This tag name is prefixed with the field name to ease the searching process.
-
SysTags
-
Tags
-
Resolution
Common Fields in Ivanti Neurons
The following fields in Ivanti Neurons are defined for SonarQube, along with their default values.
-
The Scanner Name will be SonarQube.
-
The Finding Type will be SAST.
