Privileging specific attributes
You can apply privileges at the attribute level. This is particularly useful if you have confidential information, such as payroll information, that you do not want certain people to see.
No privileged attributes will be included in a Knowledge Search.
The following procedure describes creating a business object without using the Business Object Creation Wizard. You can create the same business object using the wizard, and would possibly be a quicker way of doing it. It is a personal preference whether or not you use the Wizard. You do not have to create a new business object, alternatively, you can just add a new attribute to an existing business object.
To specify that a specific attribute is Privilegeable:
- Start the Object Designer component.
- On the Business Objects tree, select the relevant Module folder, then on the Actions list, click New Business Object.
- Name the business object, for example, Payroll.
- Add the required attributes, including the attribute that you want to make Privilegeable.
- On the Attributes tree, select the required attribute, then on the Properties grid, within the User Management group, select True alongside the Is Privilegeable? property.
By default. this property is set to False. If you leave this as False, then everybody who has read access to this business object can see this attribute. If you set the property to True, then access to this attribute is either restricted or enabled for everybody.
The Default Privileges dialog appears.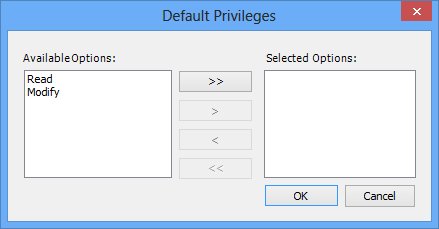
- In the Available Options list, select the required option, then click
 .
.
The option is added to the Selected Options list. - Click OK.
- Save the business object by clicking
 .
.
You use the Administration component to configure which Groups and Roles have access to this attribute, and refine the available options. For more information, see the Administrator Guide.