Creating configuration items (CIs)
When you have the required business objects and windows for the different CI types, you can create the specific CIs.
To create a new CI:
- Start the Configuration Management component.
- Expand the Configuration Items tree.
The CI types you have created appear on the tree under the Configuration Item branch. - Select the required CI type in the tree, then on the Actions list, click New Configuration Item.
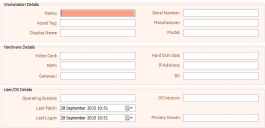
The relevant CI window appears.
When you want to make changes to a managed CI, you must first create a future version, and then make that future version the current version.
- Complete the relevant information, then click
 .
.
The Name must be unique. We recommend avoiding using the characters < and > in the name, as these can cause problems in Impact Analysis diagrams.
You can delete CIs using the Delete Configuration Item action, and restore deleted CIs using a query that displays soft deleted records. For more information about creating a query to enable you to restore soft deleted records, see the Designer Guide.
If the Confirmation behaviour has been applied to the CI object, you are prompted to re-enter your password whenever you create, update, or delete a CI using Ivanti Workspaces or Web Access. For more information about setting the Confirmation behaviour, see the Designer Guide.
If you are using a multilingual system and you create a CI when you are logged in to Web Desk as a user whose culture is not set to the base culture, a dialog appears asking you to choose the language that you want to create the CI in. You can create the CI either in the base culture or the culture of your user account. If you create the CI in your user culture and don't supply the base culture translation, the base language value is set to Not Defined, and can be updated later. For more information about setting up a multilingual system, see the Designer Guide.
