B2B connector wizards
Each vendor, or B2B connector, has slightly different requirements for configuring rules to retrieve data from their websites. For more information about B2B connectors, see B2B connectors overview
In many cases, you may have report files supplied by vendors not appearing in the B2B connectors list. For any of these .CSV, .XLS, or .XLSX files that you want to import, use the Universal B2B import wizard.
The B2B connector rules rely on vendor websites to import data. On occasion, a vendor may change their website, preventing the rule from working correctly. If this occurs, contact Ivanti to ensure that the rule functionality is updated via a content patch.
You may also find that a vendor has added a Captcha key, which prevents a B2B connector rule from accessing the vendor's website. In this case, contact the vendor directly.
Expand the B2B connector name below for more information about using the wizard:
An Adobe B2B connector rule functions just like a software-license import rule. You may need to update the software license look-up table if the rule is importing software data that's not recognized. For more information, see Licensed-software rules overview
User: The username assigned by Adobe.
Password: The password assigned by Adobe.
Start date: The date to start collecting data from Adobe. All data from the Adobe volume licensing site will be imported from this date on.
Timeout: Depending on how much data you retrieve and the speed of your connection, you may need to increase the timeout value. Values are listed in seconds.
Click the Finish button. Your new rule will appear in the B2B Connector > Adobe Software Import > All Rules folder.
To pull information from the CDW website, it's first necessary to create a report for the data you want. Create the report by going to the CDW website and following the steps below.
Because you'll be scheduling this report to run periodically, make sure you select an appropriate time period for the data you want to import. For example, you may want to schedule the report to import data once a week, so you would select Month To Date. You may also want to do one initial pull of historical data to populate the items already in your database.
To create a CDW report
- Go to http://www.cdw.com.
- Log in using your credentials.
- From the menu, select Order Center > Order History.
- Select Create New Report and select the fields you want to include in Management Suite.
- Select a Time Period for the report.
- Click Save Report.
Once you've created the report, you can configure a rule to pull the data into the database.
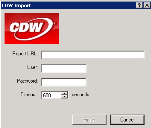
Report URL: The URL for the report you just created on the CDW website. Go to that report, run it, and copy the URL into the Report URL text box. This link will be a very long; make sure you copy the entire URL.
User: The username assigned by CDW.
Password: The password assigned by CDW.
Timeout: Depending on how much data you retrieve and the speed of your connection, you may need to increase the timeout value. Values are listed in seconds.
You can now manually run the rule to pull CDW data into the database. To import new items that you order from CDW, schedule this rule to run in accordance with the time period you selected for the report.
Click the Finish button. Your new rule will appear in the B2B Connector > CDW Import > All Rules folder.
Warranty data: An option that imports all warranty data, such as start date, end date, description, and so on.
Manufacturer parts: An option that imports the parts information (such as hard drive, memory, and so on) that Dell shipped with the ordered device.
Timeout: Depending on how much data you retrieve and the speed of your connection, you may need to increase the timeout value. Values are listed in seconds.
Key attribute: The database attribute to send to Dell when this rule looks up the device in inventory. This attribute should be the one that holds the Dell Service Tag.
Use proxy: If your server needs to use a proxy to access the Dell website, select this option and fill in the appropriate fields.
Click the Finish button. Your new rule will appear in the B2B Connector > Dell Warranty Import > All Rules folder.
User: The username assigned by En Pointe.
Password: The password assigned by En Pointe.
Days to save: The number of days back for which to retrieve data. You can set up one rule that retrieves all historical data and another rule that is scheduled to run once a month to retrieve that month’s information.
Timeout: Depending on how much data you retrieve and the speed of your connection, you may need to increase the timeout value. Values are listed in seconds.
Click the Finish button. Your new rule will appear in the B2B Connector > En Pointe Import > All Rules folder.
User: The username assigned by ePlus.
Password: The password assigned by ePlus.
Months to save: The number of months back for which to retrieve data. You can set up one rule that retrieves all historical data and another rule that is scheduled to run once a month to retrieve that month’s information.
Timeout: Depending on how much data you retrieve and the speed of your connection, you may need to increase the timeout value. Values are listed in seconds.
Click the Finish button. Your new rule will appear in the B2B Connector > ePlus Import > All Rules folder.
User: The username assigned by Insight.
Password: The password assigned by Insight.
Start /end date: Insight gathers data from a future start date back to a specified end date. Or select Today, to gather data from the last 3 years up to the current date.
Timeout: Depending on how much data you retrieve and the speed of your connection, you may need to increase the timeout value. Values are listed in seconds.
Click the Finish button. Your new rule will appear in the B2B Connector > Insight Import > All Rules folder.
User: The username assigned by Kelway.
Password: The password assigned by Kelway.
Start /end date: The start and end dates to collect data from Kelway.
Timeout: Depending on how much data you retrieve and the speed of your connection, you may need to increase the timeout value. Values are listed in seconds.
Click the Finish button. Your new rule will appear in the B2B Connector > Kelway Import > All Rules folder.
Use this connector to import MSDN volume license user data into the inventory database. Obtaining MSDN data is generally a two-step process:
- First, configure and run an LDAP import rule to import the email address of each primary user of a device using MSDN into inventory. The rule associates the primary user’s email address to a particular device, enabling the MSDN connector to import data for each address matching those assigned to MSDN licenses on Microsoft’s volume licensing website.
- Second, configure the MSDN connector to connect to Microsoft’s website and import user data for those same email addresses into Management Suite inventory.
Narrow the results of both the rule and connector by targeting just the departments in your organization that have devices using MSDN.
User: The username assigned by Microsoft to access their volume licensing website.
Password: The password assigned by Microsoft to access their volume licensing website.
Licensing IDs: Numbers assigned by Microsoft that represent your MSDN licensing contracts.
Timeout: Depending on how much data you retrieve and the speed of your connection, you may need to increase the timeout value. Values are listed in seconds.
Click the Finish button. Your new rule will appear in the B2B Connector > Microsoft MSDN User Import > All Rules folder.
User: The username assigned by Microsoft to access their volume licensing website.
Password: The password assigned by Microsoft to access their volume licensing website.
Totals only: The total number of licenses that are part of your Microsoft contract.
By individual licensing ID: Contract numbers assigned by Microsoft. Enter each licensing ID on its own line.
Ignore unresolved: A column in the Microsoft report titled "Unresolved," which typically refers to upgrades or items purchased that are not part of your original contract.
Timeout: Depending on how much data you retrieve and the speed of your connection, you may need to increase the timeout value. Values are listed in seconds.
Click the Finish button. Your new rule will appear in the B2B Connector > Microsoft Volume License Import > All Rules folder.
User: The username assigned by PDS.
Password: The password assigned by PDS.
Months: The number of months back for which to retrieve data. You can set up one rule that retrieves all historical data and another rule that is scheduled to run once a month to retrieve that month’s information.
Timeout: Depending on how much data you retrieve and the speed of your connection, you may need to increase the timeout value. Values are listed in seconds.
Click the Finish button. Your new rule will appear in the B2B Connector > PDS Import > All Rules folder.
Directory: The directory location where you'll store the .XLSX-formatted report file obtained from the Softchoice website. When this rule runs, the file will import into the inventory database.
Click the Finish button. Your new rule will appear in the B2B Connector > Softchoice Import > All Rules folder.
Directory: The directory location where you'll store the .XLS-formatted report file obtained from the Softmart website. When this rule runs, the file will import into the inventory database.
Click the Finish button. Your new rule will appear in the B2B Connector > Softmart Import > All Rules folder.
User: The username assigned by SoftwareONE.
Password: The password assigned by SoftwareONE.
Start date: The date to start collecting data from SoftwareONE. All data from the SoftwareONE volume licensing site will be imported from this date on.
End date: The date to stop collecting data from SoftwareONE.
Use current date as end date: Select if you want to collect data from the start date on, without cessation.
Timeout: Depending on how much data you retrieve and the speed of your connection, you may need to increase the timeout value. Values are listed in seconds.
Click the Finish button. Your new rule will appear in the B2B Connector > SoftwareONE Import> All Rules folder.
In order to navigate Verizon's website, this rule requires that Adobe Flash be installed on the core server.
User: The username assigned by Verizon.
Password: The password assigned by Verizon.
Timeout: Depending on how much data you retrieve and the speed of your connection, you may need to increase the timeout value. Values are listed in seconds.
Gather summary data: Retrieves summary-usage data for your account by taking the monthly summary-usage report from Verizon and importing as far as back as possible, typically 12 months.
Gather upgrade data: Pulls upgrade information for each device, such as device type and cost. This option works only on selected devices that you drag and drop onto the rule.
Gather current usage data: Retrieves usage data for the current month that hasn't been billed yet. This option works only on selected devices that you drag and drop onto the rule.
Click the Finish button. Your new rule will appear in the B2B Connector > Verizon Import > All Rules folder.
User: The username assigned by VMWare.
Password: The password assigned by VMWare.
Timeout: Depending on how much data you retrieve and the speed of your connection, you may need to increase the timeout value. Values are listed in seconds.
Click the Finish button. Your new rule will appear in the B2B Connector > VMWare B2B Import > All Rules folder.
Universal B2B import wizard
Use this wizard to create a rule that imports report-file data from vendors not appearing in the B2B connectors list. Files must have a .CSV, .XLS, or .XLSX extension to be imported into the inventory database.
You can accomplish tasks related to the universal B2B import rule by using the various right-click menus.
In the DTS tree view, right-click the Universal B2B Import folder to access these menus:
Edit classes: A list of classes, or categories, DTS can currently import from a vendor-supplied report file into one of three places, as listed in the Import type column:
- Asset Control refers to classes (non-managed devices such as printers, monitors) imported into the Asset Control database.
- Computer refers to classes (such as computers, laptops) imported into the inventory database.
- Software refers to classes (software product licenses) imported into SLM.
The classes list is used mainly for reference. You can add a new class to the list, but it will be outside the import process until you contact Ivanti with a content request to add it. (Classes with this status are listed as "No" in the System column.)
Edit manufacturers: A list of vendors whose report files DTS can currently import into inventory; used mainly for reference. You can add a new vendor to the list, but it will be outside the import process until you contact Ivanti with a content request to add it. (Vendors with this status are listed as "No" in the System column.)
Import part numbers: Enables you to import vendors, classes, or part numbers from an .XML file, which is useful in a multi-core environment.
Export part numbers: Enables you to export vendors, classes, or part numbers to an .XML file, which is useful in a multi-core environment.
When you first create a universal B2B import rule, you'll see a dialog that asks if you want to upload your anonymous data (vendor SKUs, part numbers, and so on) to an Ivanti web service.
Click Yes to ensure that the universal B2B import will function efficiently. Unknown items will be uploaded to the web service and processed. If you run the rule again, any items that have been mapped will then be downloaded. If you click No, you will need to do this exception handling yourself.
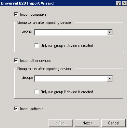
Use this page to select what you want to import using this rule.
Import computers: Select to import computer data (such as part numbers, serial numbers, and so on) into the inventory database.
- Groups: A DTS group that will run after the rule has imported the computer data; useful for post-processing actions. For example, if you import a number of Dell systems, you may also want to get the warranty information. You can set a rule group to run that will retrieve the Dell warranty information after this rule completes.
- Only run group if device is created: If a new computer record isn't created when this rule is run, the selected DTS group will not run.
Import other devices: Select to import data about devices (such as printers, routers, and so on) into the Asset Control database. This data could include part numbers, serial numbers, and so on.
- Groups: A DTS group that will run after the rule has imported the device data, which is useful for post-processing actions.
- Only run group if device is created: If a new device record isn't created when this rule is run, the selected DTS group will not run.
Import software: Select to import software license data into the Management Suite software license monitoring (SLM) console.
Use this page to select a data source containing the data you want to import.
For CSV files:
- Filename: The full path of the file to import. If you're importing all files in a directory, enter the name of just one file that can be used to show columns.
- Headers in the first row: If column headers (names) are in the first row, select this check box.
- Load all files in directory: Processes all files with a .CSV extension. All files must have the same format and columns for this option to work correctly.
- Delimiter: The column delimiter used in the .CSV file, such as a comma or tab. By default, the delimiter is a comma.
- Use column numbers instead of names: Select this option if the names of the columns may change, but the data in them stays the same. This is useful if the file headers become localized.
- Character set: The format of the file's character set. U.S. English normally uses the default, which is ANSI. However, other languages need to use a different set to support their own characters.
For Excel files:
- Filename: The full path of the file to import. If you're importing all files in a directory, enter the name of just one file that can be used to show columns.
- Sheet: The name of a single sheet in the Excel file to read data from. Each rule will read from only one sheet. Leave this option blank to read data from the entire Excel file.
- Load all files in directory: Processes all files with an .XLS or .XLSX extension. All files must have the same format and columns for this option to work correctly.
Use this page to match the columns in your file to the various identifiers used to import data for computers, devices, or software product licenses.
Part number/SKU: A required field; the vendor part number or SKU of the computer, device, or software product.
- Browse file button: Opens the .CSV or Excel file to help you match columns to identifiers.
Manufacturer: A required field; the name of the computer, device, or software product vendor.
Class: The class of computer, device, or software product (such as mouse, monitor, server, and so on) that is used if the SKU is unknown.
Description: A description for the computer, device, or software product, only used for help with exception handling.
Serial number: A required field if you selected to import computer or device data. Without the serial number, it's impossible to import this data.
- Multiple serial numbers in cell: If the computer or device has more than one serial number, select this option. The default separator between values is a comma.
Other columns with multiple values per cell: Click the Add button to open a dialog where you can select the other column(s) in the file that have multiple values per cell.
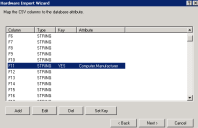
If you selected to import computer or device data, use this page to map each file column you want to import to a hardware-specific database attribute. Select a column and click the Edit button to complete the mapping.
At least one column must be set as the key, which is used to determine hardware product uniqueness. By default, the serial number column is set as the key. You can change which column is key, but the key column must always have an attribute mapping.
For device data going into Asset Control, the attribute must already exist there, or the data is considered unmodeled and will not import into Asset Control correctly. If the data is unmodeled, a dialog will display requiring you to define the component or attribute before finishing the rule-creation process.
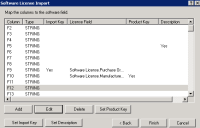
If you selected to import software license data, use this page to map each file column you want to import to a software-license-specific database attribute. Select a column and click the Edit button to complete the mapping.
At least one column must be set as a product key to determine the software product that the license data maps to. If multiple columns are selected, the columns are concatenated with spaces between them. By default, the part number/SKU column is always set as the product key. Each column designated as a product key must also be mapped to an attribute.
You also need to set at least one column as the import key to determine software product uniqueness (for example, the purchase order number). Each column designated as an import key must also be mapped to an attribute.
Click the Set Description button to select a column for the software product description, which is used for exception handling only.
Finally, you must import the column for license quantity by mapping that column to the Software License.Quantity attribute.
Click the Finish button. Your new rule will appear in the B2B Connector > Universal B2B Import > All Rules folder.


