Export data wizard
Use this wizard to configure rules that automate the process of exporting information from Management Suite inventory or Asset Control to .CSV files and external databases.
Open the wizard by right-clicking Export Data in the DTS tree and selecting New rule. Enter a unique name and description for this rule, then select the database where the rule will store the data it gathers. On the continuing pages, enter the following information:
Use database settings: Select this option to use the inventory database as the export destination. You do not need to know the connection information.
Type: Select a data source as the export destination.
When connecting to an external database, the appropriate client tools must be installed on the core server to communicate with that database. For example, to communicate with an Oracle DBMS, the Oracle client must be installed on the core server.
If your data source is not listed, you can connect using the ODBC driver from your software provider. The options on this page will change, depending on what you select:
- Server: The instance to connect to.
- Database: The database to use.
- User: The SQL username needed to connect.
- Password: The SQL username password.
- Filename: The full path of the file to export to.
- Headers in the first row: If column headers (names) are in the first row of the file, select this option.
- Delimiter: The column delimiter used in the file, such as a comma or tab. By default, the delimiter is a comma.
- Delete files before export: Deletes current data in the .CSV file before exporting the new data.
- Character set: The format of the file's character set. U.S. English normally uses the default, which is ANSI. Other languages may need a different set to support their characters.
- DSN: The name of the DSN created. The name must be a System DSN for the rule to work as a scheduled task or at scan time.
- User: The username, if needed.
- Password: The password, if needed.
- TNS server: The name of the Oracle server to connect to. For the connection to work, the 64-bit Oracle client must be installed on the core server.
- User: The user or schema used to log in to the Oracle server.
- Password: The password for the user.

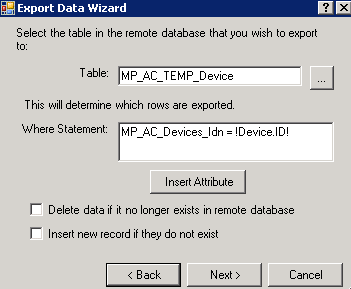
If you selected a database as your export destination, this page appears.
Table: The name of the remote database table you want to export data to. Click the ellipsis (…) button to browse available tables.
Where statement: A required statement that matches a device in inventory with a record in the remote database table. This statement should include a database attribute (click the Insert Attribute button to use the attribute browser) and a column in the table.
For example, if you have a table that shows serial numbers listed in a column named "SerialNum," you might enter the following as the where statement:
!Computer.System.Serial Number! = SerialNum
You can use more than one attribute in the where statement. This statement is passed as is, replacing attributes with values. It's possible to put joins or a subselect into this statement.
Delete data if it no longer exists in remote database: If you're trying to export device data that no longer exists in the remote database table, this option deletes the same data from the record in inventory.
Insert new record if they do not exist: Exports new data into the remote database table that didn't previously exist.
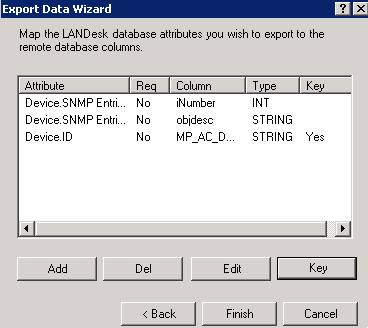
This page shows the data that will be exported to the remote database table. To export properly, you need to map attributes in inventory to columns in the table. Click the Add button to create the mappings.
If you're exporting data to a .CSV file, this page looks slightly different but the options are the same.
- Attribute: An attribute that is mapped to a table column during export.
- Req: No longer used in Data Analytics. Disregard.
- Column: A table column that the attribute is mapped to during export.
- Type: The data type of the table column (STRING, DATE, and so on).
- Key: A key column that links the device to a record in the table. You must specify at least one key.
Once you've created your mappings, click the Finish button. Your new rule will appear in the Export Data > All Rules folder.
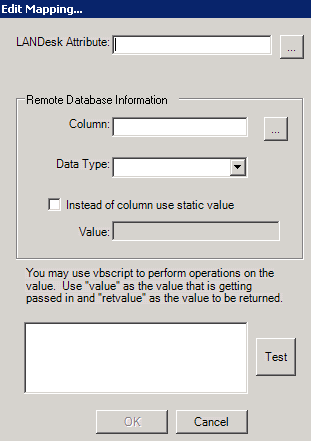
From this page, you can create the mappings between database attributes and columns in the remote database table.
If you're exporting data to a .CSV file, this page looks slightly different but the options are the same.
Ivanti attribute: The attribute in the inventory database to map to.
Remote database information:
- Column: The column in the remote database table to map to.
- Data type: The data type of the table column (STRING, DATE, and so on).
- Instead of column use static value: An option to set an attribute to a constant value and ignore the column data.
VBScript textbox: You can use VBScript to modify the outgoing data (optional). Click the Test button to verify that the VBScript works.