Web custom data wizard
Custom web forms provide an easy way of adding new, customized data into inventory for your devices. The web form consists of a table where editors can add the new information, which is then imported into inventory based on new database components and attributes that you define during the form-creation process.
Open the wizard by right-clicking Web custom data in the DTS tree and selecting New rule. Enter a unique name and description for this rule. On the continuing pages, enter the following information:
Name: The form name as it will appear in a browser.
Description: A form description that's useful when viewing multiple forms at once in a browser. (To view multiple forms at once, right-click a rule name and select All forms.)
Component: Enter a custom component that doesn't already exist in inventory. Click the ellipsis (…) button to view components and attributes currently in the database. For syntax, use a period between component elements (for example, Computer.Software.Package).
Make this a one-to-many component: Select if this component will have more than one entry in inventory. For example, if you look under Computer.Software.Package, you tend to see many entries per installed software package, each representing a single file. One-to-many components are useful for storing numerous instances of a single data type.
Editors: Click the Add button to select editors who will have rights to enter information into the form fields. If you don’t select any editors, the form will only provide a search capability that displays a static table of data.
Track changes made to the form: Select to ensure that all changes made by the editors are tracked. Last edited by and Last edited date fields become part of the resulting data that displays on the form.

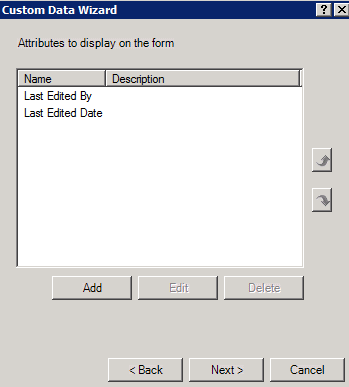
From this page, you can see a list of fields that will appear on the form. The fields will display in the order listed, which you can change using the arrow buttons. Click the Add button to create the fields.
Use this page to create fields that will appear on the form. You can create as many fields as needed for new attributes that should be part of this component.
Name: The field name.
Description: A field description that will appear on the form. This option is useful if you need to give more details about the field, such as where to find an asset tag or how to enter a model number correctly.
Pull from database: Select if you want this field to use an existing database attribute as read-only information on the form. Select an attribute by clicking the ellipsis (…) button.
Add on form: Select if you want this field to represent a new database attribute. Also select the attribute type and, if relevant, maximum characters allowed. Default value is useful if you also create a list of values for this field (that will appear as a drop-down list to the editor), and you want one value to appear as the default. Note that the field name you entered above will be the name of the new attribute as it appears in inventory.
Read only: This field will have read-only status. All fields showing attributes pulled from the database are read only.
Key field: For new attributes that are one-to-many, you must select a key field that will be used to determine uniqueness.
Auto increment number: Select for new one-to-many attributes that are integers.
On change set an attribute value: Select if you want to change the value of another attribute when this field is saved. (Rarely used.)
Run a rule group: An option to run a rule group, which can be useful any time you want a post-processing action to occur after the form is updated.
Use a list of values: Instead of allowing free-form entry of text by an editor, select this option to create a drop-down list of values.
- Link to a table in the database: Link to a column in a database table instead of manually entering all of the values to appear in the drop-down list. For example, if you want to display all login names, you could specify the Computer table and the LoginName column.
- Link to another field in this form: You may have multiple, related fields on this form that require different drop-down lists depending on what an editor selects in another field. For example, one list may be a list of manufacturers, and the linked field may be a list of device types for those manufacturers. It's possible to use database columns in a linked field.
- Create a list: A list of values that will appear to an editor as a drop-down list. You must manually enter these values by clicking the Add button.
Validation string: A regular expression that is used to check data entered by the editor. You must use proper regular-expression syntax. Click the Edit button to open a dialog where you can select a validation string to use.

Use this page to add sub-forms to the form, which can help organize how fields will appear. Create sub-forms the same way you create the parent form.

Click the Finish button. Your new rule will appear in the Web Custom Data > All Rules folder.
To verify that the form looks the way you want, open Web Custom Data > All Rules, right-click a rule, and select Run now to view the form as it will appear to an editor.
Once you're satisfied with how the form looks, your editors can access its URL via their device's web browser, fill in the fields, and click the Update button to import the new data into the inventory database.
You can access these menus by opening Web custom data > All rules and right-clicking a rule name.
- Run now: Runs the form in a web browser immediately. Before running, you must publish the form.
- Publish form: Publishes the form, which adds the newly defined attributes to the inventory database. You must publish the form before running it.
- Clear form: Deletes both the custom data entered by editors and the newly defined attributes from inventory. DO NOT clear a form unless you are sure you want to delete all the information.
- All forms: Opens a web browser with all available custom web forms shown in one list.
- Copy URL: Copies the form’s URL for pasting into a device's web browser.