Executive Report Pack
Executive Report Pack (ERP) is a Data Analytics tool for Ivanti® Management Suite that provides useful, time-saving reporting features such as scheduled report publishing and organization-driven reports.
ERP gives you detailed control over your Management Suite queries, enabling you to edit them with SQL to create reports that contain the data most meaningful to you. ERP installs with a number of reports already defined and ready to run.
ERP provides the following features, which you can apply to existing Management Suite reports as well:
Report refinement
- Refine your software and hardware reports with the include/exclude feature.
- Select software titles and vendors without complex queries.
- Easily ignore unwanted values for data.
- Name and reuse common selections.
Report organization
- Organize your reports by mapping them to specific departments in your organization. End users can then select any report or query for their department only. Managers at different levels can select an appropriate view for their reports.
Report publishing
- Publish your reports, once refined and organized, on a regular basis via the scheduled email report feature.
About the Executive Report Pack view
When you open Executive Report Pack, a pane appears across the bottom of the Management Suite console. This pane consists of a tree structure and a series of toolbar icons.
To navigate ERP, click one of the six main toolbar icons (found on the right-side of the toolbar and explained below) to open new panes that relate directly to the icon selected. These six icons are constant and act as gateways to the functionality within ERP.
The left-side icons change when you select one of the six main ("parent") icons. These other icons are described in the sections below as they relate to their parent icon.
The six main toolbar icons are:
- Run reports: Run, create, and edit reports in ERP.
- Manage reports: View all of your saved and scheduled ERP reports from one web location (called the Report Store), as well as schedule and edit reports.
- Organizations: Organize report data using an organizational structure created in ERP, imported from an LDAP source, or made from a combination of both.
- Include/exclude lists: Customize reports by including or excluding database attributes that make up the information included within the report.
- Monitor tasks: Set up options for emailing reports to individuals or departments within your organization.
- Power sort: Customize data sorting within reports.
Another constant toolbar icon is:
- Enable real-time processing: Enables or disables real-time scan processing. You will want to enable this option.
Getting started
To use ERP, your first task should be to configure the global report settings. After these settings are configured, you can run existing reports, create your own, and schedule reports to run at regular intervals.
To further customize reports, you can also create organizational structures, set up include/exclude lists, and sort report data.
Global report settings
You can configure global settings to create reports from multiple core servers, send reports via email, and track scheduled tasks and patch history.
You can set up ERP to run reports against multiple databases at the same time, avoiding the need to create a roll-up database for gathering data from more than one database in the same report. Currently, this option is only supported if all databases are Microsoft SQL Server.
To enable multiple-core reporting, you must complete two procedures. First, configure a linked server on the SQL server that's associated with the core server you'll use as the main core.
Next, configure ERP to report on multiple databases.
- On the toolbar, click the Run reports icon.
- On the toolbar, click the Settings icon.
- On the Multiple cores tab, click the Add button.
- Enter the name of the Core server associated with the remote database.
- Enter the name of the Database server for the remote database (most of these settings should be the same as ones you already entered).
- Enter the Database name for the remote database.
- Enter the Database user for the remote database.
- Enter the Database password for the remote database.
- Enter the Tables owner of the database tables (normally this is dbo).
- Enter the Link name you created in the first procedure.
- Click the OK button.
For reports that support multiple cores, you will now see a new option in the report header called Enable Multiple Cores, where you can select any of the cores you want to report against. Data from the multiple databases will be combined in the results.
If you're using include/exclude lists in your reports, you don't need to duplicate that information out to the remote core servers. The lists used are the ones configured on the main core server.
To send email via ERP, you must have access to an SMTP Gateway that the web server can send email to.
After configuring these settings, you can then email reports when you schedule them to run at regular intervals.
- On the toolbar, click the Run reports icon.
- On the toolbar, click the Settings icon.
- In the Report Settings dialog, click the Email settings tab.
- Enter the From address that will appear in emails.
- Enter the SMTP server name or address and login information.
- Enter any other information and click the OK button.
The Task Listener service tracks scheduled tasks and patch history, storing the data in tables in the inventory database.
We recommend that you enable this service only when using the patch reports that need data. This service can significantly increase the size of your database and impact performance.
- On the toolbar, click the Run reports icon.
- On the toolbar, click the Settings icon.
- In the Report Settings dialog, click the Task service tab.
- From the drop-down list, select Yes or No to enable/disable the service.
Running, creating, and scheduling reports
ERP installs with a number of reports by default. To view those reports, create new ones, and edit global report settings, click the Run reports toolbar icon.
Under Reports in the tree list, you'll see folders that contain a number of predefined reports:
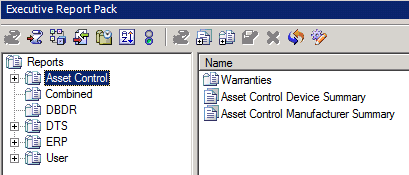
- Asset Control: Reports showing data for devices currently in the Asset Control database.
- Combined: Reports showing data for devices in both the Asset Control and Management Suite inventory databases.
- DBDR: Reports showing Database Doctor activity.
- DTS: Reports showing data gathered using Data Translation Services rules.
- ERP: Reports showing data that ERP obtains from device records in the inventory database.
- User: User-created reports automatically go into this folder.
After you click the Run reports toolbar icon, the left-side icons that appear are:
- Run: Runs the selected report.
- Create report: Opens a dialog that begins the process of creating a report.
- Create group: Creates a report group folder under the User folder, which is where you can store and organize reports that you create. All user-created reports must go in the User folder.
- Edit report: Enables you to edit a user-created report. Reports that install with ERP are not editable. All user-created reports are stored in the User folder.
- Delete: Enables you to delete a user-created report. Reports that install with ERP are not deletable. All user-created reports are stored in the User folder.
- Refresh: Refreshes the list display.
- Settings: Opens a dialog for customizing report settings that relate to using multiple core servers, setting up email, and enabling/disabling a service that tracks scheduled tasks and patch history.
Running reports
To run a report: after you click the Run reports icon, expand the tree-list folders and double-click the report you want to run. A web page will appear with reporting options you can select before actually running the report. Click the Run report button to run the report with the options you select.
From this same access page, you can save the report or schedule it to run at regular intervals as a task.
Once you've accessed a report, you'll see a number of options that you can apply to improve usability. For some of these options to appear, you must first set them up.
- Show computers: Provides a report column that includes device-specific details. This option is report dependent.
- Enable organizations: Enables you to select organizational structures you've configured. For more information, see Organizing report data by hierarchy.
- Enable include/exclude: Enables you to select include/exclude options you've configured. For more information, see Customizing report data with include/exclude lists.
- Enable multiple cores: Enables you to gather report data from any of the core servers appearing in the list. For more information, see "Set up multiple-core reporting" above.
- Dates: Some reports include an option to filter on dates.
- Graphs: Some reports have graphs associated with them.
Formatting options:
- Show totals only: Displays the standard columns with totals. This is the default display.
- Show all fields in grid: Displays a spreadsheet-type look that enables you to sort and filter data.
You can view all saved or scheduled reports from a single web location called the Report Store. To view a report from this page, you must first run the report, then save and/or schedule it.
To access the Report Store, a user must be a member of the Ivanti Management Suite group. Alternately, you can grant a user read rights to the \remote\report directory. The actual report files are saved in the \remote\report\files directory.
- On the toolbar, click the Manage reports icon.
- Click the Report store toolbar icon.
- Click the All Reports folder to browse the reports.
You can also access the Report Store directly, as either a shortcut off of the Ivanti start menu, or by entering the following URL in a browser:
Creating new reports
You can use ERP to create a new report from scratch, from an existing report, or by importing data from a query. The four types of reports are:
- Simple text: Shows all of the information in rows and columns and is how most reports are formatted. Simple text makes it very easy to use additional settings, such as organizations, in your report.
- Graph: Displays a graph of the different items in the report. You can then drill down on the details for each of the values.
- Summary: Shows information about one device. A summary is also available from the right-click menu of a device object.
- Query/Totals: Uses Management Suite queries and operations in the cells to generate a spreadsheet-like report that contains totals and calculated data.
All user-created reports appear under the User folder. You can edit a report by selecting it and right-clicking Edit. Reports that install with ERP are not editable.
If needed, you can organize new reports within custom groups you create. Create a new group by clicking the Create Group toolbar icon and naming the group. All new groups appear under the User folder as well. To organize reports in these groups, drag and drop them into the groups.
- On the toolbar, click the Run reports icon.
- Click the Create report toolbar icon. The Create Report dialog displays.
- To copy from an existing report, select Copy from an existing report, and then choose the report.
- To import a query from which to start a report, select Create from an existing query, and then choose the query. Click Text.
- To create a new report, select Create a new report and click Text.
- Click the Next button.
- Enter a unique name and a description for the report. If you want to use a company logo on the report, enter the directory path to an image file as well.
- Click the Next button.
- Select the type of data you want to report on (Management Suite, Asset Control, or Combined) and click the Next button.
- Click theAdd button to open the Select Attribute dialog.
- Browse to the attribute you want to report on. (For example, browse to Computer.Display Name.)
- Click the attribute. The Display name text box shows the column name that will display on the report for that attribute. Optionally, you can edit the display name to display a name that will be more meaningful.
- Click the OK button.
- Repeat these steps for each attribute you want to include in the report. The list shows the attributes that you added, and the display name for each. The list order is how the attributes will display from left to right as columns in the report. Click the up/down arrows to reorder the list.
- Click the Next button.
- If you want to enter conditions for the report, click the Edit button. For example, you might want the report to display only hard drives that are the first drive in the device system. This would mean that the Computer.Network Adapters.Network Adapter.Number attribute is equal to zero.
- To create additional conditions, repeat these steps as necessary.
- Click the Next button.
- If you used an SQL statement, you need to specify the data type for each attribute in the report. Click an attribute in the list. From the Type drop-down list, select a data type.
- Click the Next button.
- You can select attributes for sorting, which also allows you to display totals for the columns you sort on. Later in this procedure, you
can then select to show just the sorted columns in a report, or show the sorted
and unsorted columns. Select the attribute(s) that you want to sort on and click the Sort button.
- Click the Next button.
- You can now choose several additional options for the report. To display the totals for the attributes that you previously chose to sort on, select Display totals next to sorted attributes.
- To allow the organizations that you set up to be available for this report, select Enable organizations.
- To set an attribute that will be used to build Include lists for this report, select Enable include/exclude list, and then select the attribute from the list.
- To show items in the report that do not match the conditions you set for the report, select Show not exist option.
- If you have a date attribute in the report, select Show start and end date fields and enter those dates.
- If you have attributes that are not sorted, select Enable show additional details.
- To add an additional filter on the report, select Show number attr. Note that the field does not need to be a number, but the operations available are designed for one.
- To enable power sorting, select Allow power sort and select an attribute from the drop-down list.
- Click the Finish button.
Your newly created report will appear under the User folder. Once you save or schedule the report, it will also appear in the Manage Reports view. From there, you can view the report on the Report Store web page or schedule it to run at a different time.
When you create a report from an existing query, the SQL statement that the query generates can become quite complex. You may find it's easier to modify an existing query-generated SQL statement than to create your own. You can use ERP to view and edit these query-generated SQL statements for new reports.
- On the toolbar, click the Create report icon.
- Select Create from an existing query and select a query that you'd like to modify for a new report.
- Select Text and click the Next button.
- Name the report and click the Next button.
- Select Management Suite and click the Next button.
- Select the attributes to report on and click the Next button.
- Select Use SQL and click the Build SQL button.
You can modify the SQL statement for this report or copy it for use in other locations. The only way to change the report so it will no longer use the SQL statement is to delete it from the conditions text area. - Continue with whatever additional items or changes you want to make to the report.
Scheduling reports to run
You can schedule reports to run at regular intervals as a task. As part of the scheduling process, you can also configure email settings to have the report sent to others. Before a report can be sent via email, you need to configure the global email settings for ERP. For more information, see Global email settings.
ERP also enables you to monitor the progress of a report as a scheduled task.
- Run the report that you want to save or schedule.
- Click the Schedule report button at the top of the report. The Schedule Report page appears.
- In the File info area, click Save as and enter a unique name for the report. This is the name that will appear in the ERP view.
- Enter the email subject (optional), body, and a description. The description is for your use only. The URL text box shows the report that is currently running.
- Choose the format to save the report in: HTML, a Microsoft Excel spreadsheet, a comma-separated value (CSV) file, or an XML file.
- In the Save the output as file text box, enter a unique name for the report.
- In the Email area, enter the email address of each person
to whom you want to send the report. Use commas to separate each address.
You may include a space after the comma (for example,
[email protected], [email protected]). - To send the entire report file, select File. To send only a link to the file (which is useful when the output file is very large), select Link.
- In the Start time area, select when you want to start the report, either now or later.
- In the Reschedule list, choose how often you want this report to run: hourly, daily, weekly, or monthly.
- In the Retry area, choose the number of times that you want the system to retry running the report if the report fails to run.
- Click the Save and schedule script button.
By default, all reports are saved on the web console server in the \remote\report\files directory.
Once you've scheduled a report to be sent to various end users or departments, you can monitor the task to ensure the job completes.
- On the toolbar, click the Monitor tasks icon.
- In the left pane, find the report you've scheduled as a task.
- Drag and drop the task from the left pane into the Monitored tasks pane (middle pane).
- Once the task is in the middle pane, you can select various options to ensure it's fully monitored. The monitor options are:
- Email when job is complete: Sends a message to the specified email address(es) when the task completes.
- Email as job is running: Sends a message to the specified email address(es) as the task is running for the time frame you specify.
- Send data about all machines: Sends a message to the specified email address(es) providing a status about all devices included in the report.
- Allow reschedule of failed computers when job is done: Reschedules the same task to run again, only targeting the devices that failed.
- Job type: Monitors just this job or monitors all jobs scheduled for this task (for example, if the task is used more than once to target different sets of devices).
Organizing report data by hierarchy
You can use ERP to generate customized reports that offer the most meaning for departments within your organization. All of the options that you configure (such as the organizations or the include list to be used) will be saved when the report is saved. This means that you can configure a different software report for each department in your organization, each with a different list of applications.
To begin setting up organizational structures for your report data, click the Organizations toolbar icon.
After setting up your organizational structures, you can run a report using them.
- Access a report.
- In the top area of the report header, click the Report settings tab and select the Enable organizations check box.
- Click the Organization options button. The Organization Options area appears.
- Select the organization type you want to report on from the drop-down list.
- For Select the organizations to report on, do one of the following:
- To report on all organizational levels, leave the drop-down lists at the All setting.
- To restrict the report to only certain organizational levels, choose the levels that you want to report on from the drop-down lists. Logically, this will perform an OR operation. (For example, it will report on organizations in Org X or Org Y or Org Z.)
- For Select how you want the data sorted, do one of the following:
- To show all the levels in the hierarchy, leave all levels in the Selected options list. (This is the default.)
- To remove an item from the report display, remove it from the Selected options list.
- If you want to run a report for a child organization without seeing the parent organization name, move the organization level to the Available options list.
- Run the report. The report shows data separated into organizations, according to the chosen settings. Totals are given at each level to help make the report more useful.
Organizing using an LDAP directory
You can create an organizational structure for your report data using an LDAP directory to organize your devices.
- On the toolbar, click the Organizations icon, and then click the LDAP sychronization icon.
- In the LDAP Wizard dialog, select the organization type you want to import your LDAP organizational units into. Click the Next button.
- Enter the appropriate server and login information. If you're using a Data Translation Services mapping rule (see step 6), this information will be used to maintain LDAP data in the inventory database. Click the Next button.
- To select the container that you want to start importing from, click the ellipsis (...) button to browse and select the container.
- To import the entire LDAP tree, leave the text box blank. Only items defined as Organizational Units will be imported.
- If you want to create a Data Translation Services mapping rule, select Create mapping tool; otherwise, continue with step 8.
- To create a rule, choose one of the following:
- To create a rule where the user is located inside LDAP, choose Base on user location.
- To create a rule where the device is located inside LDAP, choose Base on computer location.
- If you want LDAP information for the device to be imported as the scan is processed, select the Set rule active box. Click the Next button.
- Click Sync now to start the import process. The text box will show many informational messages during
the import. When the import is finished, ERP will display
the organizational structure in a tree diagram.
- If you want to add new organizations to the tree that was imported, click the Add organizations icon in the toolbar.
The syncing process is intelligent in that it remembers which containers came from LDAP. If you perform an LDAP Synchronization later, any new containers will be added and any that have been removed from LDAP will be deleted from Management Suite.
Creating your own organizations
Instead of importing organizations from LDAP, you may want to create your own organizational structures. Or, if you've already imported a structure using LDAP Synchronization, you can still add your own organizations to that structure.
You can have multiple organizational structures, called organization types. The key difference between organization types is that each type has its own attribute that its structure is based around. For example, you may want to report on devices by department; to do this, you would use the Computer.Owner.Department attribute. However, you may also want to report on computers by site; to do this, you might use the Computer.Network.TCPIP.Default Gateway Address attribute.
Most organizations will have many different departments at one physical location, and one department will likely be represented at different locations. By using different organization types with different attributes, you're able to create separate organizational structures for your different reporting needs.
- On the toolbar, click the Organizations icon.
- Right-click the organization type you want to change the attribute for and select Change attribute.
- A message appears confirming that you want to change the attribute. Click Yes.
- To use your Management Suite scopes as an organizational structure, select Scopes, or select Attribute and click the ellipsis button (...) to browse to the attribute you want.
- To select an attribute for devices in the Asset Control database, click the Advanced button.
- Click the OK button.
If you're using Asset Control, you can configure the same organizational structure to work for both Management Suite and Asset Control devices by clicking the Advanced button. For example, you can use an IP address for both by selecting Computer.Network.TCPIP.Address for Management Suite and Device.Network.TCPIP.Address for Asset Control.
- On the toolbar, click the Organizations icon.
- Right-click the organization type you want to create an organizational structure for and select Add organization. Repeat this step to build your organizational tree.
- Add values to the containers in the organizational
tree: Highlight an organization in the left tree view and drag and drop values from the Available values list onto the
organization you want to assign them to.
For example, suppose you want any devices that have a Default Gateway Address of 010.001.001.001, 010.001.002.001, or 010.001.003.001 to belong to the Marketing organization. First, you would highlight Marketing in the organizational tree. Then you would drag each gateway address from Available values list to the Marketing container.
This information is as current as the last scan date for the device. If the state of the device changes after you create the organization, the device will be assigned automatically to the correct organization on the next scan. For example, if you're using a gateway address as the value, the default gateway address in the database would be updated for a device moved from one subnet to another as soon as a hardware scan was performed. Then, when a report is run, the device would show up in the appropriate organization.
Setting organizational-level names in reports
When a report is run, the names of your different organizational-tree levels become the header names of the report columns. By default, they are simply Level 1, Level 2, and so on. You can change the names that will be displayed in reports.
- On the toolbar, click the Organizations icon, then click the Set level names toolbar icon.
- For each name you want to edit, select the name and click the Rename button.
- Enter the new name. From here, you can also change the order the names (columns) will appear in the report.
- When you're finished, click the OK button.
Changing these names or the order of the names will not affect what you have defined in the main organizational page. This task changes only the names that will be displayed in reports.
Customizing report data with include/exclude lists
ERP gives you the ability to use include and exclude lists to report on just a subset of items in the inventory database. For example, instead of running a report showing every software package in the database, you can choose to include just those applications you care about, such as Microsoft Office applications.
As new items are added to the inventory database, they appear by default in the Unknown list. You can then review the new items and decide whether to add them to the Included or Excluded list.
Add every item you want to report on to the Included list. Add items that you'll never want to report on to the Excluded list.
- On the toolbar, click the Include/exclude Lists icon.
The left pane shows the database attributes for different reports. For example, reports that focus on Software Application Names (going to Software.Package in the console) use the Software.Package.Name attribute. Reports based on the Software.Application Suites use the Software.Application Suites.Application Suites.Name attribute. - To view the different lists that have been created for an attribute, expand the attribute in the tree view. Expand the lists to display the Excluded, Included, and Unknown categories.
- To create a new list, right-click an attribute and select Add list. You can create as many lists as you want.
- To include an item in your reports, drag and drop the item from the Unknown list to the Included list.
- If you never want to include an item in your reports, drag and drop it from the Unknown list to the Exclude list.
- If you're not sure about an item, leave it in the Unknown list. You can repeat this procedure later to move the item to another list.
When the report runs, only the items in the Included list are reported on; any item in the Excluded or Unknown lists are not reported on.
You can move items from one list to another when you're running a report. However, you can only create new lists in the ERP view.
When you run a report, you can move attributes from the Include list to the Exclude list, and vice versa.
- Access a report.
- In the top area of the report header, click the Report settings tab and select the Enable include/exclude check box.
- Click the Include options button. The Include/Exclude Options area appears.
- In the Use settings of list, select a list that you created in ERP.
- If you want to move an item from Included to Excluded (or vice versa), select the item, then click the arrow to move the item to the other list.
- If you want to move an item from the Unknown list to the Included or Excluded, select the item, then click the Included or Excluded button at the bottom of the list.
- Click the Run report button.
Whatever Included list has been selected will be used to run the report.
Not all reports have Included lists.
Sorting data within reports
You can use ERP's Power Sort to customize data sorting in reports when default sorting doesn't work.
By default, certain database attributes are difficult to report on accurately. For example, Computer.Software.Package.Version is a string attribute, which SQL Server is configured to sort lexically. If you have software package versions 2, 3, and 10 in your inventory database, and you sort on the version number, 10 is less than 2 and 3 because it's sorted like a string instead of a number. By using Power Sort, you can specify a different sort order for this attribute and any others.

- On the toolbar, click the Power sort icon.
- In the left pane, click the database attribute you will be sorting on. By
default, Computer.Software.Add or Remove Programs.Program.Version
and Computer.Software.Package.Version appear.
The first time you click the attribute, values currently in the database will be sorted in lexical order. Only entries in the Sorted values list will be used in the power sort routine. If you have a third pane, these are new Unsorted values. You must drag and drop them to the Sorted Values list before power sort will use them. - Move values to where they should be in the Sorted values list, either by dragging and dropping or cutting and pasting.
- In the toolbar, click the Run reports icon.
- In the tree view, expand ERP > Power Sort.
- In the right pane, double-click a Power Sort report.
- On the resulting web page, click the Report settings tab and select the Use power sort check box.
- Click the Run report button.
The report data will now be sorted using the order you specified.
There are often cases where more than one version of a software package exists on a device. However, you may only need to know what the latest version is. Use the max-value option to display only the last version of software on the device instead of all versions.
- On the toolbar, click the Run reports icon.
- In the tree view, expand ERP > Power Sort.
- In the right pane, double-click a Power Sort report.
- On the resulting web page, select the Power sort and Only return max value check boxes.
- Click the Run report button.
The report data will now be sorted using the order you specified and will also show only the highest value for each item found.
You may be interested in finding all devices that have an old version of an application so that you can upgrade it. However, because the versions are lexically sorted, you need to use power sort to sort them.
- On the toolbar, click the Run reports icon.
- In the tree view, expand ERP > Power Sort.
- In the right pane, double-click a Power Sort report.
- On the resulting web page, click the Report settings tab, and select the Use power sort check box.
If you want to find devices whose latest version is older than a certain version number, you must select the Only return max value check box. Otherwise, it will return all devices with any older version, even if they have a newer version as well. - Select an operation from the list (in this case, <=).
- Enter a value in the blank text box after the operator. You must enter a value that exists in the power sort Sorted values list or no results will be returned.
- Click the Run report button.
Once you determine which devices have an old version of an application, you may want to target a distribution to those devices.
This option is report dependent, meaning it only appears for reports that include a targeting capability (where the first column is Computer.ID).
- On the toolbar, click the Run reports icon.
- In the tree view, expand ERP > Power Sort.
- In the right pane, double-click a Power Sort report and configure the report with the settings you want.
- Click the Run report button.
- On the top right of the report results, click the Create group button.
- Enter a Group name.
- Select where the group should be created, under Public or User devices.
- Click the Create group button.
Go to the Management Suite console. You'll see a group that has been created under either Public Devices or User Devices that you can target a distribution to.