Adding actions to a provisioning template
You can create new actions or edit existing ones for your provisioning templates. Public templates are visible to all users. Templates in the My templates group are not visible to all users, and can only be modified by the template creator or by users with administrative rights.
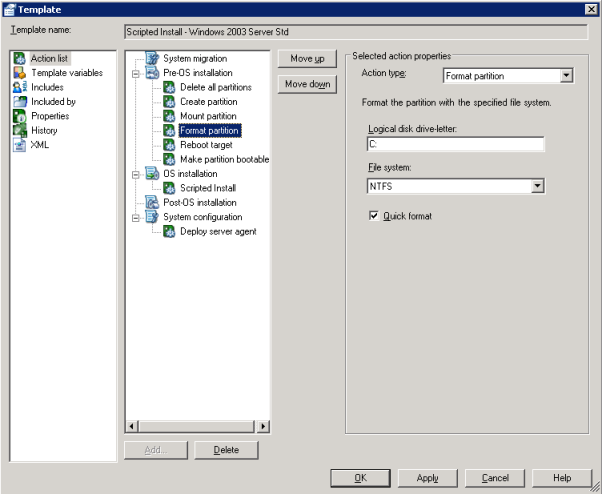
Actions are ordered into five sections, which are:
- System migration
- Re-OS installation
- OS installation
- Post-OS installation
- System configuration
In each section, you can only select actions that apply to that specific section (for example, you can't select Software distribution as an action for the Pre-installation section). You can add any available action to a section, but be aware that some actions will break the template or may render your system unusable if completed in the improper steps.
For tables that show the action types and where they fit into sections by default, see Provisioning template action types.
Each template has a Condense right-click menu option that rewrites the current parent template to incorporate all actions from its included templates. Condensing merges the XML code of all included templates with the XML code of the parent template to create a single XML file—the parent no longer has dependencies.
This feature is useful when you want to simplify a template for export or make one public. Once a template is condensed, it's a new template, and you can't expand it into separate templates again.
To add actions to a template
- Click Tools > Provisioning > OS provisioning.
- Under Provisioning templates, click Public or My templates to display templates.
- Double-click a template.
- In the Template view, click Action list.
- Click the section you want to add an action to:
- System migration: Features and components that need to be saved before modifying the system or migrating a device to other hardware or a virtual machine. For example, this section can include an action to capture profile information when migrating to a newer version of Windows.
- Pre-OS installation: Actions that are performed when the device boots into a pre-installation environment (Windows PE). For example, on a server you would add RAID configuration in this section.
- OS Installation: Actions that are performed in the pre-installation environment (Windows PE) when the OS in installed. For example, deploying an image to the disk.
- Post-OS Installation: Actions that are performed in the target operating system after it has been installed, such as performing hardware-independent imaging to install a driver.
- System configuration: Additional application installation/execution and system configuration in the installed OS. For example, installing the Ivanti agent and other software installation tasks in this section.
- Click Add.
- In the Name box, type a specific name for the action.
- In the Description box, type a detailed description of the action.
- From the Type list, select an action type. The type determines what options you'll need to specify for the action.
- If you want to add a variable that applies to this action only, under Action variables click Add.
- Select Stop processing the template if this action fails if you want to define an action as essential to the provisioning task. If the action can be ignored, clear this check box.
- When finished, click OK.
Provisioning supports conditional If/Else statements that can help you control template flow. For information about adding conditional statements to actions within templates, see Provisioning template conditionals.