Remote control
Ivanti® Endpoint Manager uses a fast and modern HTML5 WebSockets (WS) remote control engine. It uses a browser-based viewer container that is preconfigured to securely manage your remote connections. Remote control WS sessions are initiated through a connection to the core server. Once the core authenticates the session, the local and remote devices communicate directly with each other.
Support for older HTML5 and Windows console-based remote control agents was discontinued after version 2021.1.
To use remote control WS, in the network view or network map, right-click the device you want and click Remote Control. The viewer will launch, authenticate your session, and begin remote control.
Users being remote controlled will see a green border around the edges of their screen. If the Floating desktop icon option is enabled in the remote control agent settings, that will appear on both the local and remote device screens.
The viewer window has additional controls at the bottom. A Resolution button that enables\disables scaling, and a Close button that ends the session and returns you to the remote control WS viewer login page.
The Full screen button toggles a full-screen view, and Alt+Tab passthrough when in full screen mode works on Chrome-based browsers, including the new version of Microsoft Edge. With this release you can also use a Windows host's Input Method Editor to create text in other languages on a remote device that is also running Windows.
It's also possible to launch the remote control viewer from the command line. For more information, see this article on the Ivanti Community: https://forums.ivanti.com/s/article/How-To-Use-switches-with-rcviewer-exe
Windows operating systems can allow multiple Remote Desktop Protocol (RDP) sessions, depending on how they're licensed. The "console" session is the session connected to the monitor/keyboard/mouse of the user sitting at that computer. Additional sessions can run in the background under different user accounts.
If there are multiple RDP sessions available on a device, Endpoint manager remote control will prompt you to choose the session you want to connect to when it starts.

You'll only see this prompt if multiple sessions are available.
Endpoint Manager remote control allows multiple analysts to control a single session. Each remote control session consumes resources on the target, and too many sessions will slow it down.
When multiple analysts are using remote control with the same non-console session, there is an additional issue to be aware of. If the analyst who initiated that session minimizes their remote control window to the task bar, any other remote control viewers connected to that same session will see a black screen and they won't be able to interact with the remote mouse and keyboard until the session initiator restores the minimized window. This is a Windows limitation.
Chat lets you initiate a text chat session with the target. Select the Chat toolbar button  to start chat. Once chat has been initiated by the viewer, timestamped messages can be sent by both the target and the viewer.
A clipboard icon at the bottom of the chat pane copies the chat text and timestamps to the clipboard so the viewer can store a record of the chat. Additionally, when a chat session has been used and the viewer ends the remote control session with the Close toolbar button, a prompt will appear asking if the viewer wants to save the chat session to the clipboard.
File transfer lets you download files from the target or upload files to the target. Once you've connected, you can click the file transfer button to open the file transfer dialog box. You will see a list of available drive letters on the target. Double-clicking a drive letter will start browsing the remote file system on that drive.
Once you've browsed to a location, you can Download a file or folder from there or Upload a file to there. If you select a folder to download, the RCViewer application will zip that folder and its contents first before starting a download of the resulting zip file.
To transfer files to a target
- In the Network view, right-click the target and click Remote Control.
- Click the File Transfer button
 .
. - Start browsing the target file system by double-clicking a drive letter from the list.
- Navigate to the destination folder on the target (double-click folders in the list to open them).
- Click the Upload button, and browse your local filesystem to select the file you want to upload.
- Click Open. The file will transfer and appear in the target file browser.
To transfer files from a target
- In the Network view, right-click the target and click Remote Control.
- Click the File Transfer button .
- Start browsing the target file system by double-clicking a drive letter from the list.
- Navigate to the target file you want to download (double-click folders in the list to open them).
- Click the Download button, and browse your local file system to select the destination folder.
- Click Save to download the file.
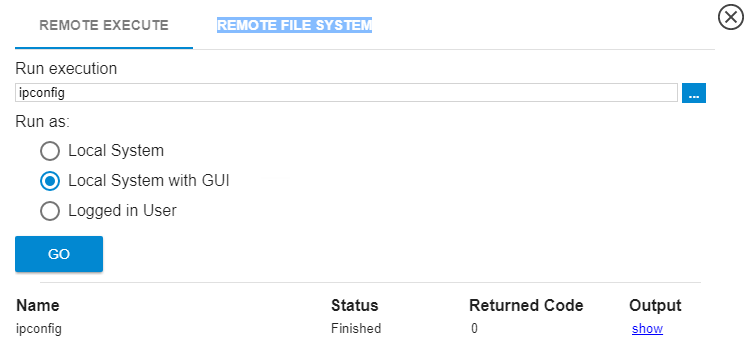
You can remotely execute programs on the target. If you execute a command that runs in a command prompt or PowerShell, the RCViewer application will capture the output from that command so you can view it later. If you execute a command that launches a Windows application, that application will launch and no output will be captured.
When you execute a file, the RCViewer application shows the execution status. If the execution captured a result, click Show to see it. The execution status history is cleared when the session closes.
You can run applications on the target as one of these users: Local System, Local System with GUI, or as the Logged in User.
When specifying the Run execution program you want, you can either type it in directly or you can click the Remote File System tab and browse for it. If you don't include a program path, the program must be in the target's Windows path for the execution to be successful.
To remotely execute a file
- In the Network view, right-click the target and click Remote Control.
- Click the Remote Execute button
 .
. - If the program you want to run is in the Windows path, type the command to launch it in the Run execution field.
- If the program you want to run isn't in the Windows path, click the Remote File System tab. Navigate to the program's folder on the target (double-click folders in the list to open them), then double-click the program you want to run.
- Select the Run as user that you want.
- Click the Go button.
- View the execution status in the command history. If the execution captured a result, click Show to see it.
The new remote control WS viewer supports a standalone mode. You can launch the viewer container from here:
-
C:\Program Files\LANDesk\ManagementSuite\remotecontrol\RCViewer
You can copy this file to any computer that you want. When you run it you'll see the remote control WS viewer login page.
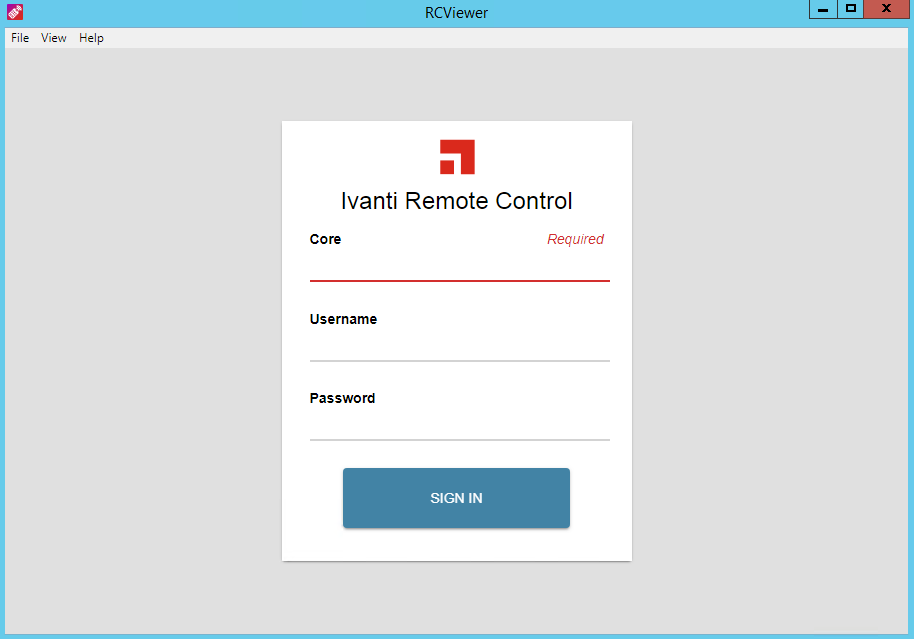
Provide all the information that page requests to initiate a remote control WS connection.
If the target desktop won't fit in the viewer window, the viewer reduces the desktop magnification so that it will. If your viewer window is a lot smaller than the target's resolution, this makes the target's text and user interface smaller.
If you want to see the target desktop at it's native resolution without scaling, you can toggle resolution scaling on or off with the Resolution button  . You may have to use the scroll bars to view portions of the desktop that don't fit in the viewer window.
Smart Card support requires a remote control Smart Card driver on managed devices. This driver allows Smart Card communication through remote control. Windows still handles the actual Smart Card authentication.
The remote control Smart Card driver isn't installed by default. Once it is installed on a device with a Smart Card reader and you remote control that device, you'll see a Smart Card button  you can click on the remote control toolbar to enable or disable Smart Card integration. When the viewer inserts a Smart Card and clicks this button, it will be as if the viewer was inserting it at the remote device.
To enable Smart Card support on a device from the command line
-
At the device where you want Smart Card support, open an administrator command prompt.
-
Run the following commands:
cd "C:\Program Files (x86)\LANDesk\LDClient"
certutil.exe -addstore -f "TrustedPublisher" LDRemoteSC.cer
lddevcon.exe ldinstall LDRemoteSC.inf root\LDRemoteSC
- Click Tools > Configuration > Agent settings. In the tree, click Agent settings > My agent settings > Remote control. Create a new remote control setting or edit an existing one.
- On the General settings page, clear Allow HTML access and Allow legacy remote access.
- Click Save and redeploy the agent setting if necessary.