Using reports [Web console]
When you use the Web console, all the reports found in the Windows console are available to you, but there are minor differences in the way you view and select parameters. You can't edit or create a custom report in the Web console, or move reports between folders, but you can view, print, and export reports.
When a user runs a report from the Web console, the user's scope is applied to the report. The report will contain only data from devices within the user's scope.
To use reports in the Web console, a user must have at least the Reports - View right.
To run a report from the Web console
- In the Web console toolbox, click Reporting > Reports .
- Expand the folder structure and find the report you want to run.
- Click the report.
In a new browser window, the report opens in the reports viewer. - Select the parameters you want and click View report.
- To view details of any portion of a chart, click that area of the chart. The view changes to the section of the report with the data you want.
- Use buttons on the toolbar to search for data, export the data in a different format, print the report, and so on.
- When you have finished, close the preview browser window.
To save a report in the Web console
- Run a report.
- On the viewer toolbar, select the report format you want to use from the Select a format list, then click the Export button.
- Save the file using the settings for your browser.
NOTE: If you save a report and plan to e-mail it, use the PDF format rather than HTML output.
Web console report viewer
The report viewer in the Web console lets you view, print, and export reports. The toolbar consists of the following buttons:

- Back to parent report: If you are viewing a sub-report, return to the parent report that launched the sub-report.
- Hide/Show Side Bar: Toggle the sidebar pane, which displays search and parameter options and document map view.
- Page setup: Change page, orientation, and margin settings.
- Print: Opens the printer dialog box associated with the output type you chose.
- Print preview: Toggle print preview (page view) mode. When this is not selected, the report displays as a single HTML page.
- Viewer mode: View the report in HTML or PDF format. Select a format from the list and click the Viewer mode button to change the format.
- Go to first page: View the first page of the report.
- Back: View the previous page in sequential order.
- Page box: Insert a specific page number, which takes you directly to that page.
- Forward: View the next page in sequential order.
- Go to end page: View the last page of the report.
- Select a format: Select the format in which you want to save the report (PDF, HTML, DOC, XML, or XLS file)
- Export: Save the report in the format you selected.
The side bar includes three options, represented with icons. As you select options and their respective parameters, the report is refreshed in the viewer.
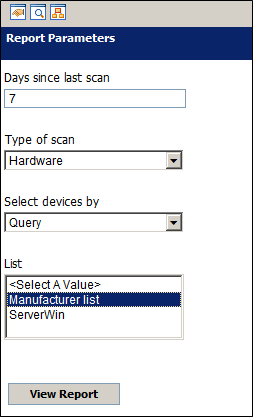
- Parameters:
 Change parameters of the report, which vary between reports. Once you've selected different parameters, click View report to refresh the report with the new parameters.
 - Find:
 Search for a string in the report results. Specify the string and select any criteria (such as Match case), then click Search. A list of occurrences of the string are shown. Click an occurrence to move to that section of the report. The occurrence is highlighted.
 - Document map:
 Displays a content outline of the report, if there is a document map defined for the report. This option is not displayed if there is no document map. Click an item in the list to go to that location in the report.
Selecting parameters from a list
When the sidebar includes a list with parameters, you can include all list items in the report by selecting (All). When you do this, the individual items in the list are not selected but all are included in the report.
To select a subset of the items, select each item you want to include in the report. Make sure that (All) is not selected. Use Ctrl+click or Shift+click to select multiple items, then click View report.
Selecting devices, groups, or locations
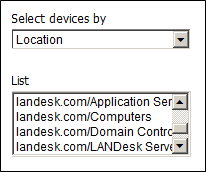
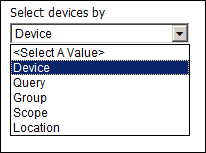
Parameters vary with each report. However, all reports include a device selection option that specifies individual devices, queries, groups, scope, or location. This lets you generate a report for a query, group, or scope that you have defined in the network view, or for a location in your network.
For example, you can select devices in a location based on the device network location. When you select Location, the list displays locations in your network by domain name.