Creating a normalized product name
As you review product data, you may find that the same product is represented by multiple instances of the product and version number. You can normalize products so that one product name and version number is used in place of all variations of the product and version.
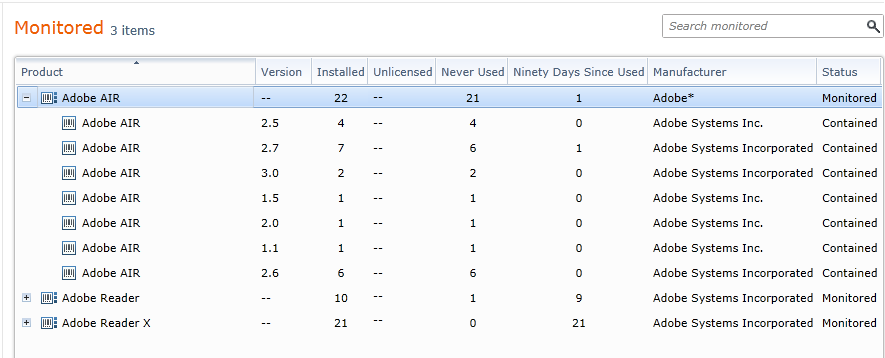
For example, computers in your organization may have multiple versions of Adobe Reader installed. If you're not interested in tracking older version numbers separately, you can select all instances of Adobe Reader 7, 8, and 9 in the Products>Discovered page and normalize them as "Adobe Reader". If you want to track how many devices have version X installed, you can select all instances of Adobe Reader X (such as version number 10.0 and 10.1) and normalize them as "Adobe Reader X".
A normalized product is displayed with a plus sign (+) before the product name. Click the plus sign to expand the product and see all variations that are included.
To create a normalized product definition
- Click Products and then click one of the product views (Monitored, Discovered, Ignored, or All installed products).
- Find the product names you want to combine, using the Search box.
- Select the product names and then click Actions > Group.
- Edit the name you want to use as the normalized product name.
- Select the view where you want the product listed (Monitored or Ignored).
- Click Save.
The name you select appears in the product view you selected. A plus sign (+) next to the name indicates it is a normalized product. When you expand the name (click +), you'll see all the names that are grouped for that normalized name.
To automatically add products to a normalized product
- Click Products and then click one of the product views (Monitored, Ignored, or All installed products).
- On the toolbar, click New > Normalized product. (If you want to add products to an existing normalized product, select that product and then click Edit on the toolbar.)
- Enter the name you want to use as the normalized product name, as well as version and manufacturer information.
- Select the view where you want the product listed (Monitored or Ignored).
- Click Dynamic rules.
- Type a rule in the box. Use an asterisk (*) for wildcard matching.
- To add another rule, click the Add [+] button and type another rule.
- When all rules have been added, click Save.
Product names currently in the database that match the rules are listed in the Matching products box. As new inventory data is added and other product names are added to the database, those names will automatically be included in the normalized product.
NOTE: With some normalized products you can specify a single manufacturer name on the Definition page of the product details dialog. However, other normalized names include products with different variations of the manufacturer name. If this is the case, use a partial match string with a wildcard so that all variations are included. For example, type Adobe* in the manufacturer box to include all variations of "Adobe Systems" as a manufacturer.
You can also set up license allocations or a reclamation process for a normalized product. For more information, see Allocating licenses and chargeback costs to a computer group and Reclaiming product licenses.
Deleting a normalized product
You can delete a normalized product by selecting it and pressing the Delete key. If you do this, the individual products that were grouped together are returned to the product list as individual products.
If you delete a normalized product, any licenses you associated with that product will no longer be associated with it, and compliance reports will no longer show the normalized product as consuming licenses. When this happens, you should edit the licenses and review the product associations for each license.