Importing Mac configuration profiles
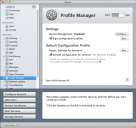
Apple's OS X server Profile Manager lets you create Mac configuration profiles for your Mac devices that can be imported into Modern Device Management. Each profile is an XML file with a .mobileconfig file extension that defines device settings, such as wireless network and VPN configurations. For more information on Profile Manager, see https://support.apple.com/profile-manager.
Once you use Profile Manager to create a configuration profile, you can use Endpoint Manager agent configurations or agent settings to deploy that configuration profile to other managed Mac devices. You can also directly create and edit Apple configuration profiles from Tools > Configuration > Agent settings for these Mac device types:
- Mac Profiles > macOS configuration
- Mac Profiles > macOS device configuration
If your Mac configuration profile uses a self-signed trust certificate, make sure you deploy that certificate before deploying other configuration profiles.
- Use Profile Manager on a macOS X Server to create a .mobileconfig file that contains the Mac configuration settings.
- Copy the .mobileconfig file to a location you can access from an Endpoint Manager console.
- Click Tools > Configuration > Agent settings.
- In the Mac Profiles group, create a new setting or double-click an existing one.
- Click Import and browse for the .mobileconfig file you saved earlier. Give it a descriptive name and click Import. The .mobileconfig file contents are imported into the Modern Device Management database.
- Move one or more Available configurations to the Selected configurations list to select them for this named setting.
- Select whether you want to Append or Replace the configuration profile. Append preserves existing profile settings. Replace removes all existing profile settings, including settings you aren't modifying, and replaces them with the profile settings you specified.
- Click Save.
This option can only be used if an Endpoint Manager agent has already been installed on targeted Mac devices.
- Click Tools > Configuration > Agent settings.
- In the toolbar, click the Create a task button, then click Change settings.
- On the Change settings page, assign a Task name.
- Locate macOS configuration in the Type column, click the box next to it in the Settings column, and select the setting you want to apply.
- On the Targets page, select which devices will receive the update.
- On the Schedule task page, schedule when the task will start.
- Click Save.
