Calculated Columns
The Calculated Columns Editor enables you to transform data during an import so that you can generate the required input data for License Optimizer rather than having to arrange for amendments to source data files. You access the Calculated Columns Editor by clicking Add/Edit Calculated Columns on the Mapping Data page during Data Import.

The dialog has four tabs:
•File Columns – lists all of the data columns identified in the import file selected with example data alongside each identified column. Use the Row buttons to move forwards and backwards through the dataset.
•Calculated Columns tab – lists any calculated columns that you have created.
•Lookups – lists any files that you are including in the import.
•Add/Edit Column – enables you to create new calculated columns and edit existing calculated columns.
To add a calculated column:
1.On the Mapping Data page, click Add/Edit Column.
The Calculated Columns Editor appears.
2.Click the Add/Edit Column tab.
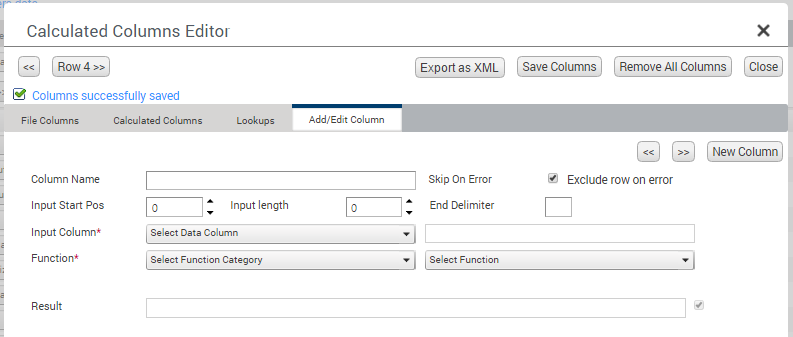
3.In the Column Name field, enter a name for the new column.
4.In the Input Column drop-down, select the initial input column you want to use in the calculated column.
A read-only example value appears in the text field alongside the drop-down for information purposes.
5.In the Function drop-down, select a function type for the input column.
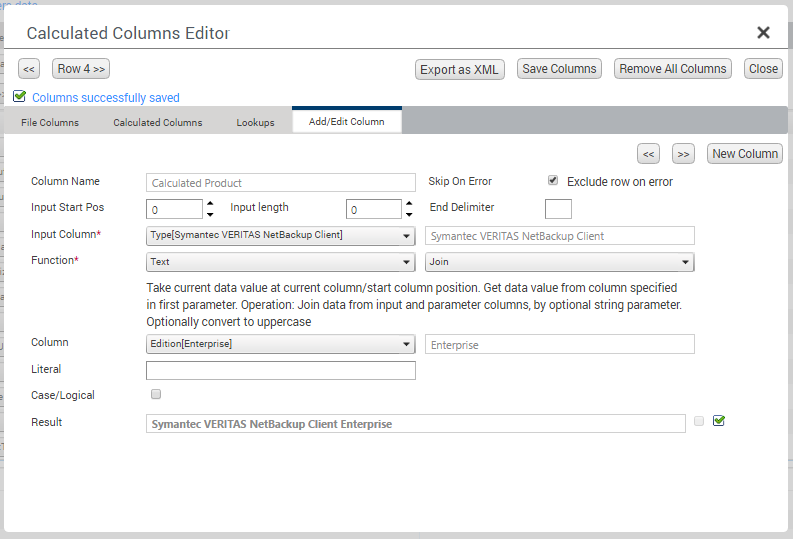
License Optimizer has a number of built-in functions, which are grouped by category. When you select a function category, the Select Function drop-down updates to list corresponding functions.
6.Select the required function.
An explanation of the selected function appears.
For example, you could create a calculated column to join two import file columns in order to produce a calculated field that includes the product name and edition. The Literal field enables you to specify a character (or characters) that is placed between the selected fields. The result of the calculated column appears in the read-only text field at the bottom of the dialog.
7.When you have finished configuring the calculated column, click Save Columns.
You can generate an XML file containing Calculated Column Definitions for any calculated columns that have been created. This XML file enables you to use the same calculated columns in other data sources. To generate the XML file, click Export as XML. You can then import the resultant XML file into a data source from the Calculated Columns Editor.
Clicking Remove All Columns deletes any calculated column definitions that you have created.