Standard Builds
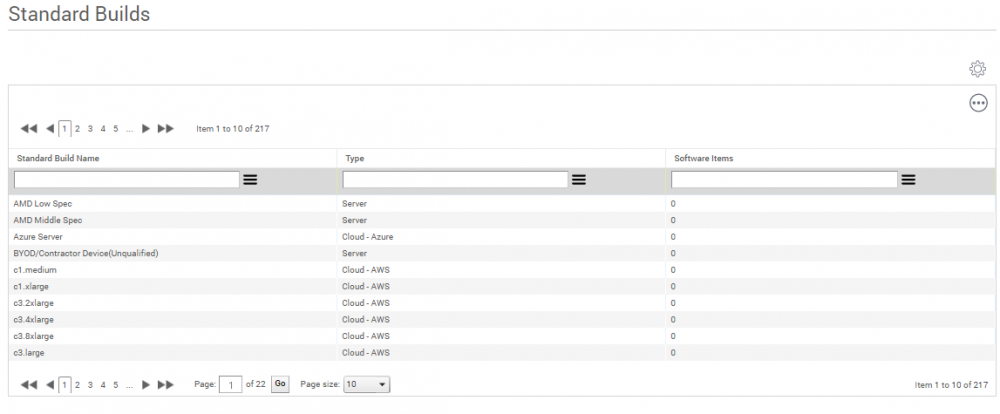
Click Standard Builds under Configuration on the menu bar to manage the standard build templates that you use for scenario modelling.
To add a Standard Build record:
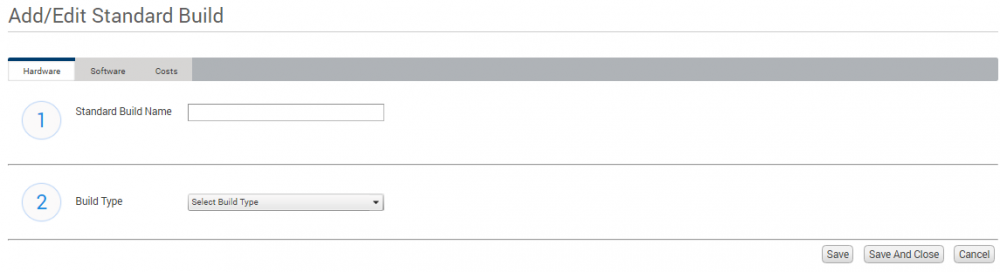
1.On the Standard Builds page gears menu, click Add.
The Add/Edit Standard Build page appears.
To edit a standard build template record, click the required entry in the Standard Builds data grid to display the Add/Edit Standard Build dialog.
2.Enter a Standard Build Name and in the Build Type drop-down list, select the standard build type:
•Server
•Desktop
•Cloud – AWS (Amazon Web Services)
•Cloud – Azure
If you select Server in the Build Type, a Partition Type drop-down list appears so that you can specify the partition type. When you have set the Partition Type, further fields appear according to the option selected.
When you have set the hardware configuration as required, you can add software or costs to the standard build template.
3.Click the Software tab.
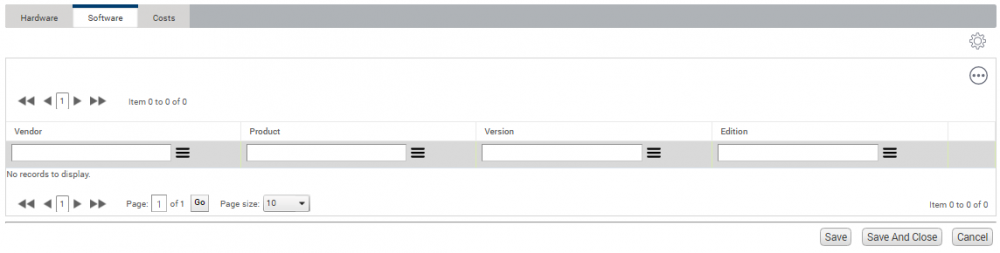
4.Click Add from the gears menu on the Software tab.
The Select Product dialog appears.
5.Search for and select the required product to add to the standard build template. Repeat this step as required.
6.Click the Costs tab.
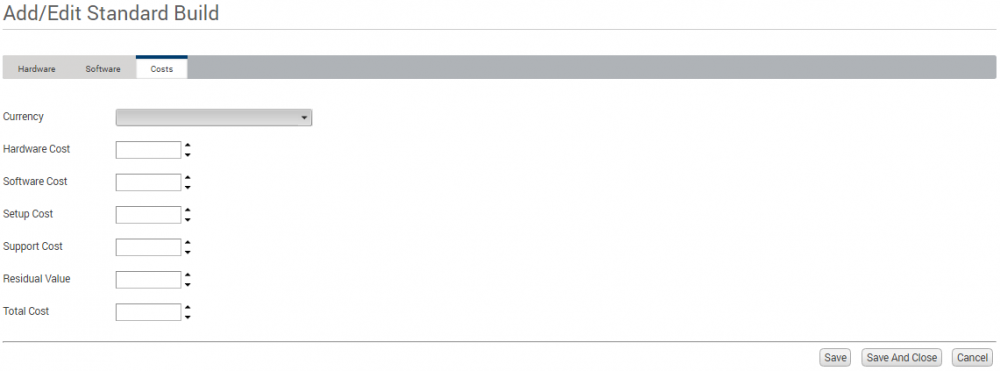
7.Specify the currency for the costs and enter the following costs:
•Hardware Cost
•Software Cost
•Setup Cost
•Support Cost
•Residual Value
•Total Cost
The Total Cost field automatically sums the other costs and subtracts the Residual Value specified.