Start Reconciliation
Start Reconciliation enables you to configure and run a reconciliation. You can also configure reconciliation to run automatically when an inventory or license import completes by selecting the Run reconciliation after recognition check box on the Settings page of the Data Import. For more information about configuring data imports, see Creating a new data source.
To run a reconciliation:
1.Click Reconciliations under Reporting on the menu bar.
The Reconciliation page appears.
2.Click the Start Reconciliation button above the data grid.
The Start Reconcile dialog appears.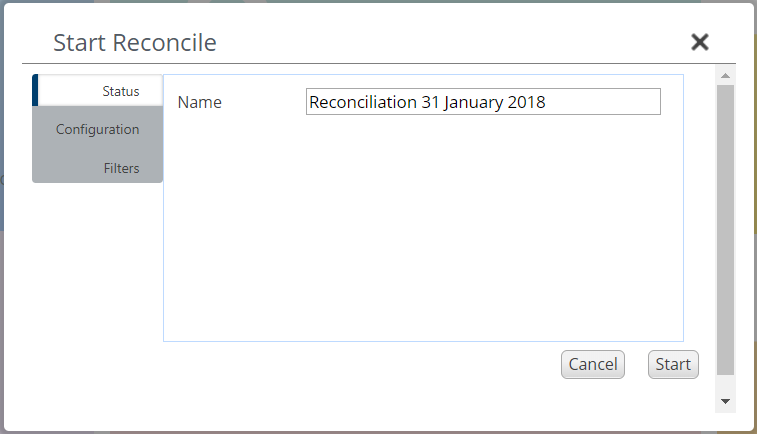
3.On the Status page, type the Name for the reconciliation. By default, the Name is set to Reconciliation followed by the current date, but you may change this.
4.Click Configuration.
The Configuration page appears.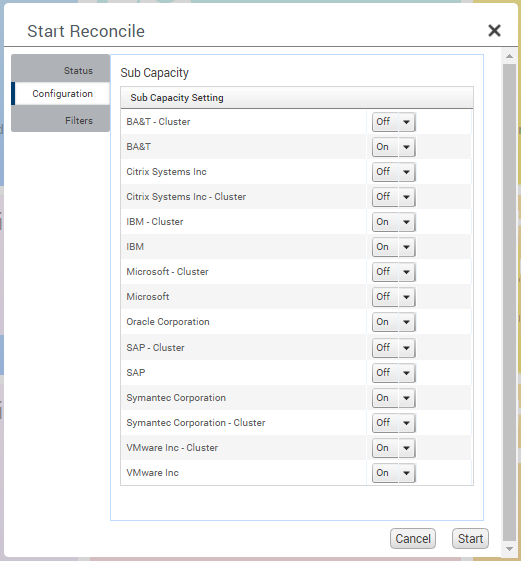
5.Set the drop-down lists to On or Off to configure the sub capacity settings for specific vendors.
Verify these settings before you run a reconciliation to ensure they are configured as required.
6.Click Filters.
The Filters page appears so that you can choose between a full reconciliation or a partial reconciliation.
You can run a partial reconciliation to get a quick indication of the licensing position for a particular Business Unit, Vendor or Product, or Data Source. The defined reconciliation shows a brief overview of compliance and risk for the area, but does not form part of the full data summary or dashboards
7.In the Reconcile based on drop-down list, select the required reconciliation:
•None – a full reconciliation runs.
•Business Units – enables you to run a reconciliation against a specific business unit or business units.
A drop-down list appears so you can specify which business unit(s) you want to run the reconciliation against. The drop-down list displays the business unit structure in a tree structure.
Expand the tree as required and select the check boxes alongside the business units you want to include in the reconciliation.
•Products/Vendor – enables you to run a reconciliation against specific products or vendors.
A tree of vendors from the License Optimizer Software Library for which there is entitlement or inventory appears in a tree structure.
Select one or more vendors from the list using the check box alongside the vendor. Selecting a vendor automatically selects all products for the vendor, although you may deselect entries by clearing the associated check box.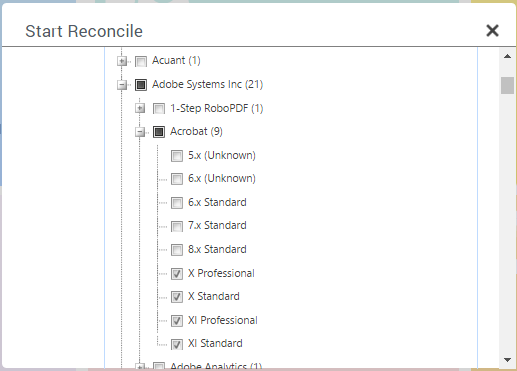
•Data Source – enables you to run a reconciliation against specific data sources.
A list of data sources against which imports have been successfully completed appears.
Select the check boxes alongside the required data sources.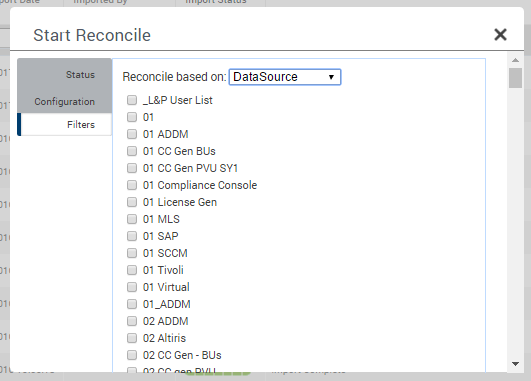
8.When you have configured the reconciliation as required, click Start.
The reconciliation starts. A message appears in the title bar, showing that a reconciliation is in progress. Hold your mouse over this message to see further details.